air inlet with sufcient dimensions is always provided for
the (open) combustion device.
9 . It must be impossible to touch the fans by hand,
therefore ducting at least 900 mm long must be used.
10. Mount the domestic ventilator out of the reach
of children.
11. After use, place this manual, together with the user part
at the front, back into the device;
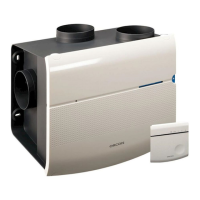
2. Installing the MVS-15RH
domestic ventilator
The MVS-15RH consists of a suction plenum with ve
Ø 125/160 mm suction openings and one Ø 125 mm
outlet opening. A volute with inlet ring containing
a motor plate with front cover. The connection openings
are provided with caps which can be easily removed.
The motor and the receiver PCB are mounted on the motor
plate. The humidity sensor is on the receiver PCB .
Steps for installing the MVS-15RH
1. Mount the MVS-15RH device on a wall or ceiling with
sufcient mass (200 kg/m
2
).
2. Install a silencer at least 1 metre long.
3. Mount the air ducts with as little air resistance as
possible, and free from leakages.
4. Limit the use of exible tubes as much as possible.
5. Cap the unused openings on the suction side with the
supplied caps.
6. Mount the Orcon extraction valves in the various spaces.
7. Mount the required remote control(s) and CO
2
sensor(s)
(BRH models only)
8. Connect the MVS-15RH device to the power supply.
9. Pair separately supplied remote control(s) and/or CO
2
sensor(s).
If there is more than one remote control, always switch the
device on and off before pairing.
10. . Set the DIP switches of the MVS-15RH device on the
receiver PCB, and adjust the valves. See the chapter
‘Adjustment of air volume’.
3