EasyManua.ls Logo

Oregon Scientific BAA928U User Manual

Oregon Scientific BAA928U
7 pages
To Next Page IconTo Next Page
Page #1 background imageLoading...
Page #1 background image
1
GB
RELATIVE HUMIDITY WINDOW
Displays the indoor relative humidity
COMFORT INDICATOR
Indicates the comfort level of the indoor relative humidity
ATMOSPHERIC PRESSURE BAR GRAPH
Indicates the atmospheric pressure for the latest 24 hour period
ATMOSPHERIC PRESSURE WINDOW
Displays the current atmospheric readings
PRESSURE HISTORY INDICATOR
Indicates the pressure history of previous hours
MOON PHASE SCANNER
Graphically illustrates the phases of the, and moon
phases for other specified dates
INTRODUCTION
Congratulations on your purchase of the BAA928U Top Weather
Station. The BAA928U is all all-in-one weather device and clock.
The BAA928U, a weather forecasting device, and has several weather
related functions. One function is that it takes and records tempera-
tures. Using the remote thermo-sensor, included with your pur-
chase, the unit can simultaneously monitor two temperature read-
ings. The unit will show temperature trends and record maximum
and minimum temperature readings.
Another weather function is the humidity readings. It shows the
indoor relative humidity and rates the comfort level. It can retain
the maximum and minimum relative humidity readings.
A built-in barometer displays the atmospheric pressure with a user-
select altitude adjustment. A bar graph shows the pressure trend for
the last 24 hours.
The unit includes a moon phase scanner. This feature graphically
illustrates the current moon phase and lets you check the moon
phase of any date between 1990 and 2089.
Other features of the BAA928U include a clock and calendar, HiGlo
backlight, extra-large liquid crystal display (LCD), and a daily
crescendo alarm with an eight minute snooze function.
No wire installation is required between the main and remote units.
As the BAA928U operates at 418 MHz, it can be used in the USA and
most places in Continental Europe.
MAIN FEATURES : MAIN UNIT
LEFT PANEL AND DISPLAY
The extra-large LCD occupies the left panel. The LCD is sub-
divided into seven easy-to-read sections. Each section has
specific purposes that relate to weather functions, or clock/
calendar functions.
WEATHER FORECAST WINDOW
Graphically illustrates a weather forecast
MAIN UNIT BATTERY LOW ( ) INDICATOR
Lights up and blinks when batteries of the main unit are low
REMOTE BATTERY LOW ( ) INDICATOR
Lights up and blinks when the batteries of the remote unit are
low
TEMPERATURE WINDOW
Shows current temperatures, minimum/maximum temperatures,
temperature readings from the remote sensor, and temperature
trends
TEMPERATURE TREND ARROWS
Indicates the trend of temperature changes
IN/OUT REMOTE INDICATOR
Indicates if the current temperature is displayed as indoors or
outdoor-remote
TOP WEATHER STATION
MODEL: BAA928U
USER’S MANUAL
Question and Answer IconNeed help?

Do you have a question about the Oregon Scientific BAA928U and is the answer not in the manual?

Oregon Scientific BAA928U Specifications

General IconGeneral
BrandOregon Scientific
ModelBAA928U
CategoryWeather Station
LanguageEnglish

Summary

Main Unit Features

Temperature Window

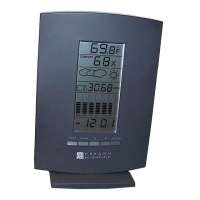
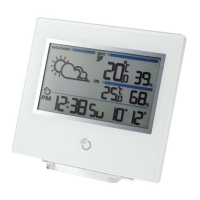
Displays current, min/max temps and temperature trends.

Relative Humidity Window

Displays the indoor relative humidity.

Atmospheric Pressure Window

Displays current atmospheric pressure readings.

Main Unit Display Details

Right Panel Control Buttons

Temperature (Thermo) Button

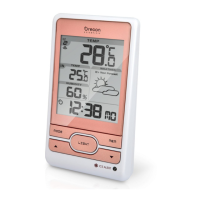
Sets indoor or outdoor-remote temperature mode.

Memory Button

Sets min/max readings and erases memory data.

Alarm Off/On Button

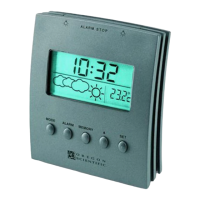
Displays or sets the alarm status.

Mode Button

Changes display mode, time/date, and altitude.

Other Switches and Controls

Snooze/Light Bar

Activates snooze function and turns on backlight.

°C/°F Slide Switch

Selects between Centigrade and Fahrenheit display.

Remote Sensor Unit Features

Before You Begin

Battery Installation Order

Insert batteries for remote unit first, then main unit.

Remote Unit Battery Installation

Remote Unit Battery Installation Steps

Steps for removing screws, inserting batteries, selecting scale, and replacing door.

Main Unit Battery Installation

Main Unit Battery Installation Steps

Steps for lifting tab, inserting batteries, and replacing door.

Manually Setting the Clock

Setting Clock Hours

Press MODE, then UP/DOWN to set hour digits.

Setting Clock Minutes

Press MODE again, then UP/DOWN to set minute digits.

Setting the Calendar

Accessing Calendar Settings

Press MODE until calendar settings are displayed.

Setting Calendar Year

Press MODE and hold, then use UP/DOWN to set year.

Setting Calendar Day/Month Order

Select display order for day and month.

Setting Calendar Month and Day

Set month and day using UP/DOWN buttons.

Setting Day of the Week Language

Select language for day-of-the-week display.

Setting Day of the Week

Use UP/DOWN to enter the day of the week.

Altitude Setting

Accessing Altitude Settings

Press MODE until calendar settings, then hold for altitude.

Setting Altitude Value

Use UP/DOWN button to enter desired altitude value.

Atmospheric Pressure

Setting and Activating the Alarm

Setting Alarm Time

Press ALARM, hold, then use UP/DOWN to set hour/minute.

Alarm and Snooze Function

Snooze Function Activation

Press SNOOZE/LIGHT bar to trigger snooze.

Checking Indoor and Outdoor Temperatures

Measuring Indoor Temperature

Press THERMO button until "IN" indicator is displayed.

Measuring Outdoor Temperature

Press THERMO button until "OUT" indicator is displayed.

Setting Temperature Units

Use °C/°F slide switch on the left panel.

Maximum and Minimum Temperatures

Displaying Max/Min Temperatures

Press MEMORY to alternate between current, MAX, MIN.

Weather Forecast

Weather Forecast

Predicts weather for the next 12-24 hours based on pressure.

Indoor Relative Humidity

Using the Moon Phase Scanner

Checking Moon Phase

Resetting the Unit

Accessing the Reset Slot

Lift battery compartment door to access reset slot.

Performing a Reset

Insert a blunt stylus into the slot and press.

Maintenance

Relative Humidity Measurement

Barometric Pressure Measurement

Power Specifications

Cautions

Related product manuals