17
ment screws closer to the front of the tube (Figure 20b).
Look into the eyepiece. Adjust the adjustment screws just
enough to place Polaris HALF the distance back to the
center of the illuminated reticle eyepiece (Figure 21).
14.Repeat steps 7 to 12 until Polaris remains in the center
of the eyepiece field of view, or moves slightly around the
center, when the mount is rotated about the R.A. axis.
Note: This calibration method can be applied to both
refracting and reflecting telescope designs. Differences
in the optical path of telescopes do not affect how the
telescope tube and tube rings should be adjusted on the
mounting plate.
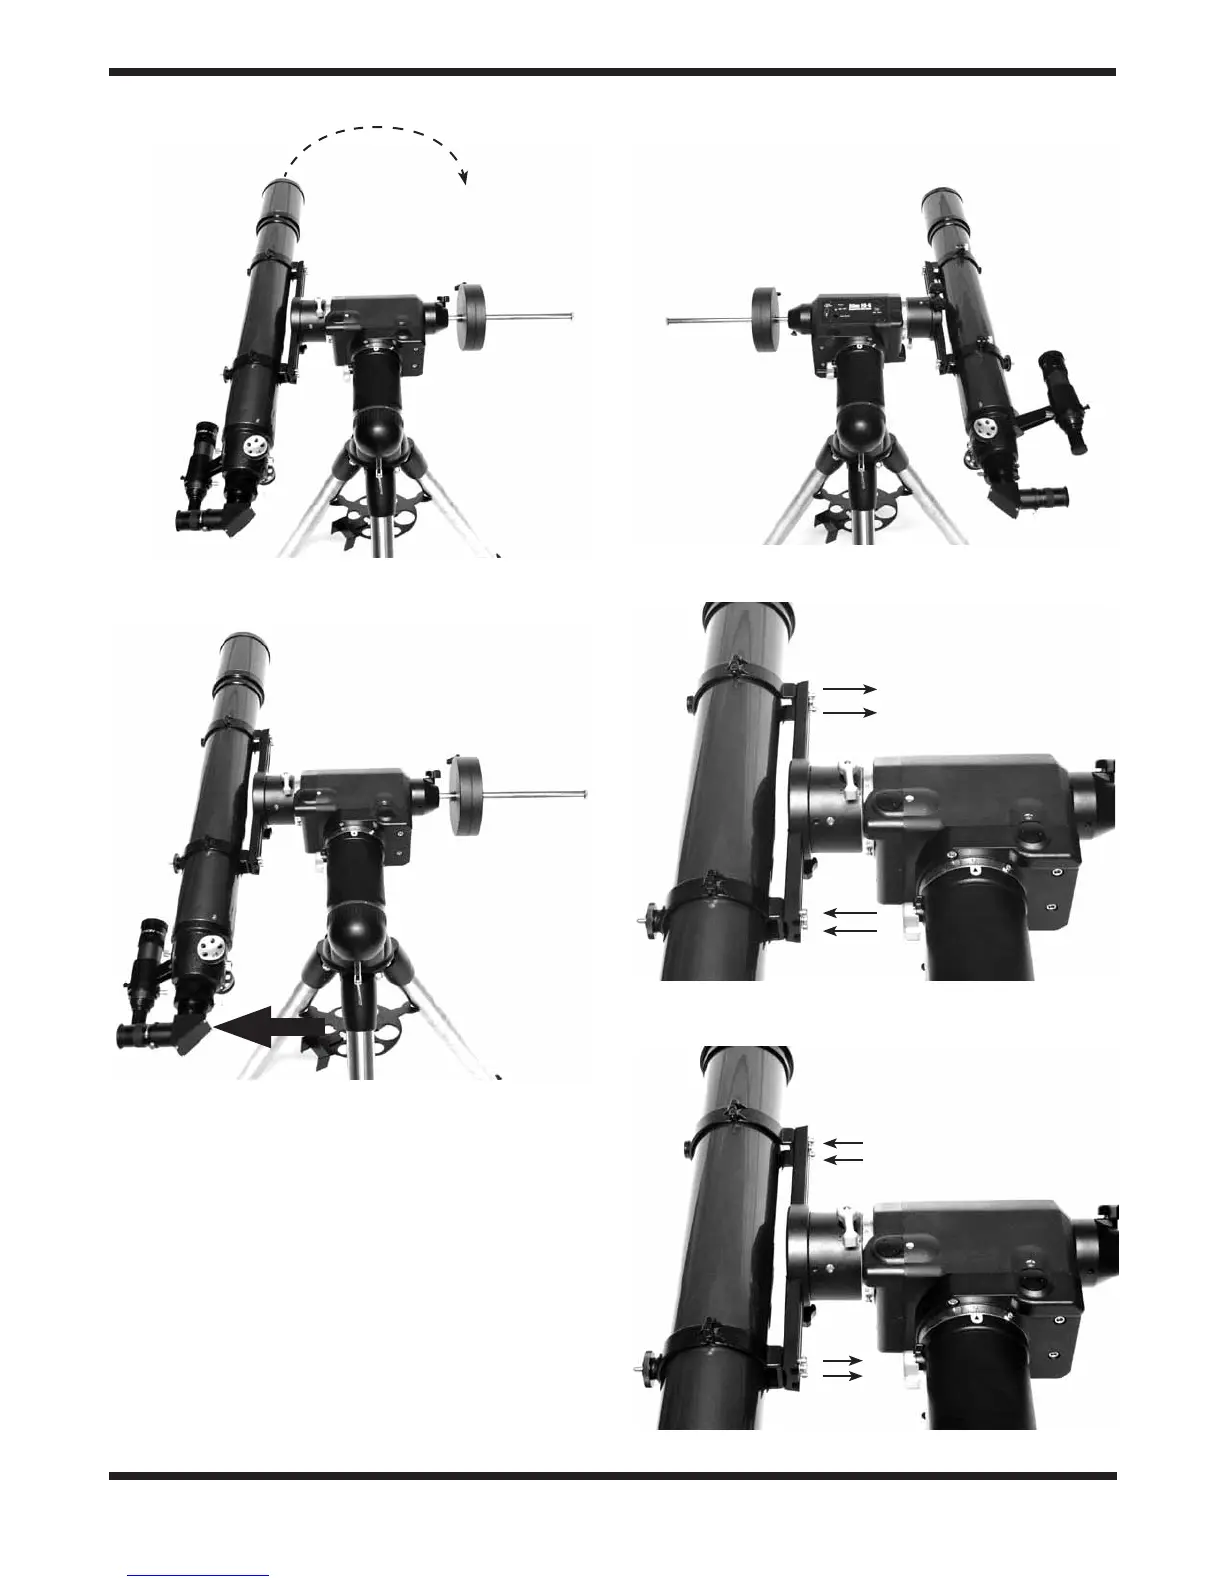
Figure 19. gently push the telescope horizontally to determine
direction of optical axis offset.
Figure 18a-b. Rotate the telescope 180° about the R.A.axis.
Figure 20a. Adjust the optical axis offset screws this way if
Polaris moves toward the center of the eyepiece when the tube is
pushed as in Figure 19.
Figure 20b. Adjust the
screws this way if Polaris moves
away from the center of the
eyepiece.
a. b.
 Loading...