14
Customer Service at 800-676-1343 for guidance.
To clean the eyepiece lenses, any quality optical lens cleaning tissue and opti-
cal lens cleaning uid specically designed for multi-coated optics can be used.
Never use regular glass cleaner or cleaning uid designed for eyeglasses. Before
cleaning, remove any loose particles or dust from the lens with a blower bulb or
soft brush. Then apply some cleaning uid to a tissue, never directly on the optics.
Wipe the lens gently in a circular motion, then remove any excess uid with a fresh
lens tissue. Oily ngerprints and smudges may be removed using this method. Use
caution; rubbing too hard may scratch the lens. On larger lenses, clean only a small
area at a time, using a fresh lens tissue on each area. Never reuse tissues. When
bringing the telescope inside after an evening’s viewing it is normal for moisture to
accumulate on the optics due to the change in temperature. We suggest leaving
the telescope and eyepieces uncovered overnight to allow the condensation to
evaporate.
6. Collimation – Aligning the optics
Collimation is the process of aligning the telescope’s two mirrors. Your telescope’s
primary and secondary mirrors were precisely aligned at the factory, and should
not need any adjustment unless the telescope was jarred while in transit. Accurate
mirror alignment is important to ensure the best images from your telescope, so it
should be checked regularly. Collimation is a relatively easy process and can be
done in daylight or darkness.
To check the collimation, remove the eyepiece and look down the focuser draw-
tube. You should see the secondary mirror centered in the drawtube, as well as the
reection of the primary mirror centered in the secondary mirror, and the reection
of the secondary mirror (and your eye) centered in the reection of the primary mir-
ror, as in Figure 7a.
If the entire primary mirror reection is not visible in the secondary mirror, as in
Figure 7b, you will need to adjust the tilt of the secondary mirror with the three
Philips alignment setscrews surrounding the center screw (Figure 8). Using a
small Philips screwdriver, rst loosen one of the three alignment setscrews by, say,
a half turn, and then tighten the other two to take up the slack. Is the primary mir-
ror reection more centered in the secondary mirror now? You may need to loosen
a different screw then tighten the other two to better center the primary mirror in
the secondary. It’s a matter of trial and error. The goal is to center the primary mir-
ror reection in the secondary mirror, as in Figure 7a, by adjusting these three
screws in this fashion. Do not adjust the center screw.
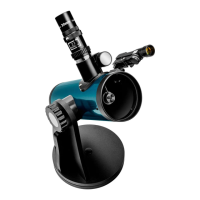
Aligning the Primary Mirror
The primary mirror of the FunScope is xed in place, so no adjustments are nec-
essary. The view down the focuser drawtube should now resemble Figure 7a. A
simple star test will indicate how well the telescope optics are collimated.