18
Operating and Riding the Electric Balancer
IMPORTANT INFORMATION
Non-powered training: We recommend that you teach your child how to
balance the bike first before you add power. They should be proficient at
kicking and balancing the bike before turning the power switch on. There
are many videos on YouTube that can teach them how to kick and balance
a bike.
POWER MODE
The 12in comes in the lowest speed settings and 50% power. We
programmed the beginner mode so that the balancer does not move too
fast and you can briskly walk next to your child while training. The
throttle is not very responsive and has a delay built in and takes a few
seconds to start moving (1.5 sec). If you are unsure the bike is working
simply lift the rear wheel, twist the throttle and spin the rear wheel
forward. Once they kick or you push them, the bike will start to move
and will slowly gain speed as it goes. This is a safety feature built in so
that the Balancer does not start too fast and scare them. In speed setting
3, the throttle delay goes away.
We leave the speed cap off so that you can adjust the speeds quickly to
your child’s skill level. After you have chosen a safe setting for your child’s
skill level, we recommend you cover the switch (cover is in the tool bag)
so they cannot change the mode and go faster.
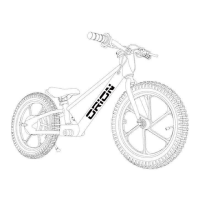
The illustration on the next page shows you the different positions of the
speed switch located on the bottom of the frame. As mentioned above,
the 12in comes with 50 % power, kick-start and the slowest speed setting
(1-3 mph). To change to 100 %power, full torque, non-kick mode - please
refer to the next page.
WARNING: It is recommended that once you change to full-power
mode, you monitor your child and make sure that they can operate
the bike safely. We recommend that you change 1 setting at a time as
follows: