8
Connecting the Optical Tube to the
Dobsonian Base
The telescope is now assembled and ready to be placed into
the Dobsonian base. The left altitude hub on the optical tube
has a dovetail slot that slides into the altitude axis trunnion on
the inside of the left side panel (Figure 17). We recommend
orienting the trunnion such that the threaded hole for the tube
securing knob is facing upward. Then the telescope tube can
be cradled horizontally and just lowered into the base by gen-
tly sliding tube’s dovetail altitude hub into the mating recep-
tacle of the altitude trunnion on the base (Figure 18). (Get
help lifting the tube in place if it is too heavy or unwieldy for
you.) The tube should now be resting in a balanced, horizon-
tal position in the base. Then just insert and tighten the tube
connecting knob to secure the tube in place (Figure 19).
Accessory Installation
Now that the base is assembled and the optical tube installed
all that remains is to attach the EZ Finder II reflex sight and
the eyepiece. These accessories can be found in a small box
within the optical tube assembly box.
EZ Finder II
Using the included dovetail mounting bracket, the EZ Finder
II will slip neatly into the dovetail base preinstalled on your
SkyQuest optical tube. The EZ Finder II arrives pre-installed
in the mounting bracket. Just simply slide the dovetail mount-
ing bracket into the telescope’s dovetail mounting base and
tighten the thumbscrew on the base to secure the mounting
bracket.
Before installing the EZ Finder II on the telescope, you’ll need
to insert the included 3-volt lithium battery.
1. Insert a small, flat-blade screwdriver into the notch in the
battery casing and gently pry it off (Figure 20).
2. Slide the CR2032 3V lithium battery under the retaining
clip with the positive (+) side facing down (touching the
clip).
3. Then press the battery casing back on.
Should the battery die, replacement CR2032 batteries are
available at many stores where small batteries are sold.
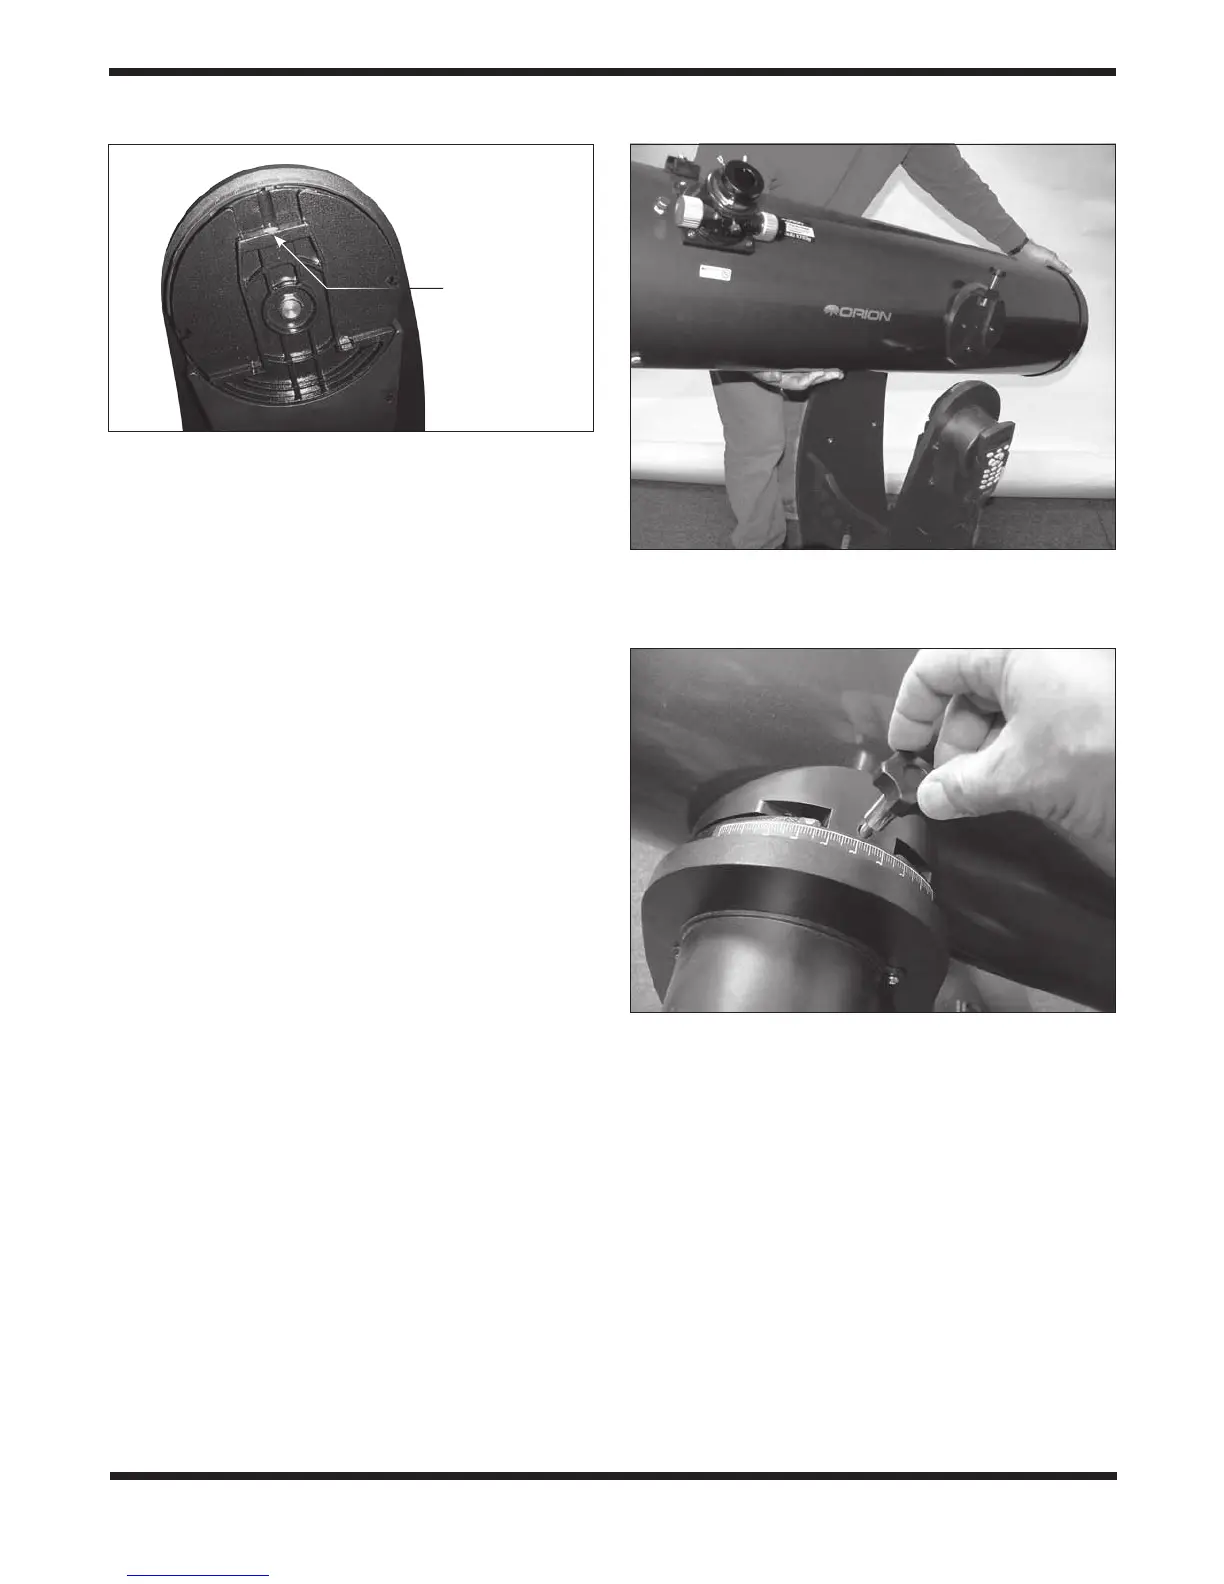
Figure 17. The cast-metal dovetail trunnion on the left side panel
of the base mates with the left side bearing of the telescope tube.
Before mounting the tube on the base, turn the trunnion by hand so
that the hole for the tube connecting knob is facing up.
Threaded
hole for tube
connecting knob
Figure 19. Secure the tube to the base with the tube connecting
knob.
Figure 18. Hold the telescope tube as shown, with one hand on
the rear end ring and the other cradling underneath the tube, gently
lower the scope so the dovetail side bearing on the tube seats in the
metal trunnion on the left side panel.
 Loading...