3
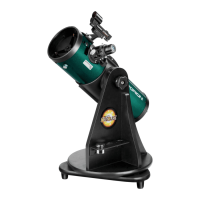
Assembly of the SkyScanner BL 102mm
1. Attach side brace to side panel with two assembly screws
(Figure 2).
2. Attach eyepiece rack to side panel with two assembly
screws (Figure 3).
3. Attach side panel assembly to top side of top ground plate
with three assembly screws (Figure 4).
4. Place top portion of base onto bottom ground plate,
centering the hole in top ground plate over the pre-
installed center bolt in the bottom ground plate (Figure 5).
5. Place a at washer followed by a spring washer onto the
center bolt. Make sure the spring washer is oriented as
shown in Figure 6. Now thread a tension knob onto the
center bolt (do not over-tighten).
6. Remove tension knob and sleeve from altitude axis bolt
on side hub of optical tube (Figure 7).
7. Install optical tube on side panel by inserting bolt of opti-
cal tube’s altitude hub through the hole in the side panel,
as shown in Figure 8A. Make sure the plastic disc is
between the hub and the side panel.
8. Now place a at washer followed by a spring washer onto
the exposed end of the bolt, the thread on a tension knob
(do not overtighten). (Figure 8B)
9. Now install the red dot nder scope by sliding the bracket
into the nder base on the optical tube as shown in
Figure 9.
10. Finally, insert the 25mm eyepiece into the focuser draw-
tube collar and secure it with the thumbscrew (Figure 10)
With your telescope now fully assembled, you can skip to the
section titled “Getting Started”.
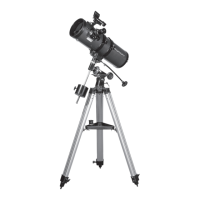
SkyScanner BL 135
Included Items
Unpack and identify all included items, using the list below and
Figure 11 for reference.
• SkyScanner BL 135mm optical tube
• Red dot nder scope
• 25mm Kellner eyepiece
• 10mm Plossl eyepiece
• 3x Barlow lens
• MoonMap 260
•
Bottom ground plate (with feet and azimuth axis bolt
pre-installed)
• Top ground plate
• Side panel (x2)
• Side brace (x2)
• Front panel
• Bearing cylinders (x4)
• Eyepiece rack
• Assembly screw (x18)
• Azimuth tension knob
Tension knob
Spring washer
Flat washer
Figure 3. Use two screws to
attach the eyepiece rack
Figure 4. Attach the side panel
assembly to the top ground plate.
Figure 6. With the top portion of the base installed on the bottom
ground plate, place a at washer then a spring washer onto the
center bolt as shown, then thread on a tension knob.
Figure 5. Place top portion of
base onto bottom ground plate.
Figure 2. Installing the side
brace/handle
 Loading...