4
camera lens contact the eyepiece! Note that with some eyepiece and camera
combinations, it may not be possible to eliminate vingetting entirely.
6. Place the eyepiece (with SteadyPix Pro attached) back in the telescope’s
focuser (if the eyepiece was removed to install in the SteadyPix Pro) and
secure it with the locking thumbscrew(s) (Figure 3). Now you’re ready to aim,
focus, and shoot!
TIPS:
• Before attaching the SteadyPix Pro with camera attached to the telescope,
focus the object you want to photograph in the telescope eyepiece using
the telescope’s focuser. You may still have to tweak the focus a bit once
the SteadyPix and camera are installed, but at least you’ll be close to the
focuspoint.
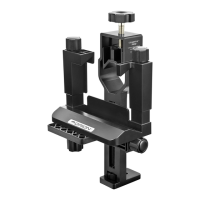
Figure 3. The SteadyPix Pro with camera attached is shown mounted on an Orion
SpaceProbe 3 reector telescope.