5
• We recommend using the
camera’s self-timer setting to take
your picture, as this will allow
a few seconds for any camera
shaking caused by pressing the
shutter button to settle down
before the exposure begins. If
the camera is shaking during
the exposure the resulting image
will be blurry. Many smartphone
camera apps also have a self-
timer feature.
For Smartphones
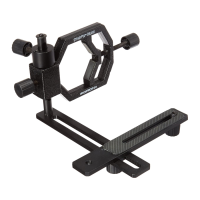
The smartphone bracket included
with the SteadyPix Pro is compatible
with phones measuring up to 3.15"
(~80mm) in width and any length.
1. Rotate the smartphone bracket
post adjustment knobs (M)
counterclockwise to raise the
bracket posts (N) as needed to
t the width of your particular
smartphone.
2. Slide your smartphone into the
bracket (O) from the right side
as shown in Figure 4, with the
phone’s LCD screen facing toward
you. Make sure that the phone’s
camera lens is not blocked by
the bracket. Then tighten the post
adjustment knobs (M) to lock the smartphone in place.
3. Mount the smartphone bracket on the SteadyPix Pro camera platform
using the camera mounting bolt (H) and camera lock knob (I) and one
bracket attachment knob (P) into the two left-most holes in the base of the
smartphone bracket (O) (Figure5). (Depending on where your phone’s
camera lens is located, you may need to use the two right-most holes.)
Figure 5. Attach the smartphone bracket
to the SteadyPix camera platform.
Figure 4. Slide your smartphone from
right to left into the bracket.
 Loading...

