Technical Note • May 4, 2021
Page 5
[3]: Determining the Installation Procedure
The installation procedure for option cards varies, depending on:
i.
option card model
ii.
installation slot chosen by you, and
iii.
for upper slots only: if the bottom slot is used or not.
Determining the correct installation procedure
a.
Identify the last two digits of the
part number of your option card (see label on bag).
b.
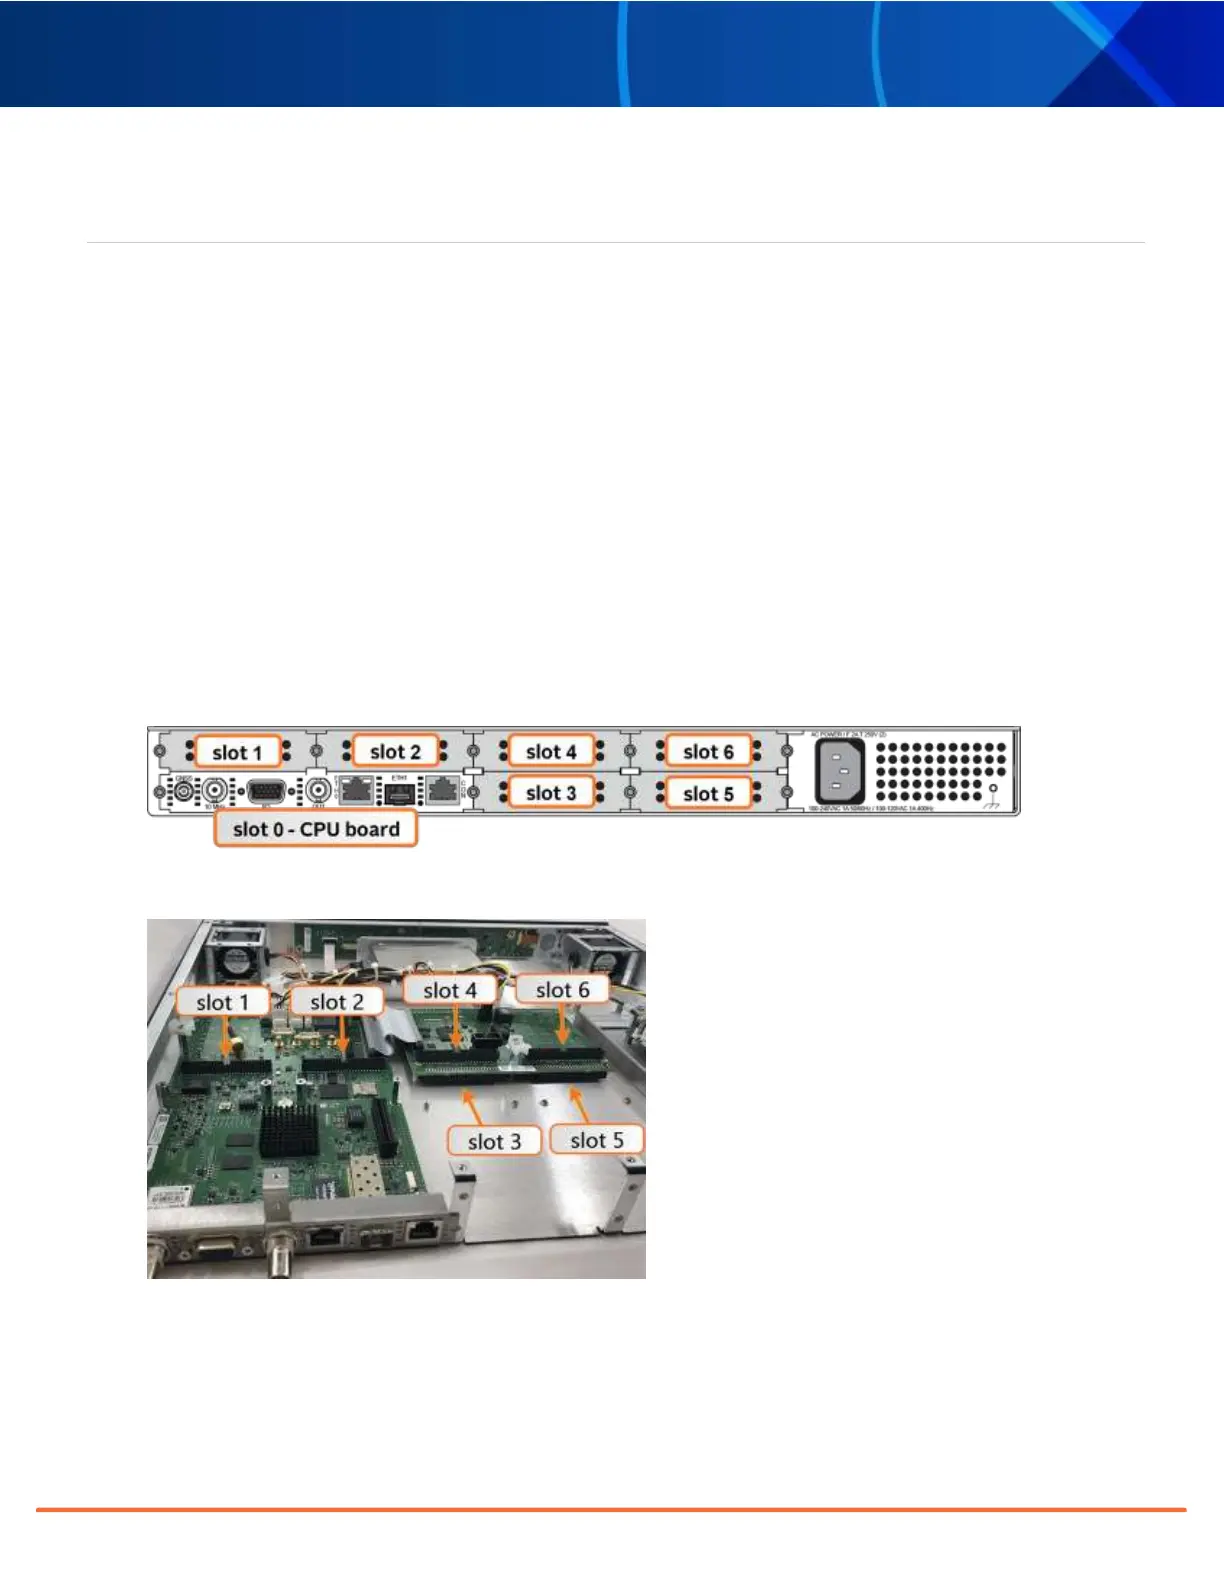
Inspect the back of the SecureSync housing, and select an
empty slot for the new card. If the card is to be
installed in one of the upper slots (4, or 6), take note if the corresponding lower slot (3 or 5) is occupied.
Slots 1 and 2 always have an occupied slot below them.
Units must be equipped with an Extension Board to fill option card slots 3, 4, 5, and 6.
Figure 1: Unit rear view
Figure 2: Unit internal view (from rear)
SecureSync 2400 Option Card Field Installation Guide