1110
The individual Grip Chips are programmed using the Biosim and the My i-Limb app and can be reprogrammed by
the user at any time.
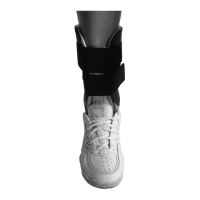
IDIGITS DEVICE ASSEMBLY
. WRISTBAND, DUMMY POSITIONING AND DIGIT ASSEMBLY
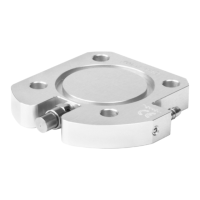
Positioning the Socket Terminal Dummy
Place the socket terminal dummy on the dorsal surface of the positive cast. The position should be central to the
midline of the wrist and elbow joints. Leave mm space between the socket terminal dum¬my and the center of
the wrist joint, to enable good range of movement at the user’s wrist (Fig. ).
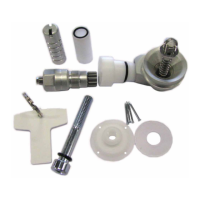
Digit Removal from the Knuckle
Depending on device version, use the T or T screwdriver to remove the M grub screw from the knuckle
assembly (Fig. ).
The digit can now be freely disengaged from the knuckle assembly.
Extra Small and Medium Digit Assembly
Depending on the size of the kit, the knuckle mounting plate will vary in shape.
Figure shows a medium size digits assembly.
Figure shows an extra small size digits assembly.
Knuckle Mounting Plate
The knuckle mounting plate supports digits. Cut to adjust to the number of digits required by the user (Fig. ).
Attaching the Knuckle Mounting Plate
– Use the T screwdriver to attach the knuckle assembly to a knuckle mounting plate using three Mx mm
Torx screws (Fig. ).
– Lamination tabs can be bent or shortened as appropriate.
– Consider fabrication before cutting and removing tabs, since some tab length will be needed to fix the plate
to the frame.
Digit Attachment to the Knuckle Assembly
– Pre-flex the digit slightly to aid assembly.
– Firmly place the digit into the knuckle assembly.
– Insert screw. Torque to Nm (Fig. ).
NOTE: Screws are for single use only.
. ALIGNMENT TRANSFER
Thumb Alignment
– Use the thumb alignment plate to help position the thumb mounting plate (Fig. ).
– Screw the thumb alignment plate onto the index position of the knuckle mounting plate using three
Mx mm screws.
– Depending on if it is a left- or right-handed device, attach the thumb rotation assembly to the correct side of
the alignment plate using three Mx mm screws (Fig. ).
Knuckle Dummies
– Use single knuckle dummies to help transfer alignment. Attach the single knuckle dummies to the knuckle
mounting plate using three Mx mm countersunk Torx screws and the T screwdriver (Fig. ).
– Insert the alignment bars into the single knuckle dummies. Lock each in place using Mx mm countersunk
torx screws and the T screwdriver (Fig. ).
. CONTROL INPUTS
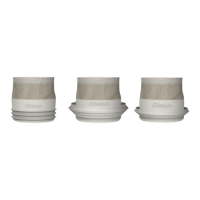
Remote Electrode Domes
Assemble the electrode domes into the silicone socket by integrating the suspension piece into the silicone. Use
the dummies supplied to create optimal spacing and relief (Fig. ).
 Loading...