English-11
4. Discard the remaining water by removing the reservoir and turning it upside down
over the sink. It is recommended to empty the water reservoir between uses. Do not
immerse appliance in water.
5. Wipe housing with a soft wet cloth. Do not use abrasive cleaners or scouring pads, as
they will scratch the nish.
6. Do not store the porta-lter in the brew head. This can adversely affect the seal
between the brew head and the porta-lter while brewing espresso.
DELIMING
Mineral deposits built-up in the Espresso Maker will affect the operation of the appliance.
Your Espresso Maker must be delimed when you begin to notice an increase in the time
required to brew espresso, or when there is excessive steaming. Also, you may notice a
build-up of white deposits on the surface of the brew head.
The frequency of cleaning depends upon the hardness of the water used. The following
table gives the suggested cleaning intervals.
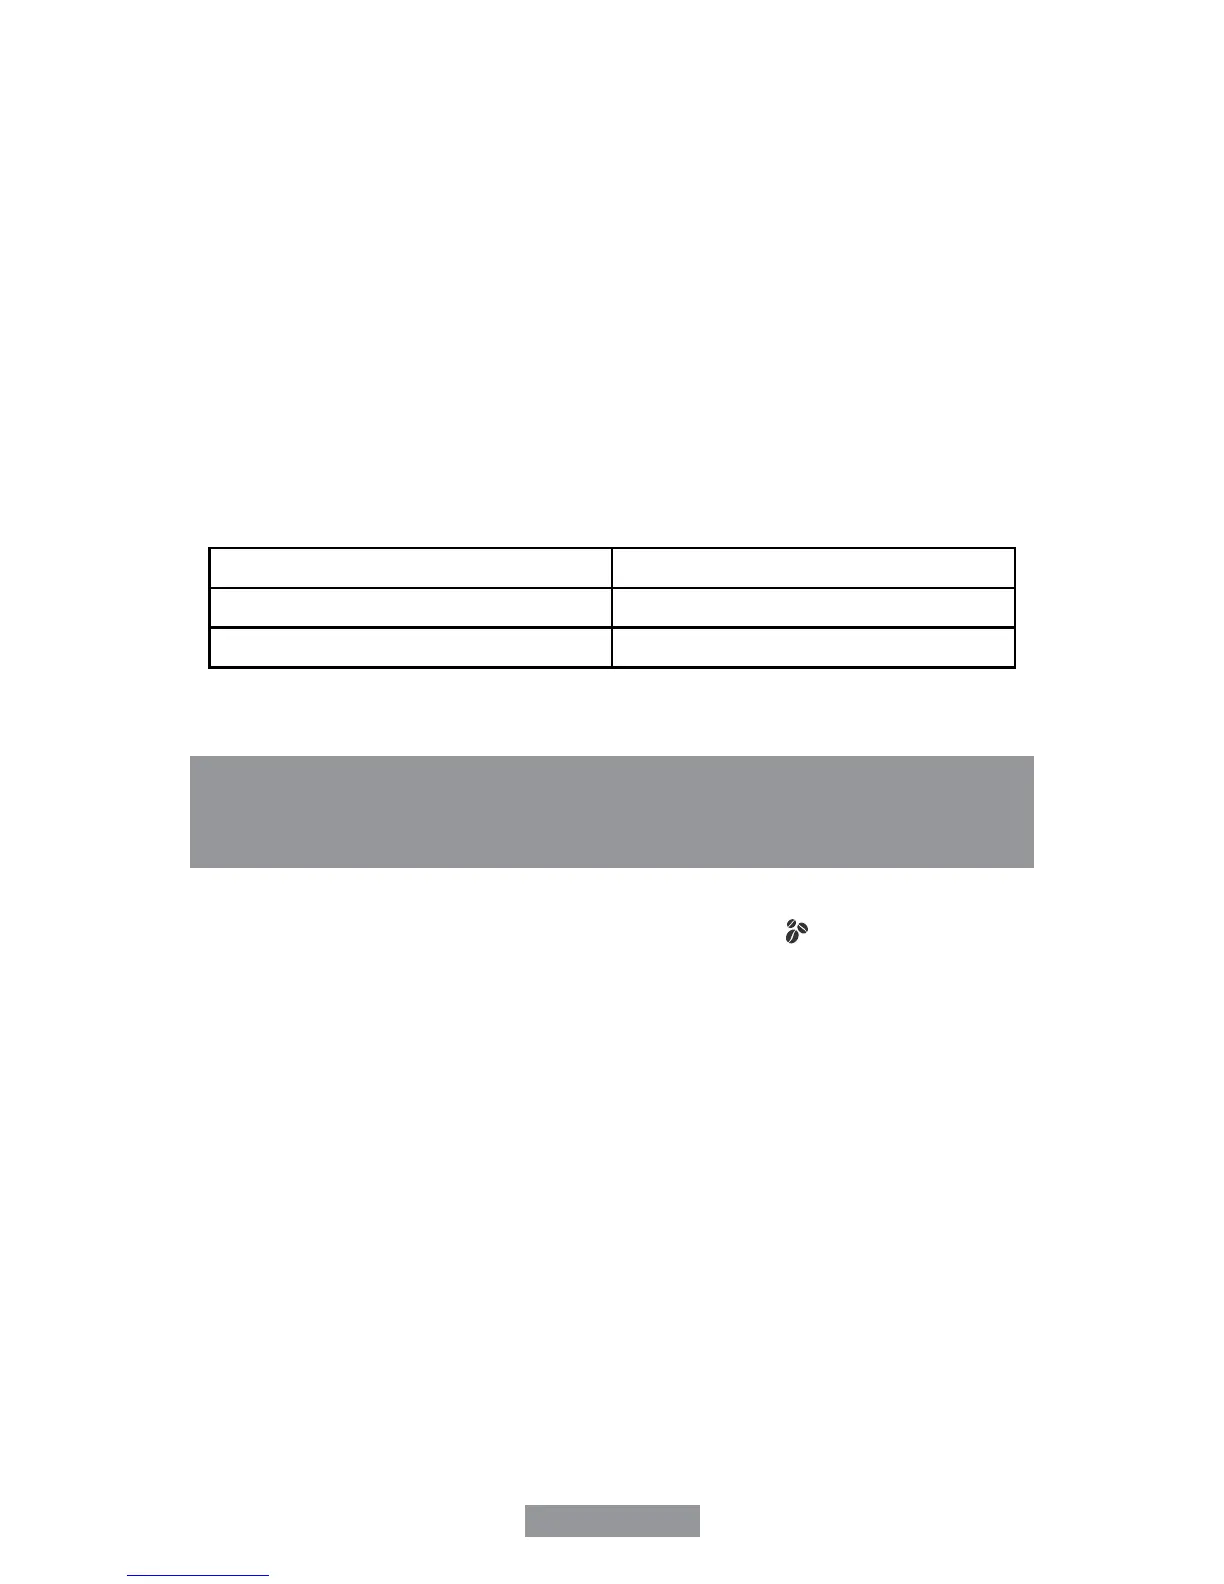
SUGGESTED CLEANING INTERVALS
Type of Water Cleaning Frequency
Soft Water (Filtered Water) Every 80 Brew Cycles
Hard Water (Tap Water) Every 40 Brew Cycles
DELIMING YOUR ESPRESSO MAKER
TO DELIME WATER RESERVOIR:
1. Make sure the side control knob is in the brew/off position “ ”, the red switch is in
the off position “O” and that the power cord is disconnected from the electrical outlet.
2. Fill the reservoir with fresh, undiluted white household vinegar.
3. Allow appliance to sit overnight with the vinegar solution in the water reservoir.
4. Discard vinegar by removing the reservoir and turning it upside down over the sink.
5. Rinse the water reservoir thoroughly with tap water by lling tank half full with water
and then pouring the water back out into the sink, repeating this step twice.
TO DELIME INTERNAL PARTS:
1. Make sure you delime the inside of the water reservoir rst by following the “Deliming”
steps above.
2. Make sure all controls are in the off position and the power cord is disconnected from
the electrical outlet and the appliance is. Fill the reservoir with white vinegar above
the minimum level into reservoir.
3. Insert the porta-lter (with lter) and place jar/carafe or regular cup on top of the drip
tray and under the porta-lter.
4. Plug the power cord into the electrical outlet.
5. Press the red button to switch the unit on “I”, once the coffee intensity control panel
lights (4 lights) become solid blue the unit is ready to brew, press one of the four
brewing coffee intensity buttons. The vinegar will start owing through the unit.