7
Using Your Product
Before you use the product for the first time, separate the lid, filler cap and blade
from the jar. Wash in warm, soapy water, or top rack in the dishwasher. Rinse
and dry well.
Blade is sharp. Handle with care.
Assembly
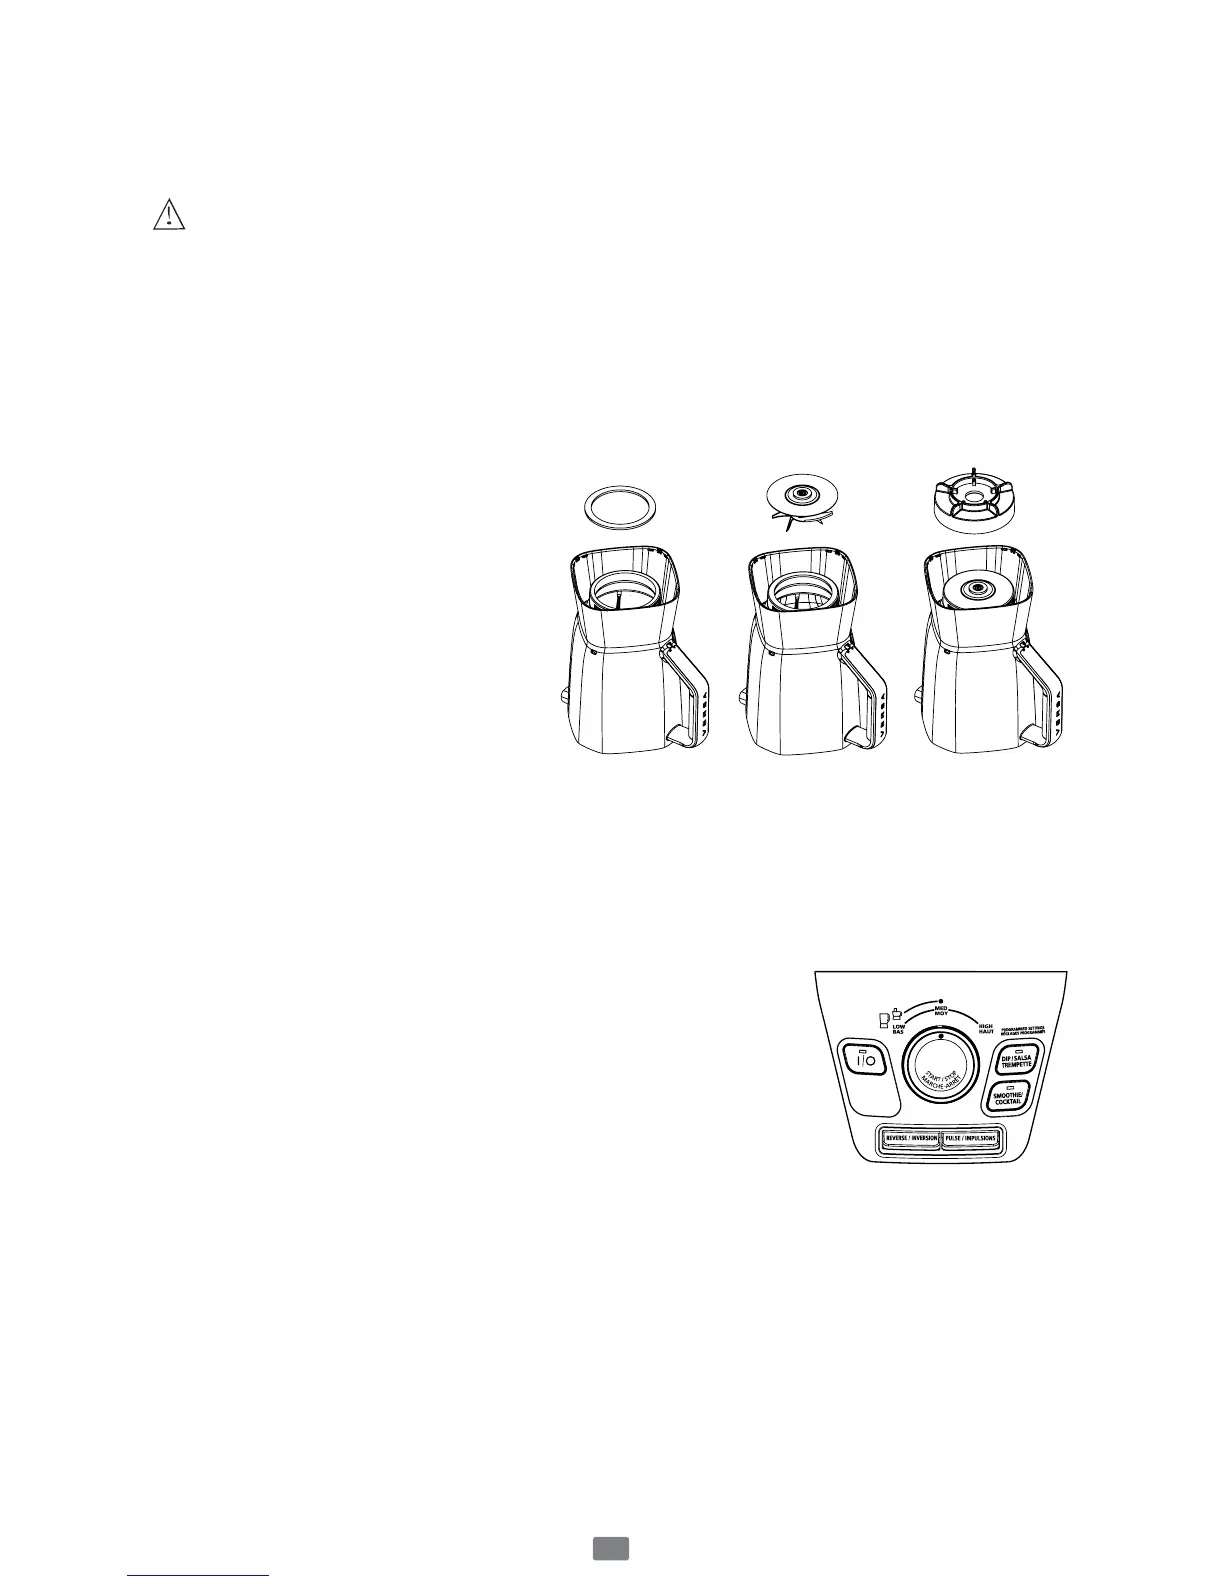
1. Install the sealing ring over the blade.
2. Turn the jar upside down and place it on a flat and stable surface.
3. Turn the blade with sealing ring upside down and place into the bottom of
the jar.
4. Install the threaded jar bottom over the blade assembly. Turn clockwise to
tighten.
Be sure the threaded jar
bottom is tightened to the jar
before using.
5. Choose a recipe from the
recipe book provided.
6. Put the ingredients into the jar.
7. Secure the lid and filler cap.
8. Slide the jar onto the base.
9. Plug the power cord into a
standard household 120/127-volt, 60 hz. AC outlet. You are now ready to
start.
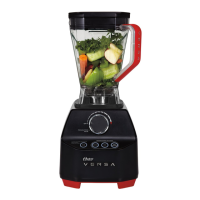
Using the Programmed Settings
1. Press the ON/OFF (I/O) power button to turn the product on. The power
light will blink, meaning the product is active and ready to use. The light
will stay on when the motor is running.
2. Press one of the two Programmed Setting buttons
appropriate for your recipe.
- “Smoothie/Cocktail” Button
- “Dip/Salsa/Trempette” Button
3. To change your selection, press knob to stop, followed
by another Programmed Setting button.
4. Once the program is finished the product automatically stops. Please note:
You may press the knob to cancel the program at any time. The blinking red
light indicates that the blender is ready.
5. Press the ON/OFF (I/O) power button to turn the product off.
This product is programmed to turn off automatically if not used for a period
of several minutes. All lights will turn off when the unit automatically powers
down.