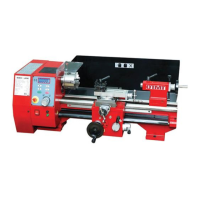
Turning a Workpiece
Turning is the process of removing material
from the outside surface of a cylindrical
workpiece to reduce its diameter. This might
be done, for example, to form the end of a
shaft to fit into a bearing.
During a turning operation the cutting tool is
advanced a small distance into the side of the
workpiece. Then the carriage is moved at a
steady rate towards the headstock, either by
turning the carriage handwheel by hand or by
moving the carriage using power feed. As the
carriage moves along, material is removed all
along the length of the workpiece that the
cutting tool contacts, thus reducing the
diameter.
Typically, several passes are made, since the
amount of material to be removed often is too
large to be done in one pass. The goal of these
initial passes, called roughing cuts, is to quickly
remove material to approach the final required
diameter.
If a fine surface finish is required, one or two
finishing cuts are made, removing only a few
thousandths of an inch of material on each
pass with the carriage traveling relatively
slowly along the workpiece.
The following exercise is a continuation of the
previous operations and assumes that the
workpiece is already set up as in the
completion of the drilling operation.
1. Adjust the angle of the toolholder so that
only the rounded tip of the tool bit will
contact the side of the workpiece. The side
of the tool bit should be at about a 95-100°
angle to the side of the workpiece – similar
to, but slightly less than the angle it was at
for facing – with the tip slightly closer to the
headstock than the end of the tool bit.
2. Verify that the carriage locking screw is in
the unlocked position.
3. Position the tip of the tool so that it is close
to the side of the workpiece.
4. Advance the cross-slide handwheel until
the tip of the tool just touches the side of
the workpiece.
5. Holding the handwheel with one hand,
rotate the calibrated sleeve with the other
hand to set it to zero.
6. Rotate the carriage handwheel to move the
tool to the right until it is clear of the end of
the workpiece.
7. Press the Start button.
8. Adjust the spindle speed to about 800 RPM
Note: When making a turning cut, the depth of
the cut as indicated by the cross-feed dial is
the depth removed from the radius of the
workpiece; the diameter will be reduced by
twice that amount. Thus, taking a cut of 5
divisions (five thousandths) will reduce the
diameter by 0.010 (ten thousandths).
9. Rotate the cross-feed dial by 5 divisions to
remove ten-thousandths (0.010”) from the
diameter of the workpiece.
10. Slowly rotate the carriage handwheel
counter-clockwise to move the carriage
towards the headstock. As the carriage
moves, the cutting tool removes material
from the workpiece, reducing its diameter.
PDF created with pdfFactory Pro trial version www.pdffactory.com