5
KOKO USER’S GUIDE
A
B
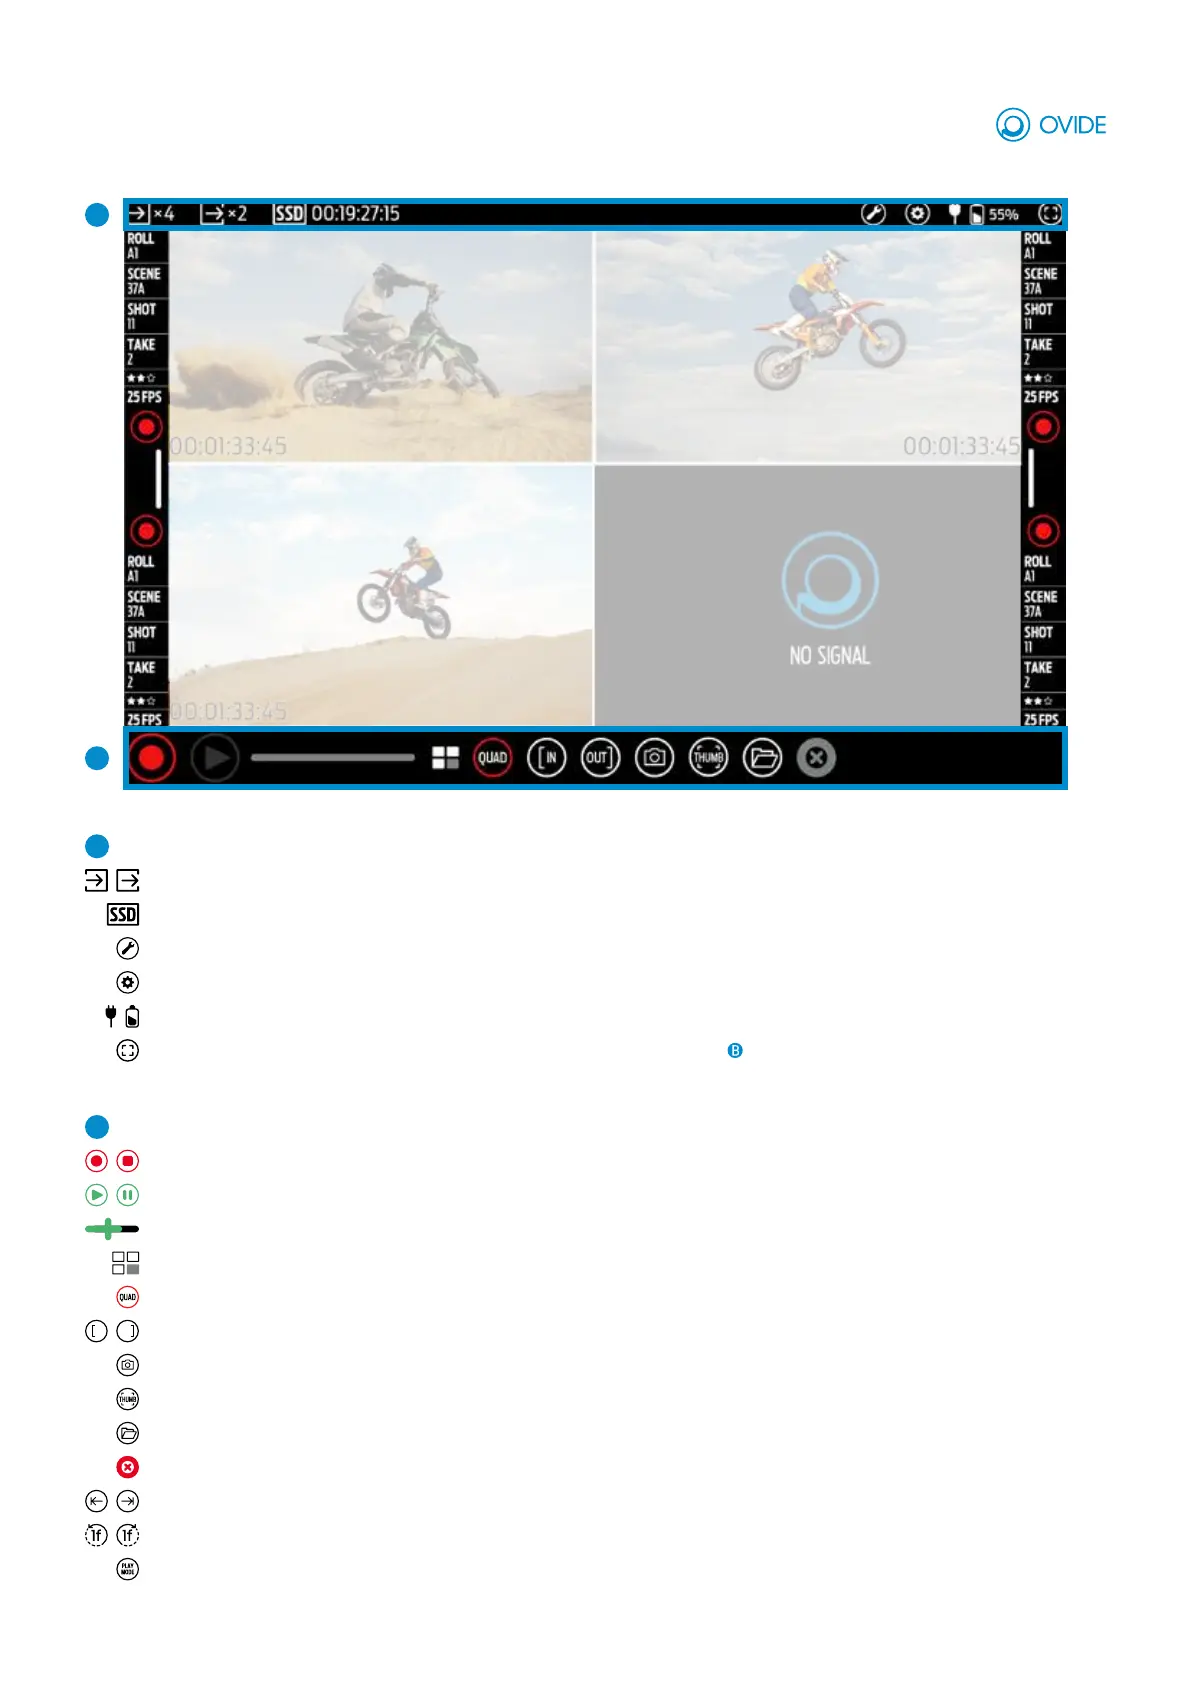
INTERFACE OVERVIEW
A
Topbar
Inputs & Outputs:
SSD:
Toolbar button: Zebra, focus, metadata, LUT’s, waveform, histogram, vectorscope, false color and spot.
Settings button:
Power: Indicates power status. On click, opens power info window.
Fullscreen button: Removes top and side toolbars and only keeps main toolbar .
B
Main toolbar:
Rec/Stop:
Play/Pause: Starts and pauses playback.
Slider: Controls playback.
Selected view/s: Shows which views have video input and which are selected or on standby.
Showed view/s: Shows which view/s you are actually seeing (View 1-4 or Quadsplit view)
IN OUT
In/Out: Adds in/out markers for playback.
Snapshot: Set marker to current selected view.
Thumbnail: Generates a thumbnail for a clip.
Browser:
Abort: Cancels recording and ereases the current clip (only on Rec Mode).
Previous/Next clip:
Skip time:
Play Mode:
Indicates how many inputs and outputs are connected. On tap, opens in/out settings window.
Indicates the remaining recording time available at current fps and codec. On tap, opens SSD options window.
System info, reset settings, abort button, format, date and time, import and volume.
Controls the currently selected view/s
When in play mode, will switch to “Rec Mode”.
Opens a list of the recorded clips in the SSD so you can play them
Jumps to previous/next marker (only on Play Mode).
Play 1 frame/ 1” / 10” backwards or forwards. On tap, opens Skip Time options window (only on Play Mode).
On tap, opens Play Mode options window (speed, loop/pong, reverse or single/all) (only on Play Mode).
 Loading...