Installation
7
OWC Data Doubler
➦
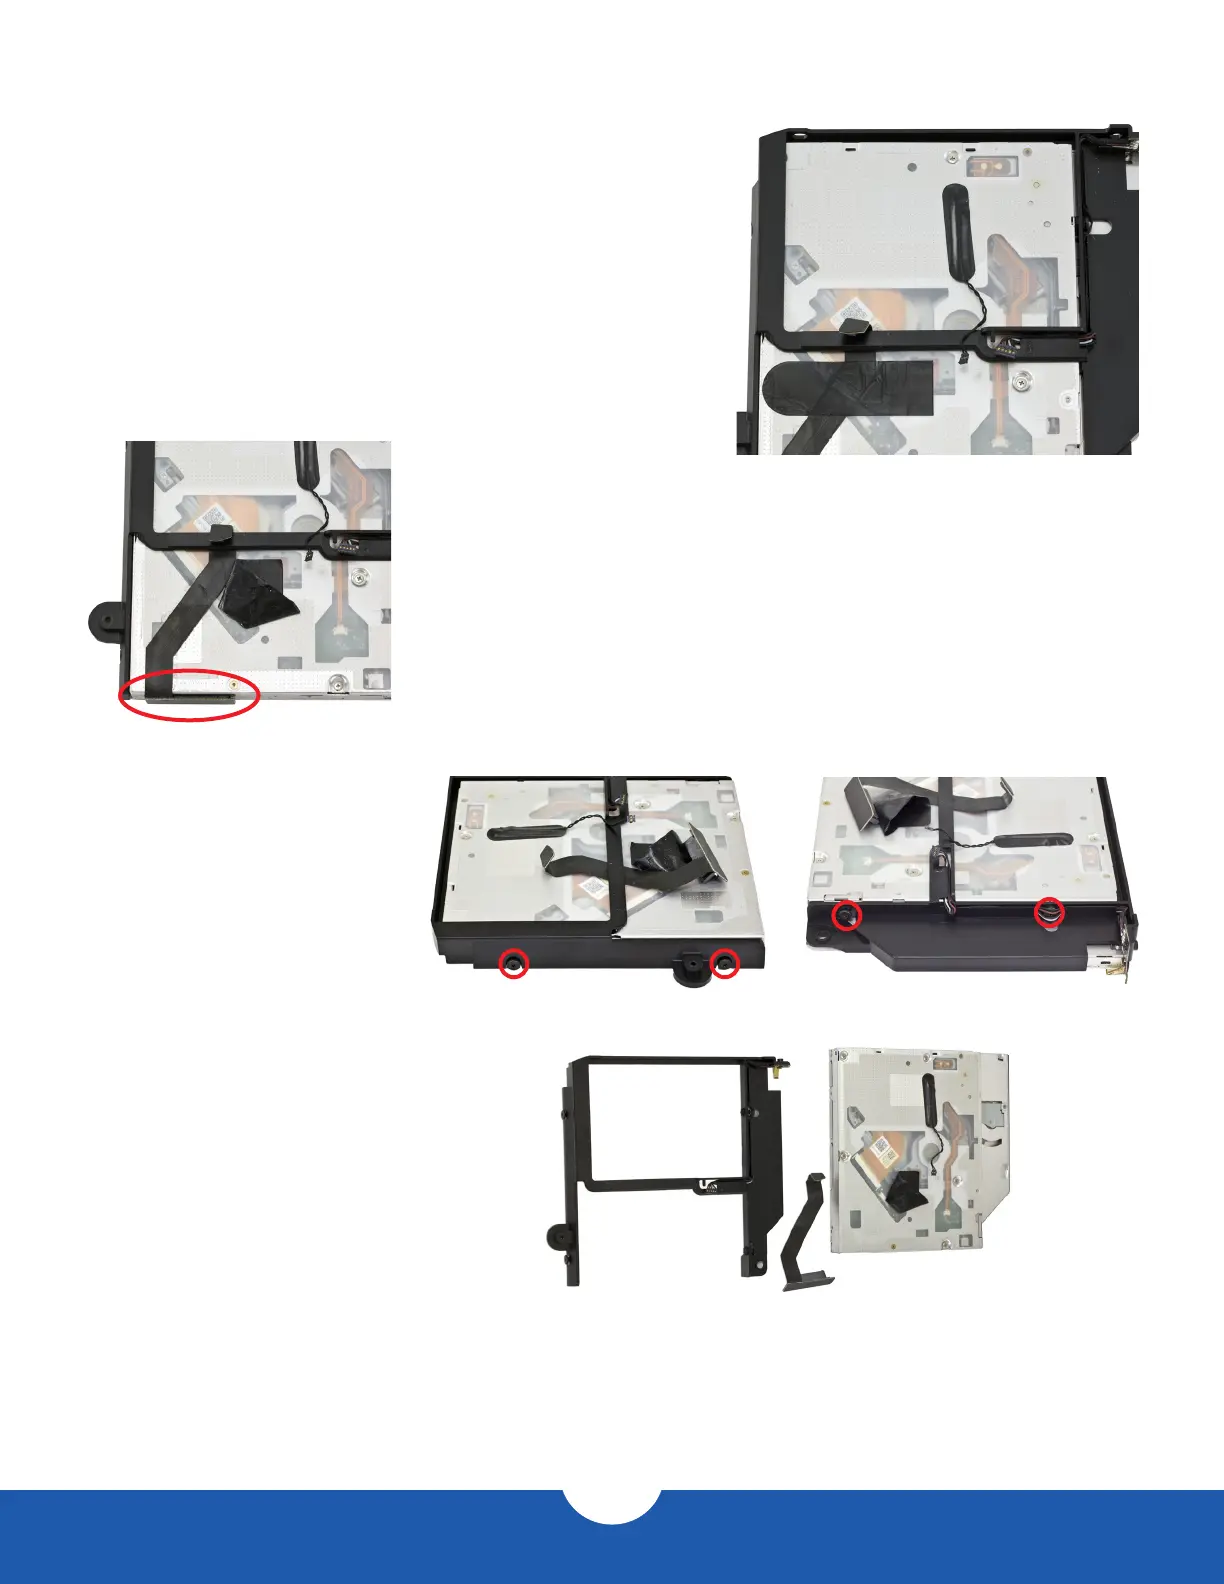
25. Peel back the tape securing the optical drive ex cable to the optical
drive, as shown in the picture to the right. Be careful, as you will be using
this tape again during the installation of the Data Doubler.6.
26. Disconnect the optical drive ex cable from the optical drive, as circled in the picture
to the left. Do not attempt to remove the cable from the assembly. One end of the
cable is trapped between the optical drive and the carrier. Simply slide the cable up
and out of the way as you go about the process of removing the optical drive.
27. Remove the four T8 screws
from the optical drive, as circled
in the pictures to the right.
These screws are held in place
by rubber grommets, so they
will remain seated in the carrier
once they are removed from
the optical drive.
28. Remove the optical drive from the
optical drive carrier. At this point,
the optical drive ex cable can also
be removed.
Disassembly is now complete. Proceed to Section 2.2 for instructions on installing a drive in the
Data Doubler and installing the Data Doubler in the Mac mini.