EasyManuals Logo

OWC Mercury Elite-AL Pro Assembly Instructions

OWC Mercury Elite-AL Pro
22 pages
To Next Page IconTo Next Page
To Previous Page IconTo Previous Page
Page #6 background imageLoading...
Page #6 background image
(Versions with FireWire & USB)
Begin drive installation by
setting your hard drive into the
chassis, towards the front of
the chassis and slide the drive
onto the black connector on the
green logic board.
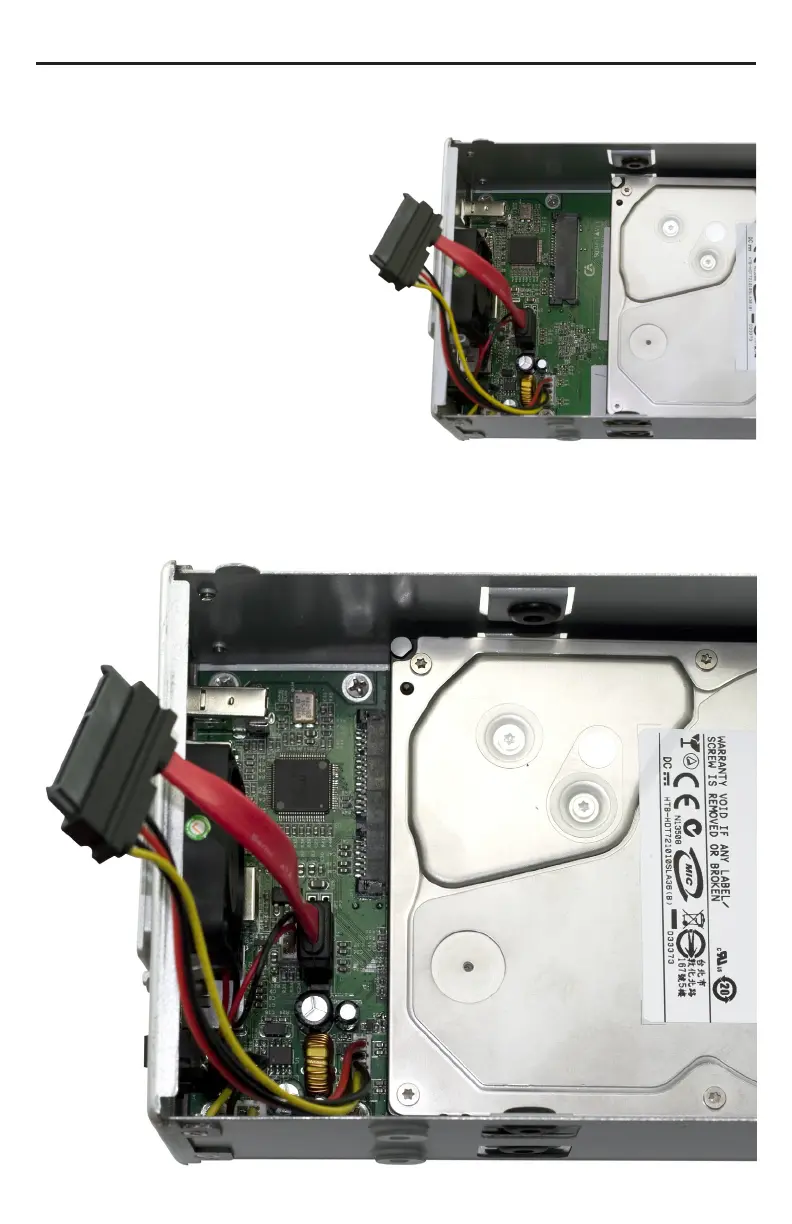
(Versions with eSATA ONLY)
Connect one of the multicolored
power cables to the hard drive
you are installing in the lower
drive position, and connect one of the red SATA cables to the hard drive
you are installing in the lower position, and place the hard drive into the
chassis.
OWC Mercury Elite-AL Pro Dual Chapter 2 - System Setup
2.2 Drive Installation

Other manuals for OWC Mercury Elite-AL Pro

Questions and Answers:

Question and Answer IconNeed help?

Do you have a question about the OWC Mercury Elite-AL Pro and is the answer not in the manual?

OWC Mercury Elite-AL Pro Specifications

General IconGeneral
BrandOWC
ModelMercury Elite-AL Pro
CategoryEnclosure
LanguageEnglish

Related product manuals