EasyManuals Logo

OWC Mercury Elite-AL Pro Assembly Instructions

OWC Mercury Elite-AL Pro
22 pages
To Next Page IconTo Next Page
To Previous Page IconTo Previous Page
Page #8 background imageLoading...
Page #8 background image
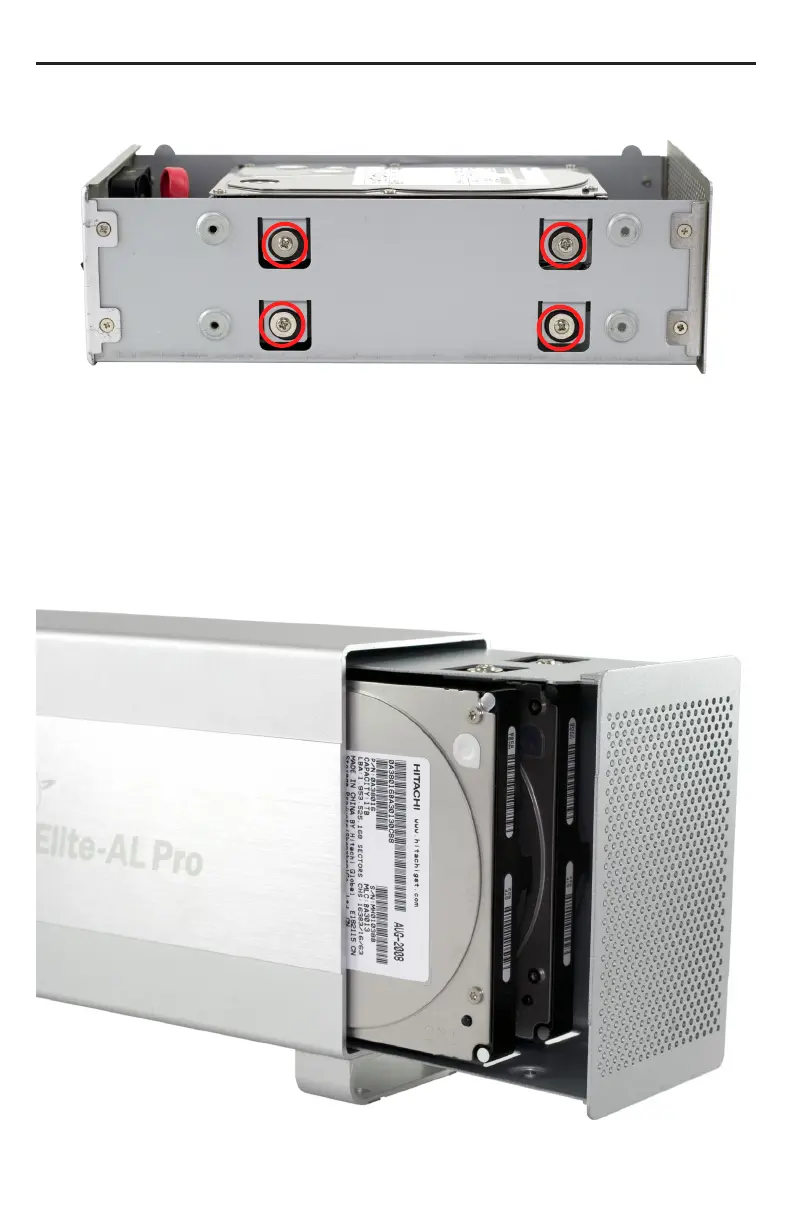
Secure the 2 hard drives into the chassis by inserting the 8 Phillips
screws (4 each side) through the black rubber anti-vibration grommets,
and into the hard drives. You may have to lift up a bit on the drives to
get them into position. Firmly tighten the 8 screws to secure your hard
drives into the chassis.
Slide the assembled chassis back into the enclosure from the front to
the rear.
OWC Mercury Elite-AL Pro Dual Chapter 2 - System Setup
2.4 Final Assembly

Other manuals for OWC Mercury Elite-AL Pro

Questions and Answers:

Question and Answer IconNeed help?

Do you have a question about the OWC Mercury Elite-AL Pro and is the answer not in the manual?

OWC Mercury Elite-AL Pro Specifications

General IconGeneral
BrandOWC
ModelMercury Elite-AL Pro
CategoryEnclosure
LanguageEnglish

Related product manuals