OWC MERCURY ELITE PRO DUAL MINI
INTRODUCTION
3
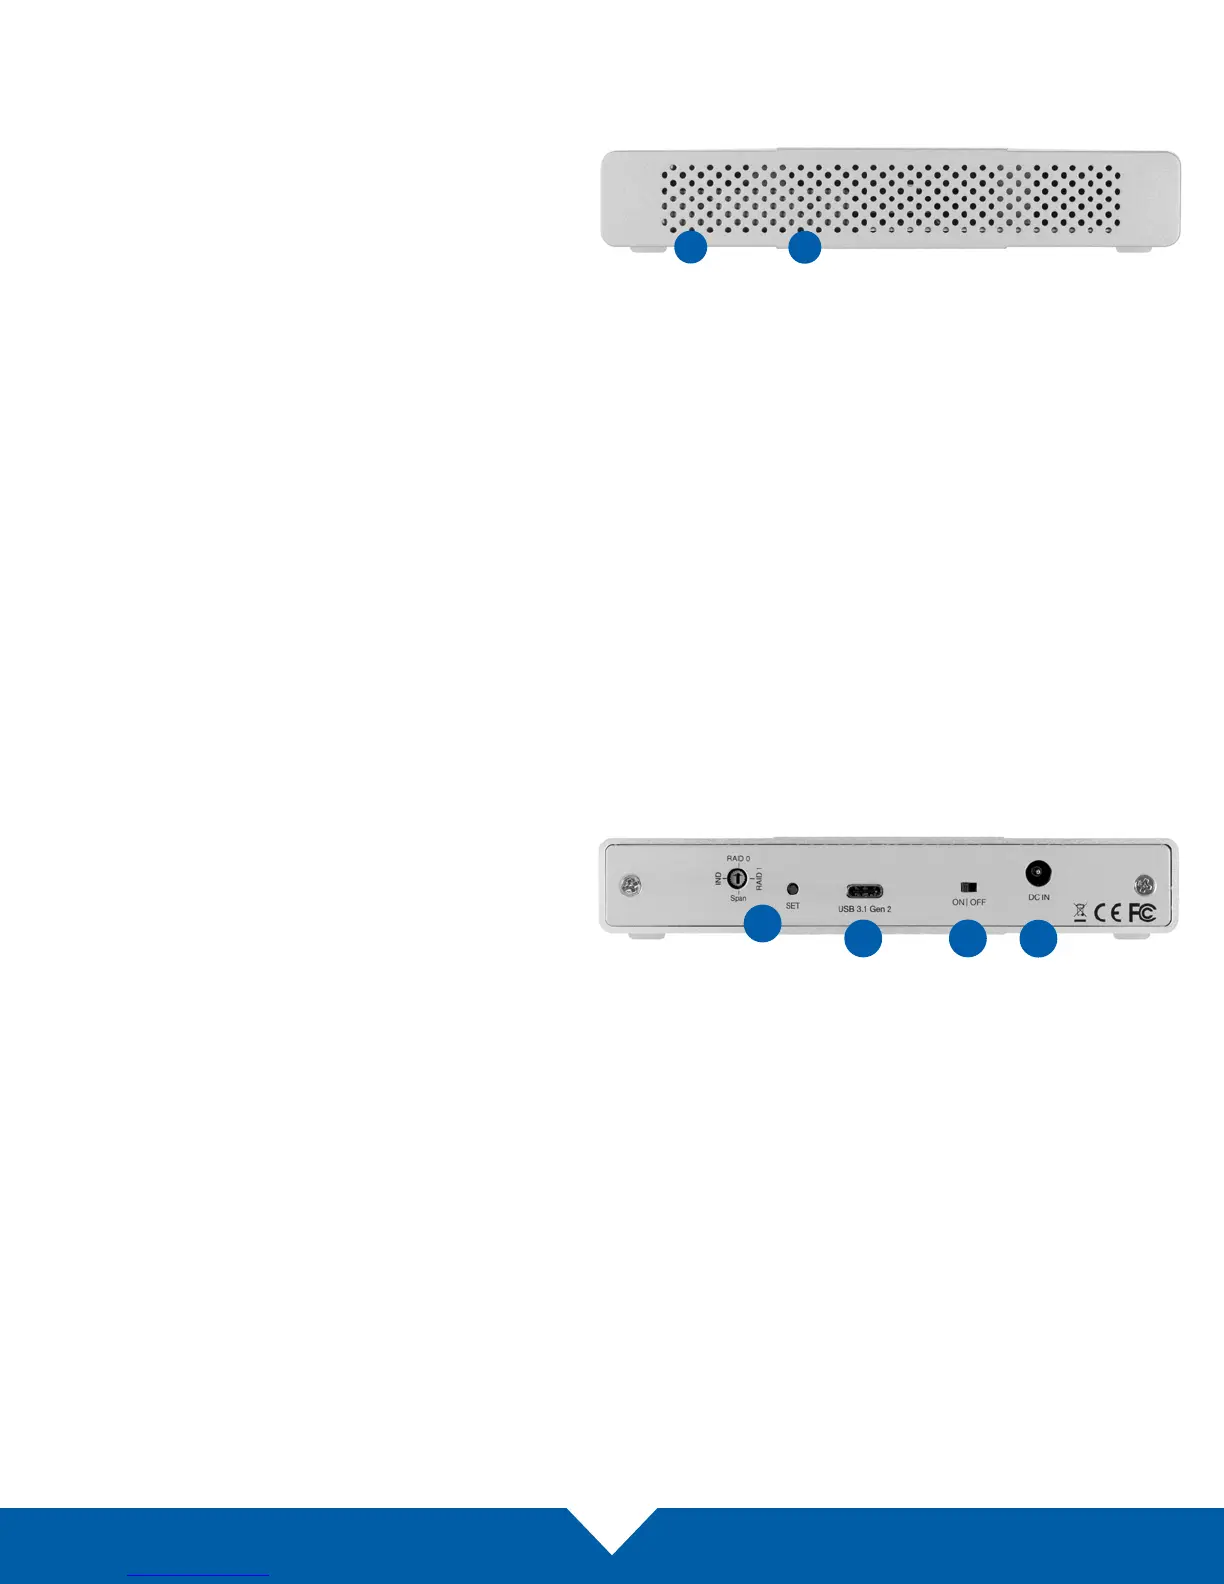
1.4 Front View
1 & 2
LEDs — these LEDs represent the two
drives inside the Mercury Elite Pro Dual mini.
When the device is powered on but there is
no drive activity, the LEDs will display solid
blue. When there is drive activity for one or
both, the LED(s) will blink blue.
If a drive fails or is not connected, the
LED will display solid red.
When a RAID 1 is being rebuilt, both LEDs
will blink red and blue.
1.5 Rear View
1. RAID dial & SET button— set the RAID
mode by using these items.
2. USB 3.1 Gen 2 port — attach one of the
included USB 3.1 cables to this port, based
on your computer type. The Type-C to
Type-C cable is recommended for best
performance.
3. ON/OFF Switch — power the Mercury Elite
Pro Dual mini on and o using this switch.
4. DC IN — connect the power supply here.
1 2
1
2 3
4
 Loading...