OWC MERCURY ELITE PRO DUAL MINI
DEVICE SETUP
5
2.1 Quick Start
Follow the steps below to use the OWC Drive Guide utility to format your Mercury Elite Pro Dual mini for Mac OS
X or Windows. If you installed your own drives, please use the formatting method you are most familiar with or
check Section 3.1 for a link to our online formatting tips.
1. Power on the Mercury Elite Pro Dual mini and plug it into to your computer using one of the included data
cables. If you prefer to use a dierent formatting utility, do so at this time and skip the rest of these steps.
2. The disk will mount and your operating system will display it as “OWC SETUP”. Open the disk icon to view its
contents.
3. Double-click the OWC Drive Guide application.
4. Follow the simple on-screen instructions to complete the formatting process. Once the formatting is nished
the drive is ready to use.
2.2 Assembly
NOTE: these assembly instructions are written for users who purchased the Mercury Elite Pro Dual mini as an
empty enclosure. The instructions show how to open the enclosure in order to install drives. If you purchased
the Mercury Elite Pro Dual mini with drives already installed, opening the enclosure before the expiration of
the original warranty will VOID the warranty. If you wish to remove or replace the drives after the expiration of
the original warranty, you may do so at that time. You should start with Step 13 in that case and work backwards.
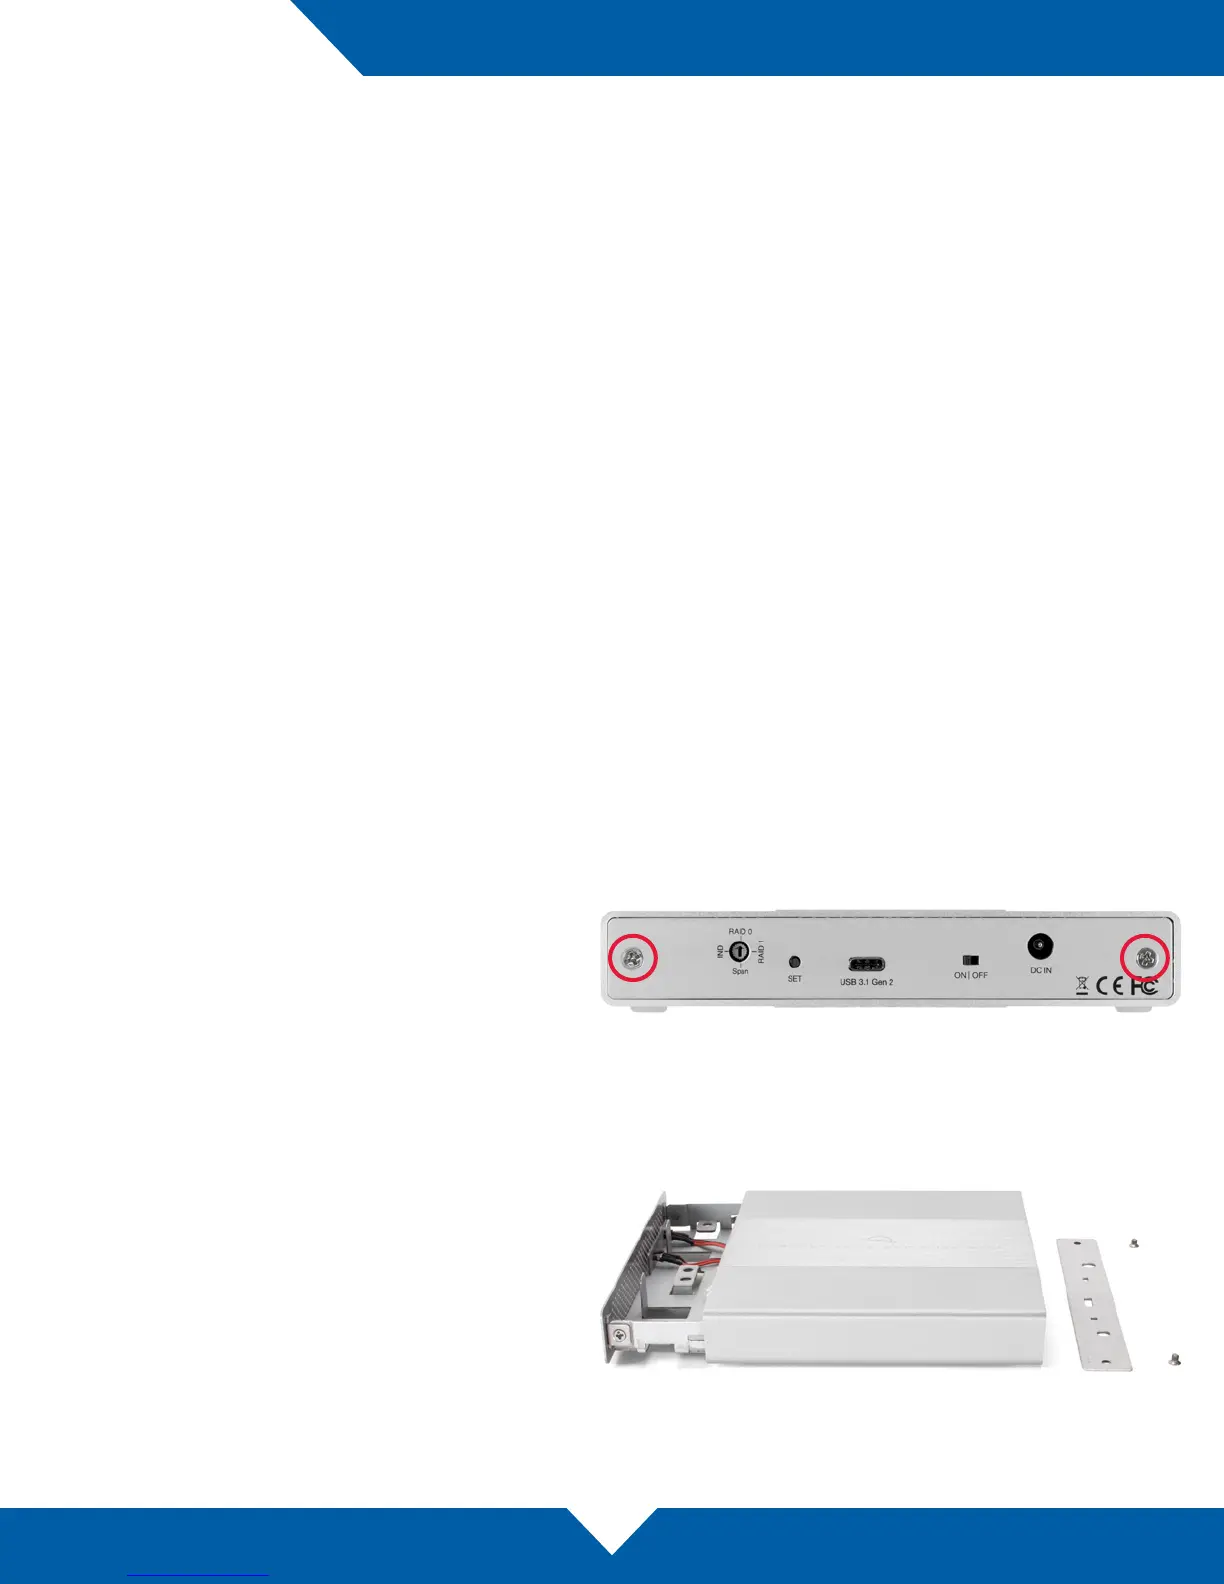
1. Remove the Elite Pro Dual mini from its packaging,
set it on your work surface and remove the two
screws attached to the rear cover (highlighted
at right). Note: once you remove the screws, the
back plate will fall out of the enclosure as shown
in the next step.
2. Grasp the front grill and gently pull the inner
chassis from the outer enclosure, as shown at
right.
DEVICE SETUP

 Loading...