OWC Mercury Elite Pro Dual – USB-C
Introduction
3
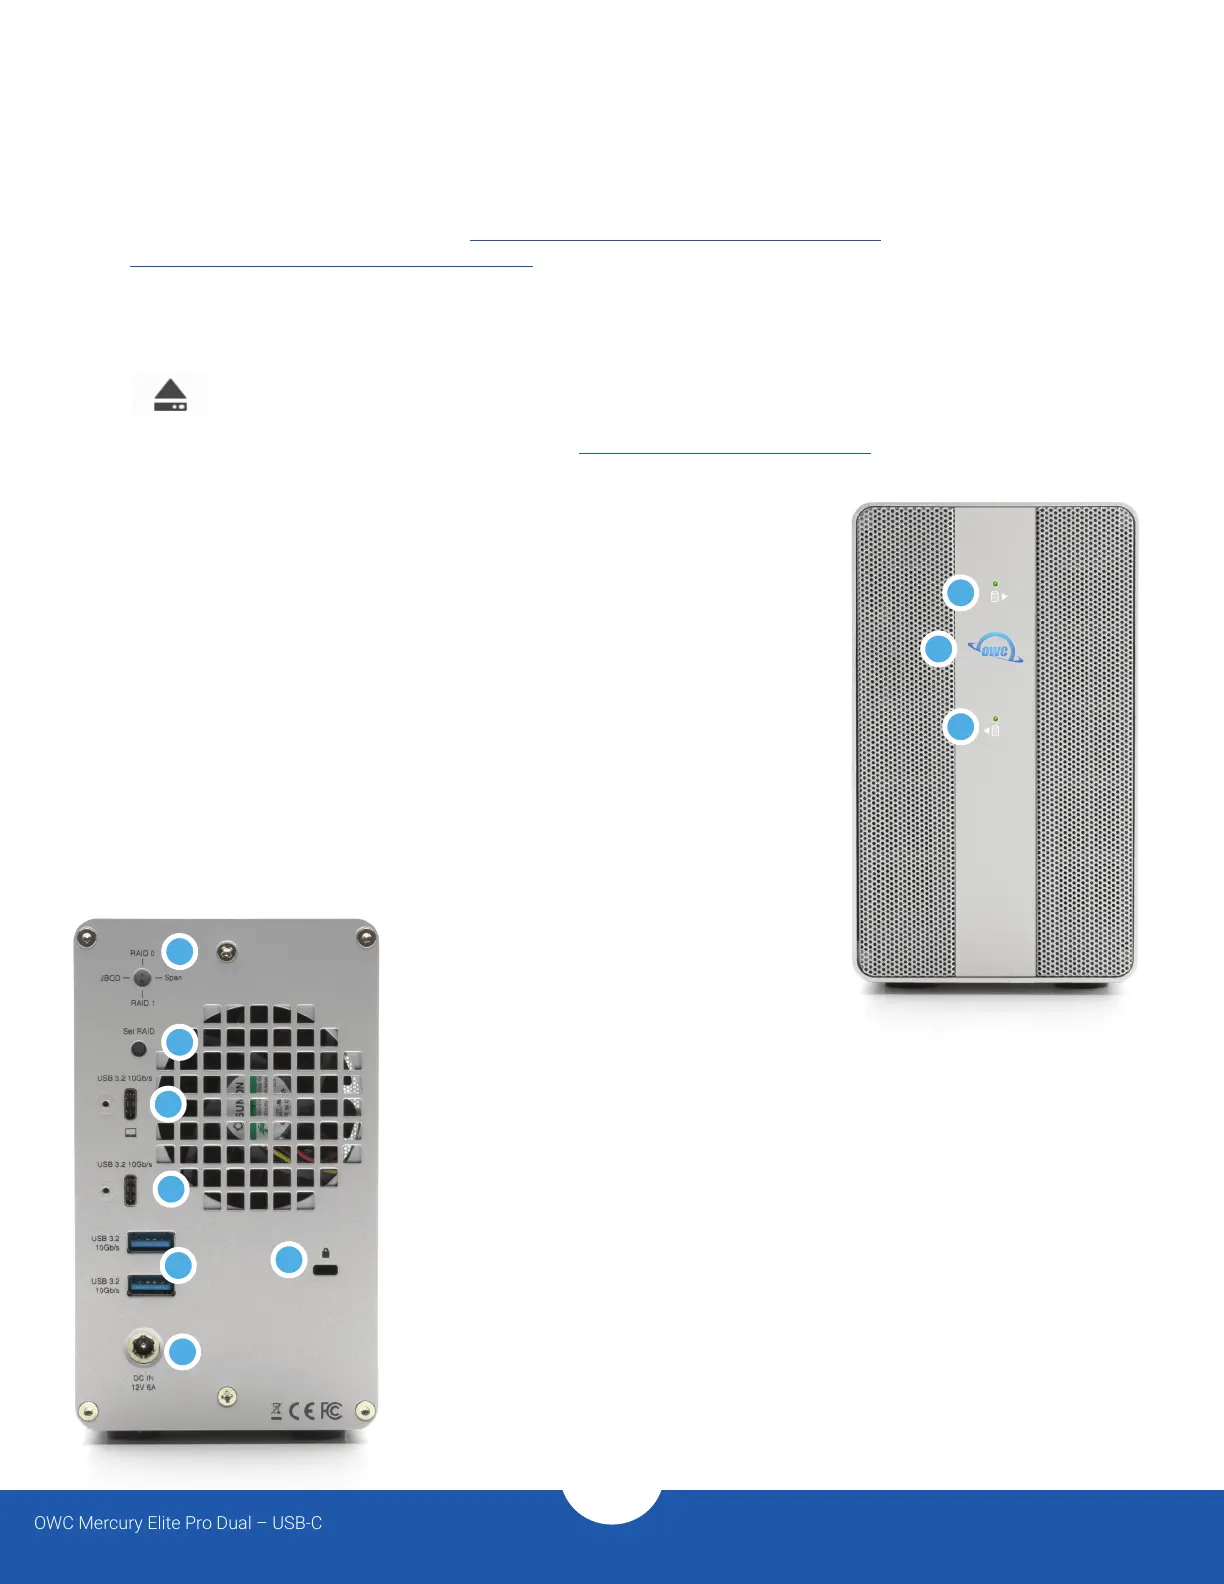
1.5 Front View
1. Drive A LED – will blink red for disk errors or missing disks, will blink green during
normal activity.
2. Power LED – solid white when connected to power and solid blue when
connected to both power and an active host.
3. Drive B LED – will blink red for disk errors or missing disks, will blink green during
normal activity.
1.6 Rear View
1. RAID selector dial – See Section 2.3 for details.
2. Set RAID button - See Section 2.3 for details.
3. USB 3.2 10Gbps USB-C host port – connect a compatible host computer here.
4. USB 3.2 10Gbps USB-C hub port – connect a compatible USB device here.
Up to 3A bus power provided.
5. (2) USB 3.2 10Gbps USB Type-A hub ports – connect a compatible USB device
here. Up to 900mA bus power per port.
6. DC IN – connect the included power supply here.
7. Security slot – connect a security tether here.
1.4 OWC Dock Ejector
This application safely ejects all drives connected to the Mercury Elite Pro Dual USB-C with a single click,
adding peace of mind to fast-paced mobile workows. To install this app, please follow the steps below.
1. Download the installer le: For Mac download.owcdigital.com/dockejector/mac or for Windows
download.owcdigital.com/dockejector/win
2. Launch the installer and follow the prompts. No restart is required.
3. Once the app is running an icon like the one shown below will appear in the macOS menubar, or, System
Tray on Windows.
To learn more about OWC Dock Ejector please visit: go.owcdigital.com/dockejector.
1
1
2
7
5
3
4
6
2
3

 Loading...