OWC Mercury Elite Pro Dual – USB-C
Device Setup
5
2.1 Quick Start
If you purchased the Mercury Elite Pro Dual USB-C as an empty enclosure, proceed to Section 2.2 below.
If you purchased the Mercury Elite Pro Dual USB-C with drives installed, the OWC Drive Guide formatting utility
has been installed. Follow these steps go.owc.com/storage/formatting to use the Drive Guide to format your
drives for macOS or Windows.
2.2 Assembly Steps
This section describes the process of installing your own drives; additional formatting information is available
in Section 3.1. If your Mercury Elite Pro Dual USB-C shipped with drives installed, they are pre-congured
as a RAID 0; see the steps above for using Drive Guide to format your RAID 0 volume.
1. Remove the device from the box and set on a static-
free work surface.
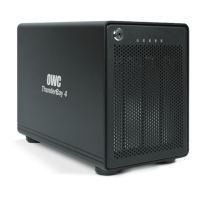
2. Remove the two screws highlighted in red from
the back of the enclosure and set them aside.
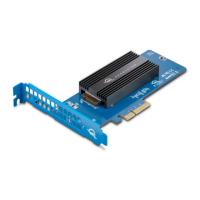
3. Pull on the front edge of the enclosure so the
inner-chassis slides out, then remove it fully.
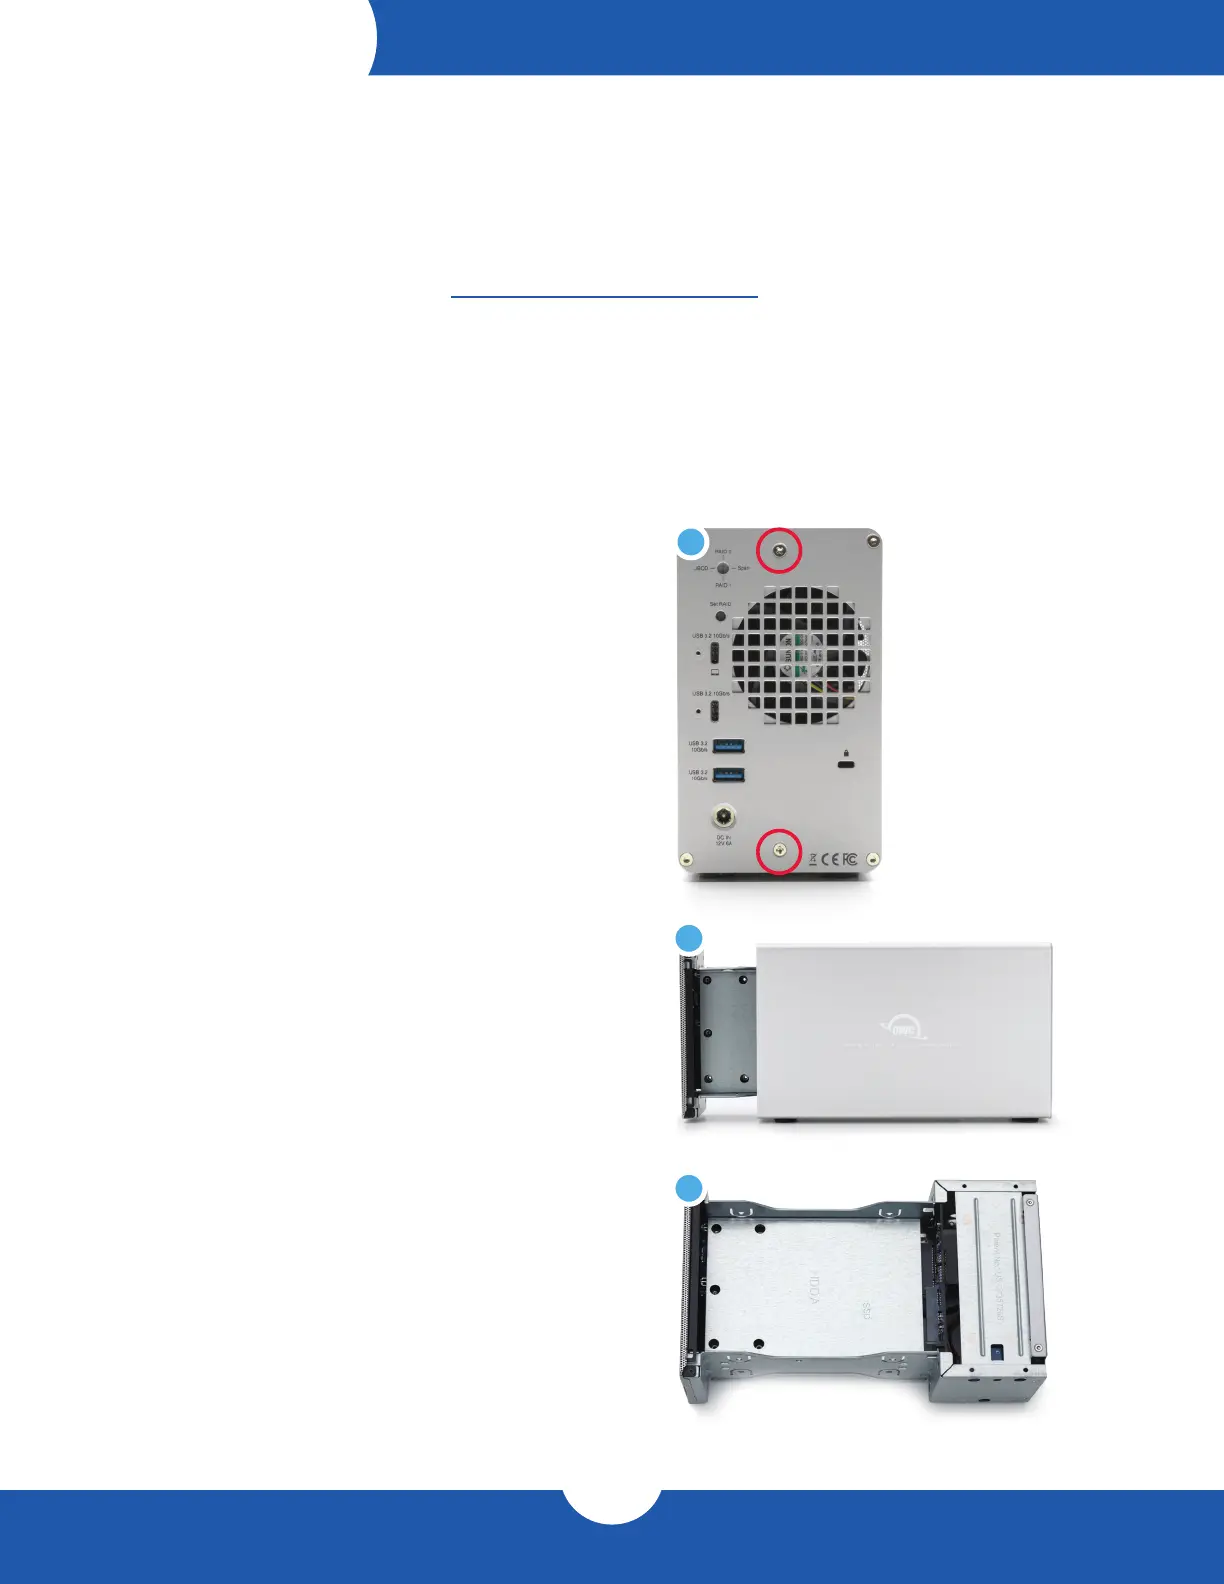
4. Set the inner chassis at on the work surface.
3
4
INSTALLATION
2

 Loading...