OWC Mercury Elite Pro Dual – USB-C
Device Setup
6
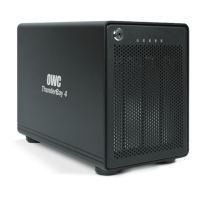
5. Set a 2.5 inch or 3.5 inch SATA drive into the drive
housing, then seat the drive on the SATA connector
as shown. Minimal force is required.
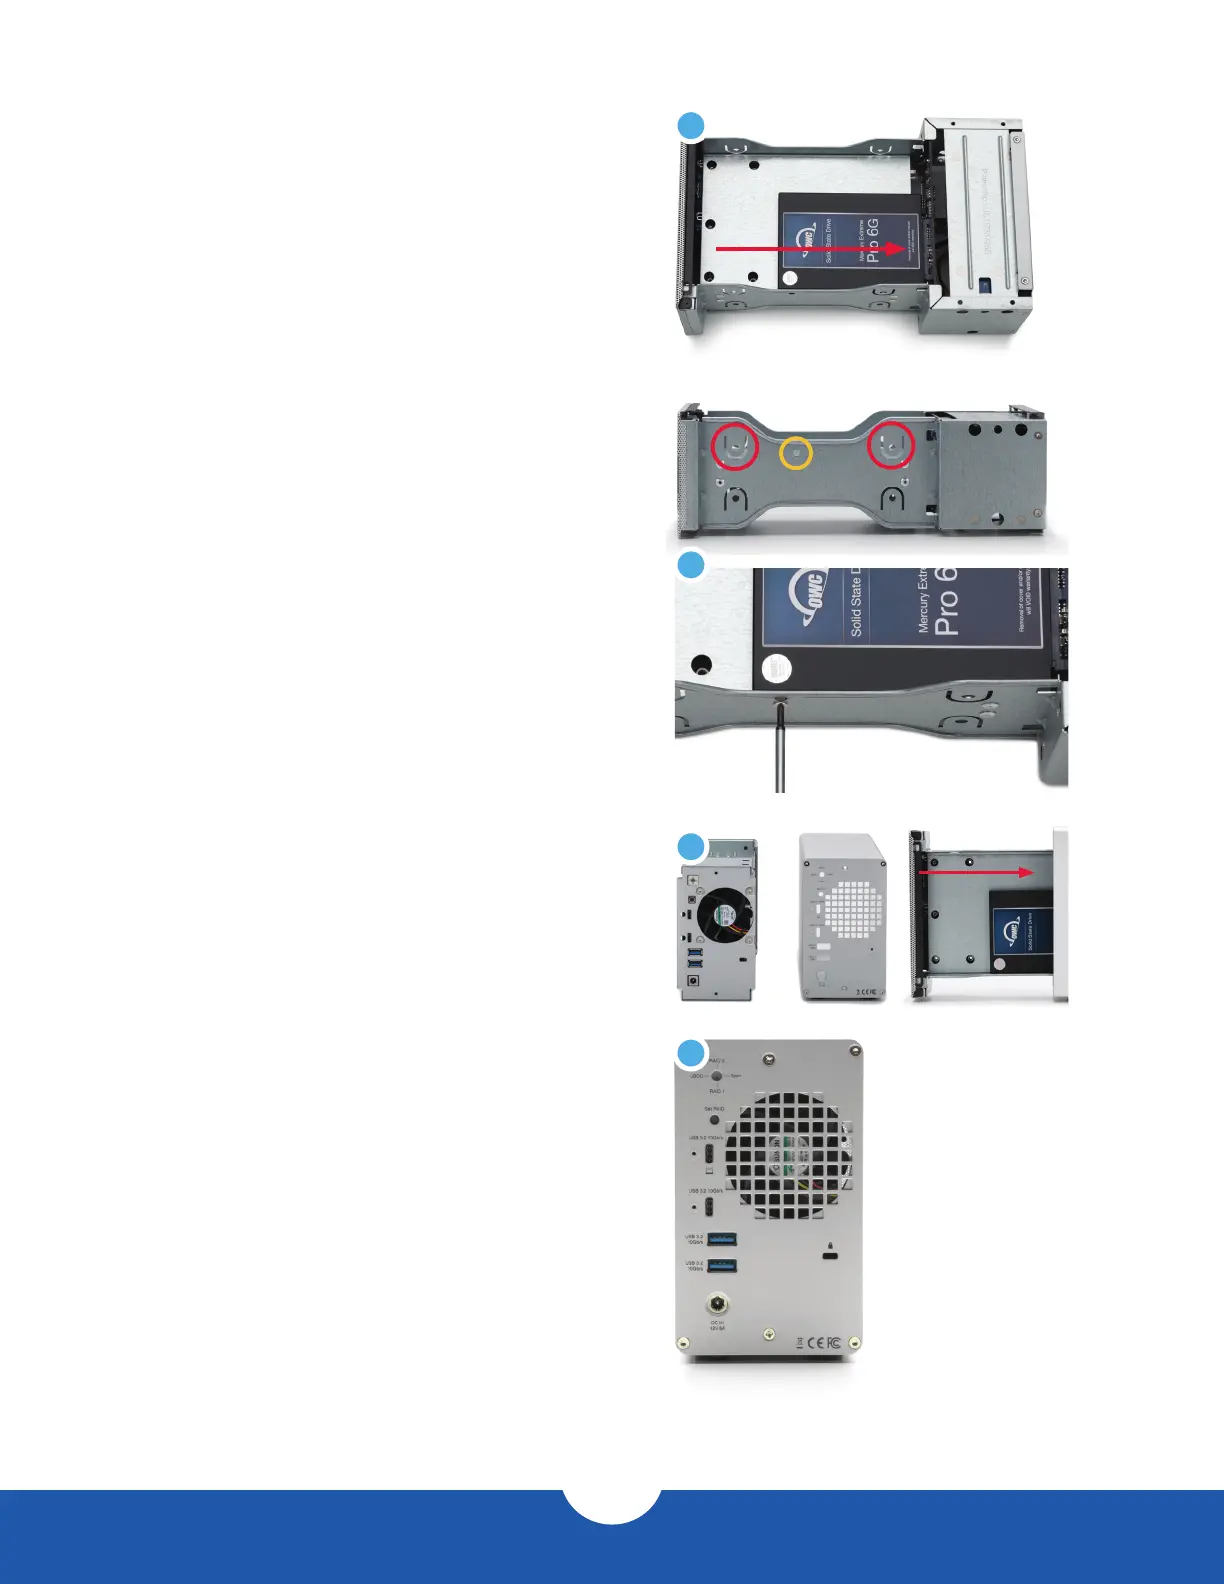
6. Afx the drive to the inner-chassis at the location(s)
shown — holes for the slightly larger 3.5 inch drive
screws are circled in red, the hole for a 2.5 inch drive
is circled in yellow. Note: a total of one screw
is required for 2.5 inch drives, and four screws
(two on each side) for 3.5 inch drives.
7. Once the rst drive is secured, ip the inner chassis
and repeat Steps 5 and 6 as needed. IMPORTANT:
by default, this device is set to congure any installed
drives as a RAID 0, once it is powered on and
connected to the host. If you intend to change the
RAID mode RAID 1, Independent, or SPAN, you can
do so now or after re-assembly. See Section 2.3
for information on how to set the RAID mode.
8. Make sure the ports on the back of the inner chassis
and the port cut-outs on the back of the outer
enclosure are oriented the same way, then slide the
inner chassis into the outer enclosure so that the
chassis’ front plate is ush with the cover’s front edge.
9. Re-afx the screws you removed in Step 2.
This completes the assembly process.
This completes the assembly process.
5
6
8
9

 Loading...