OWC MERCURY ELITE PRO DUAL
INTRODUCTION
3
4. Follow the simple on-screen instructions to complete the formatting process.
5. Once the formatting is finished, the drive is ready to use.
For more information on formatting your new external drive for Mac or Windows, includ-
ing an in-depth guide to the Drive Guide utility, go to: http://www.macsales.com/
format
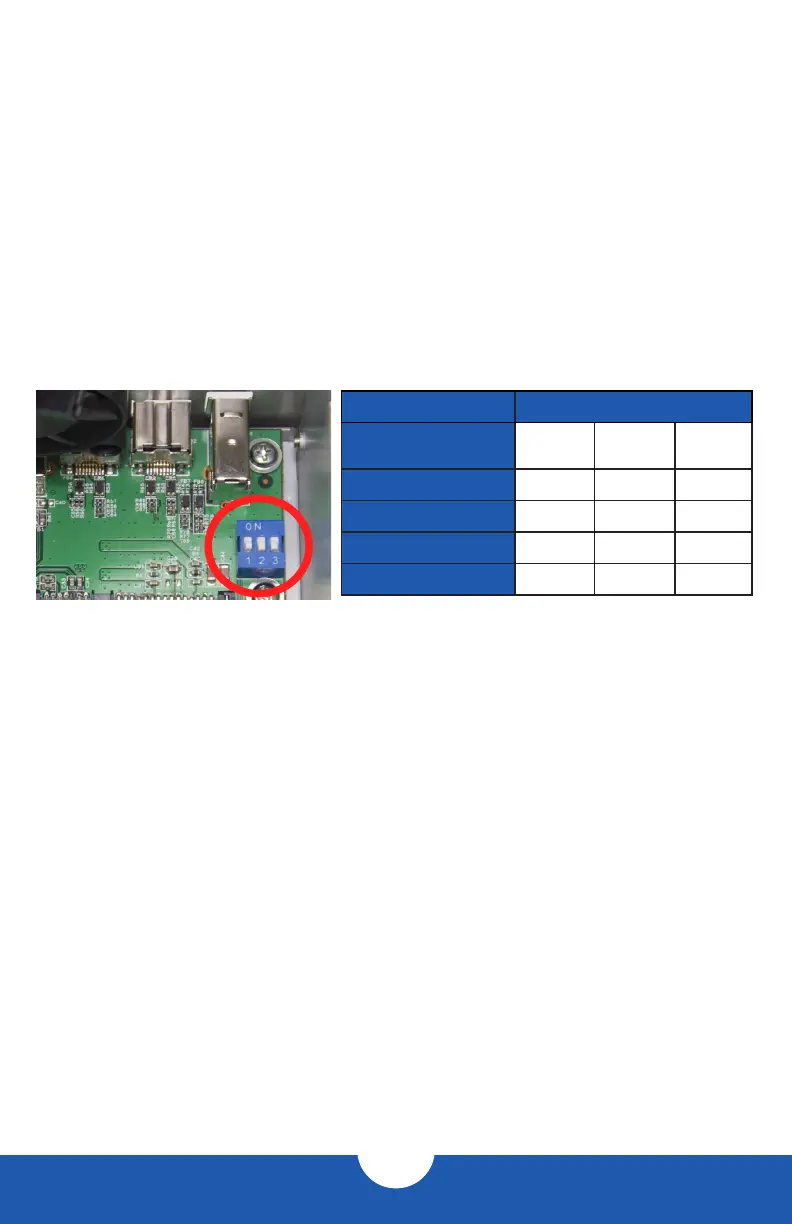
1.6 RAID CONFIGURATION
To change the RAID settings of your Mercury Elite Pro Dual, there are three switches inside
the enclosure that need to be adjusted, circled below in red. You can access the switches by
removing the clip-in fan at the rear of the enclosure.
WARNING: The default RAID configuration for the OWC Mercury Elite Pro Dual is RAID 0.
Configuring a new RAID mode will destroy any data stored on the drives. Back up any
important data before proceeding.
MODE SW#1 SW#2 SW#3
RAID 1
NOT RECOMMENDED
--- OFF OFF
RAID 0
--- OFF ON
SPAN
--- ON OFF
INDEPENDENT
--- ON ON
2TB MODE
ON --- ---
INDEPENDENT — Each hard drive will appear as a separate volume. You can use different
models and sizes of hard drive with this mode. NOTE: Independent mode is not supported
over eSATA. Only FireWire and USB connections support independent mode.
SPAN — The drives show up as one large single volume. A span is an array (not RAID) in
which data is written sequentially across both hard drives. It combines the capacities of the
two drives, but it does not provide any performance or redundancy benefits.
RAID 0 (STRIPE) — The drives show up as one large single volume. RAID 0 is used when
speed is the primary objective. It is required to use identical hard drives for this RAID level.
RAID 1 (MIRROR) — The drives show up as one volume, but only 50% of the total capacity
can be used. It is required to use identical hard drives for this RAID method. RAID 1 creates an
exact copy (or “mirror”) of a set of data on the second drive. RAID 1 is NOT RECOMMENDED
in the Mercury Elite Pro Dual due to the lack of any indication of a drive failure.
2TB MODE — When switch #1 is in the OFF position, the total capacity of the drives is
limited to a maximum of 2.2TB for compatiblity with older operating systems. NOTE: If set-
ting switch #1 to ON does not initially allow volume sizes to exceed 2.2TB, do the following:
keeping switch #1 in the ON position, change to a different RAID level, then turn on the unit.
Format the new RAID volume, then shut off the unit, change to the desired RAID level (or
independent mode), and turn on the unit.

 Loading...