OWC Mercury Elite Pro Chapter 2 - System Setup
2.1 Hard Drive Assembly & Installation
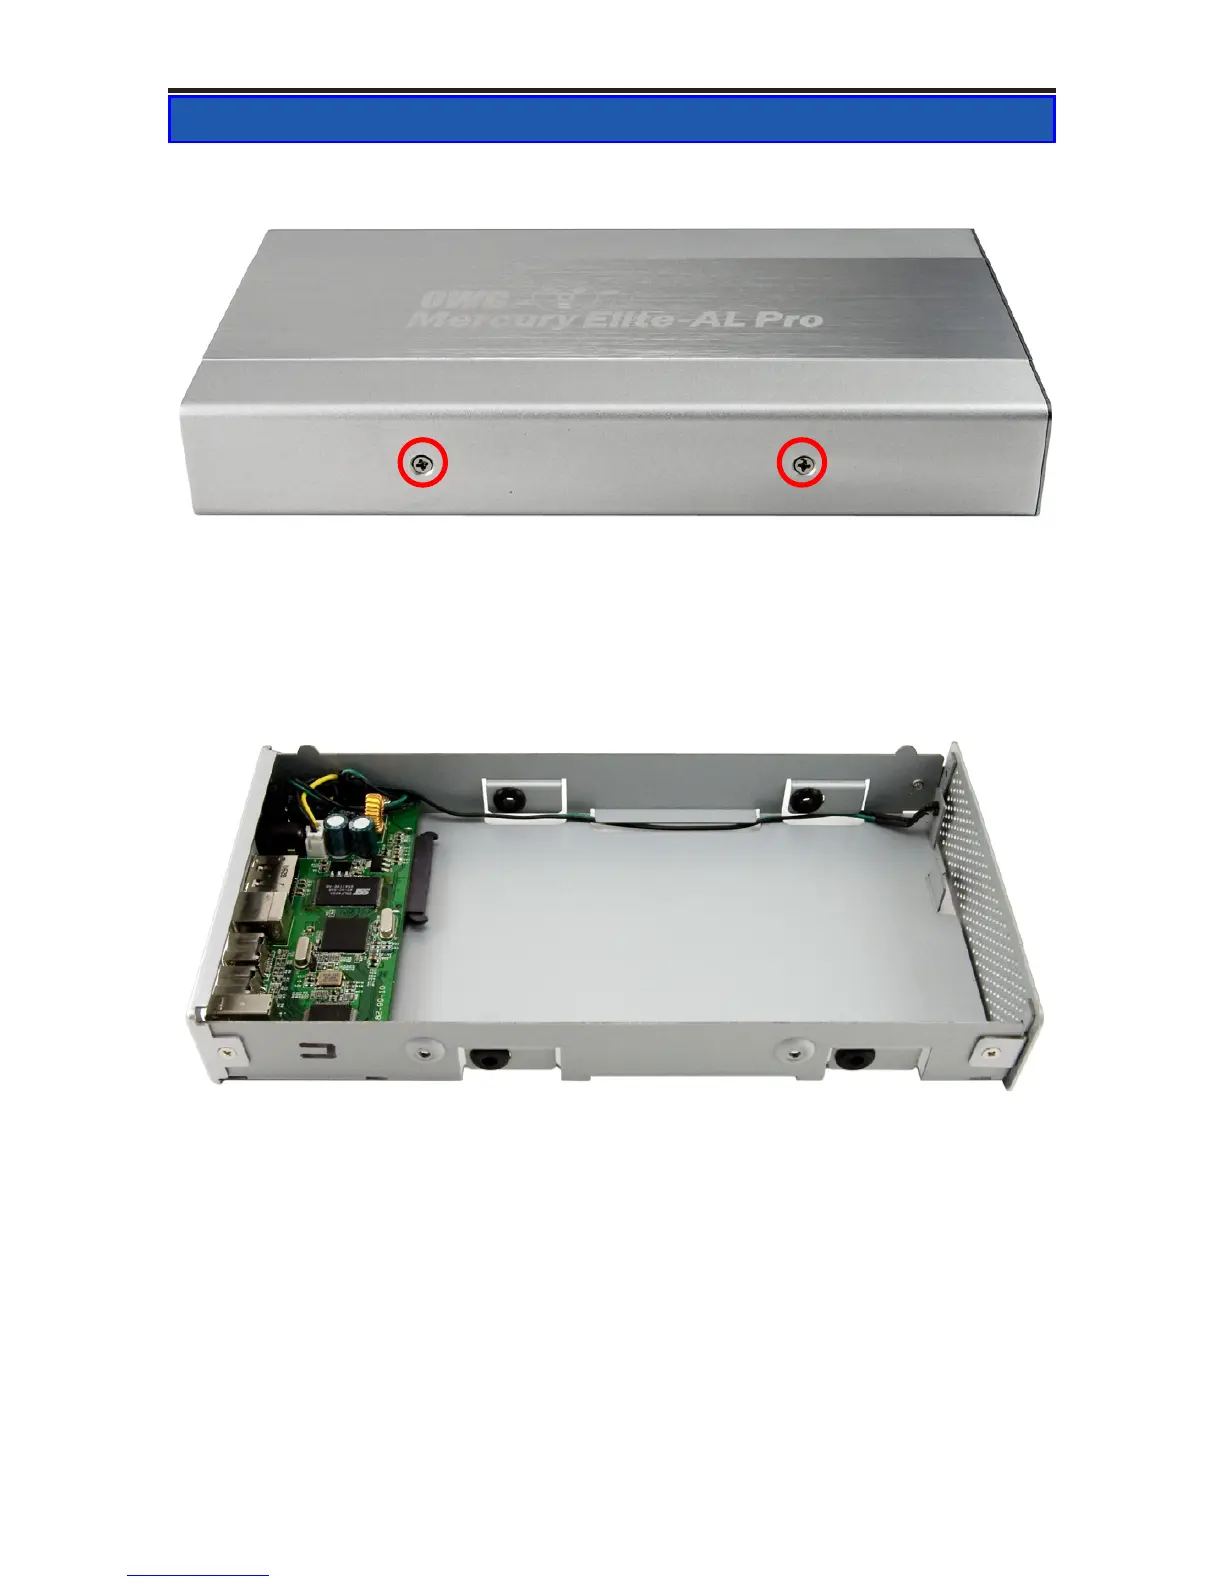
On the bottom of the OWC Mercury Elite Pro enclosure you will nd 2
Phillips screws. Remove those two screws and the drive compartment will
slide out towards the front of the enclosure. Remove the outer shell to
proceed with drive installation.
Here you see the OWC Mercury Elite Pro internal drive tray compartment.
There will be a package of 4 screws inside of the compartment taped down,
please remove them to use in step 4.
Insert your SATA 3.5” hard drive in the bay, and fully seat the drive
connector onto the bridge board. The bridge board is the green circuit
board pictured to the left in this photograph. You will see there is a
connector built onto the bridge board that will interface with the drive,
providing power and signal connections - no cables to connect!
2 SYSTEM SETUP
➁
➀

 Loading...


