OWC Mercury Elite Pro Chapter 2 - System Setup
2.1 Hard Drive Assembly & Installation (concluded)
2 SYSTEM SETUP
➄
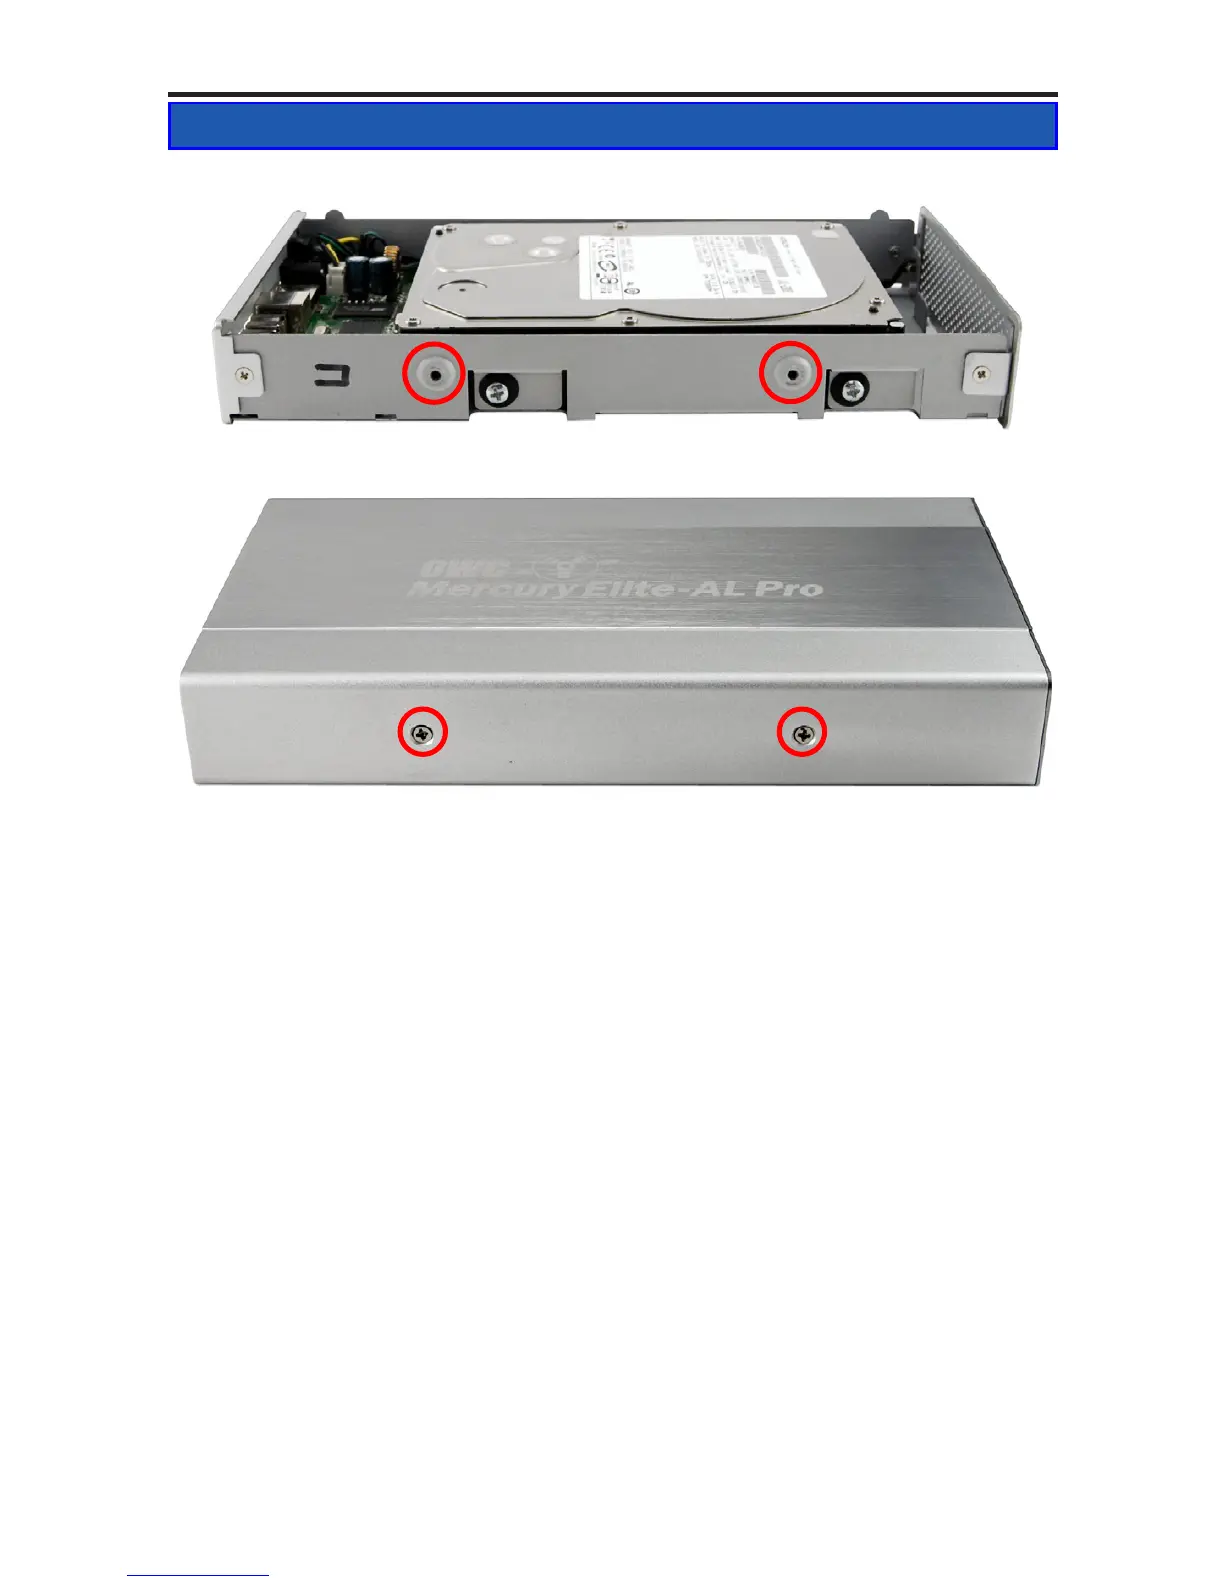
Screw holes on bottom
Once you have completed installation of your drive, turn the chassis so that
the ports are on your left as shown in the above picture. You can see the 2
screw holes that the drive enclosure outer shell screws into circled. Slide
the outer shell onto the inner chassis from the rear and insert the 2 Phillips
screws you removed to start the assembly process. The enclosure is now
fully assembled.
2.2 Computer Connections
The OWC Mercury Elite Pro requires external power to operate. Insert the
power adapter into a wall outlet and plug it in to the back of the OWC
Mercury Elite Pro.
To use the OWC Mercury Elite Pro, connect any interface cable to the drive
and the computer. Then, turn the power switch to the ON position, and
verify the blue LED on the front of the drive is illuminated.
Your drive should mount on your computer’s desktop, or a dialog box will
appear if you have a new, unformatted drive installed.

 Loading...


