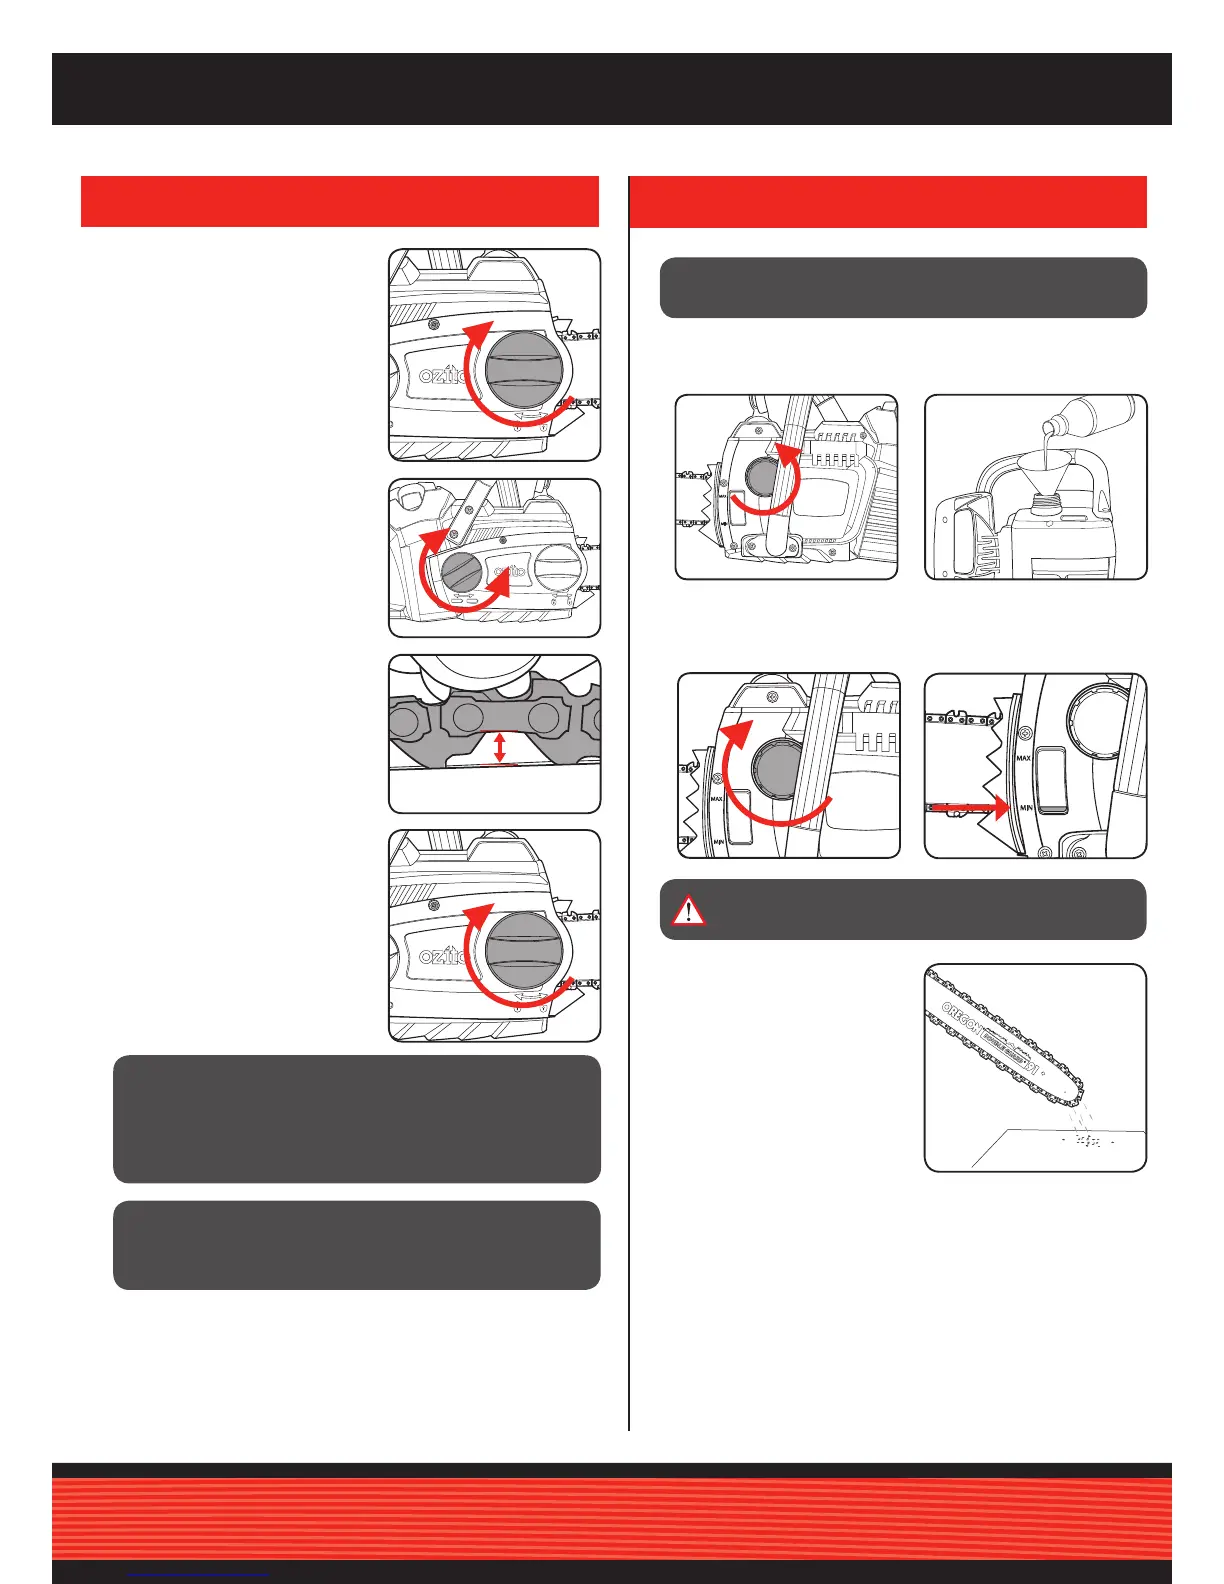
5. Fit the side cover back onto the
chainsaw. Screw on the guide bar
locking knob but do not fully tighten at
this stage.
6. Adjust the tension of the chain using
the chain tensioning adjustment knob
The tension is correct when the
chain can be pulled 3mm away
from the guide bar when using your
nger and thumb.
Do not over-tighten as this will
reduce the life of the chain and
guide bar.
7. After the chain has been accurately
tensioned, lock the guide bar in place
with the guide bar locking knob.
Tighten with rm nger force.
2. OIL
IMPORTANT: IT IS VITAL FOR THE PROPER AND SAFE
OPERATION OF THE CHAINSAW THAT THE CHAIN IS
TENSIONED CORRECTLY.
IMPORTANT: THE CHAIN SHOULD BE ADJUSTED
BEFORE FIRST USE, AGAIN AFTER 2-3 MINUTES OF
OPERATION AND RECHECKED AND ADJUSTED IF
NECESSARY AFTER EACH 30 MINUTES OF USE. TAKE
CARE NOT TO OVER TENSION THE CHAIN.
IMPORTANT: ONLY USE OIL THAT IS EXPRESSLY
LABELLED “CHAIN BAR OIL”.
WARNING!: NEVER START WORK UNLESS THE
CHAIN AND BAR ARE LUBRICATED.
1. Turn the chainsaw onto its side
and remove the chain oil tank cap.
3. Ret cap and clean any
oil spillage.
5. To check the lubricating system,
switch on the chainsaw and hold it
with the guide bar and chain above
some light coloured paper such as
newspaper. A steadily increasing
stain caused by oil spray shows the
lubricating system is working.
Chain bar oil may leak if the tool is
left for long periods. This is normal.
If the tool is to be left unused for an
extended time, drain the oil from
the tool. Rell before use.
4. Always ll the oil tank when the
oil level is below the minimum
mark on the oil level window.
2. Fill the tank with chain bar oil.
The capacity of the chain oil
tank is 85ml.


 To Next Page