3/8” LP
33
MIN
3/8” LP
33
MIN
3/8” LP
33
MIN
3/8” LP
33
MIN
3/8” LP
33
MIN
3/8” LP
33
MIN
3/8” LP
33
MIN
3/8” LP
33
MIN
3/8” LP
33
MIN
2. TENSIONING THE CHAIN 3. LUBRICATION OF THE CHAIN & GUIDE BAR
WARNING! THE CHAIN HAS SHARP EDGES, FOR YOUR
OWN SAFETY, PLEASE USE WORK GLOVES. NEVER
TOUCH THE CHAIN OR SERVICE THE UNIT WITH THE
POWER SUPPLY CONNECTED.
1. Loosen the chain cover lock. Do
not remove the chain sprocket
cover.
WARNING! IF YOU TRY TO ROTATE THE CHAIN
TENSION DIAL WHILST THE CHAIN COVER LOCK IS
TIGHT, IT WILL RESULT IN THE CHAIN NOT LOOSENING
AND POSSIBLE DAMAGE TO THE MECHANISM.
2. Adjust the chain tension with
the chain tension dial. Turning
the dial CLOCKWISE increases
the chain tension, turning
it COUNTER-CLOCKWISE
decreases the chain tension.
3. For the correct chain tension,
firmly pull up on the chain at
the middle of the top of the
exposed guide bar. When the
chain is pulled up to its highest
point, the bottom tip of the links
should only just stay in the
track [middle of the guide bar].
3mm gap is the
ideal tension
4. After the chain has been
accurately tensioned, lock
securely the guide bar in place
with the chain cover lock.
5. Check the tension again after
a few minutes of cutting and
several times in the first hour
because the chain will lengthen
as it breaks in. Adjust as you go. A loose chain causes rapid
wear to both the chain and the guide bar and could derail
causing a major safety hazard.
NOTE: Proper tension of the chain is extremely important and
must be checked before starting, as well as during any cutting
operation. Taking the time to make adjustments to the chain will
result in improved cutting performance and prolonged chain life.
WARNING! NEVER START WORK UNLESS THE CHAIN
AND GUIDE BAR ARE LUBRICATED.
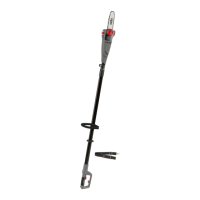
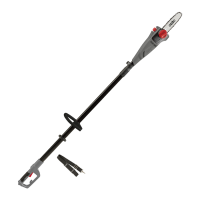
1. Place the telescopic pole pruner on a level surface.
2. Clean the area around the oil
tank cap and then open it.
3. Fill the oil tank with
CHAIN AND BAR OIL (not
supplied).
Do not overfill in doing
so, make sure that no
dirt gets into the oil tank.
This will ensure that the
oil nozzle does not clog.
4. Always fill the oil tank
when the oil level is
below the minimum mark on the oil level window. The capacity
of the oil tank is 100ml. Do not overfill.
5. Close the oil tank cap and clean any spillage.
WARNING! THE USE OF THE POLE PRUNER WITHOUT
CHAIN & BAR OIL OR WITH OIL BELOW THE MINIMUM
OIL LEVEL MARK WILL RESULT IN DAMAGE TO THE
CHAIN.
6. To check the lubricating system, switch on the pole pruner and
hold it with the guide bar and chain above some light coloured
paper such as newspaper. A steadily increasing stain caused by
oil spray shows the lubricating system is working.
NOTE: Chain & bar oil may leak if the pole pruner is left for long
periods. This is normal. If left unused for an extended time, drain
the oil from the pole pruner. Refill before use.
WARNING! ONLY USE OIL THAT IS EXPRESSLY
LABELLED “CHAIN & BAR OIL”
WARNING! BEFORE BEGINNING WORK, INSPECT THE
CHAIN. NEVER USE AN OBVIOUSLY DAMAGED CHAIN.
 Loading...