15
Using the hex key (17), tighten the locking bolt (16) by
rotating in an anti-clockwise direction (Fig. 8).
Removing Your Accessory
Loosen the locking bolt (16) with the allen key (17) by rotating in a clockwise
direction.
Remove the locking bolt (16) and the accessory fixing washer (15) from the multi
function head. Remove the accessory.
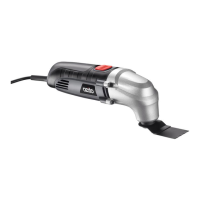
Changing Sanding Paper
Align the sanding paper (14) to the hook & loop sanding pad (11) and press
firmly to hold in place. As this product does not include a dust extraction
system, it is not critical that the holes in the sanding paper line up with the
holes on the hook & loop sanding pad (11).
To remove or change the sanding paper (14) carefully peel it off from one of the
triangle ends.
Choosing the Correct Sanding Paper
Sanding paper is rated according to a number marked on the back. The higher
the number, the smaller and finer the grit is on the sanding paper. The lower the
number, the larger and more coarse the grit is on the sanding paper. A coarse grit
will provide a more aggressive sanding action for quick material removal.
Coarse grit (eg.40) is used for removing paint and sanding down rough surfaces.
Medium grit (eg.80) is used for sanding down plain timber .
Fine grit (eg.120) is used to give a smooth finish to bare wood.
Extra fine grit (eg.400-1200) is used for polishing or sanding between coats of paint.
Note:
When using the Multi Function Tool in sanding application, try not to apply
excessive pressure when using course grit paper as this can lead to swirl marks on
the workpiece.
6.
1.
2.
1.
2.
Fig. 8
PREPARATION AND SET-UP