11
SPNE 190913-24
Surround Assembly and Installation
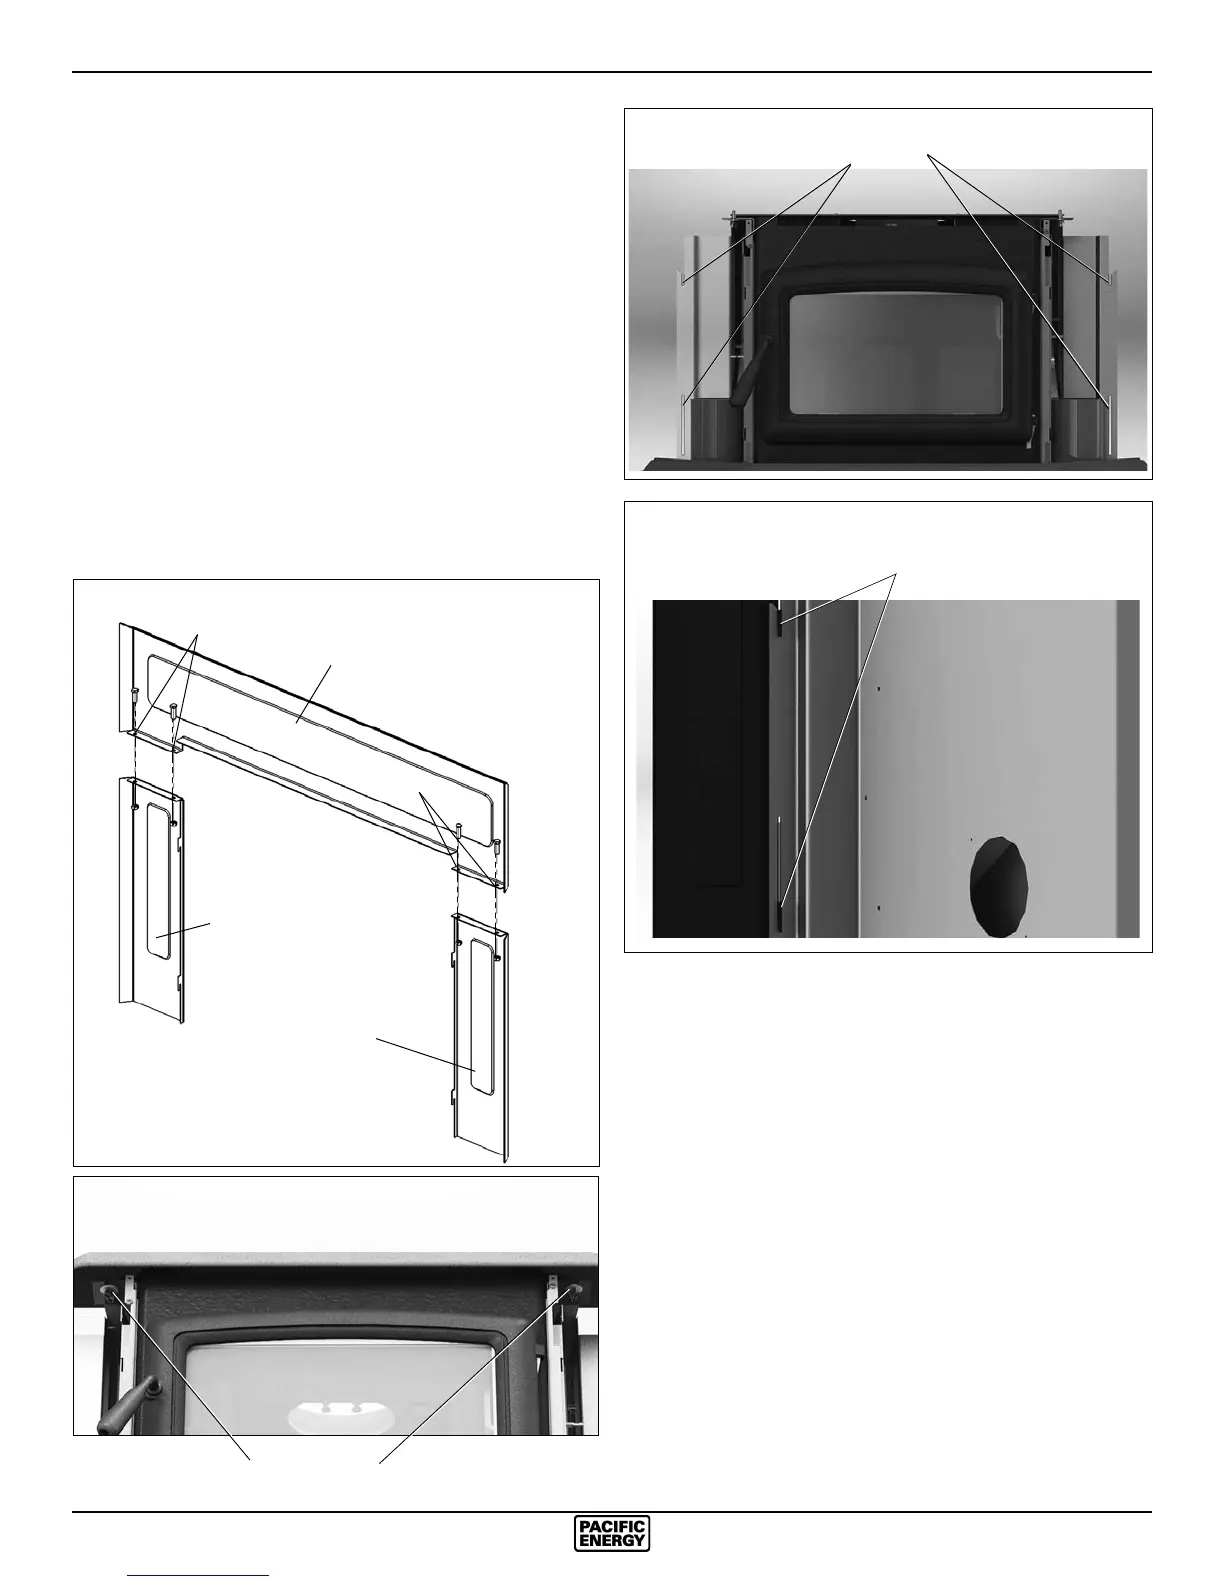
1) Lay part A, B and C face down on a at, non-marring
surface. Fasten together with 1/4" x 1/2" bolts and nuts
provided through holes at points “D” (Fig. #17).
2) Lift the surround assembly to the upright position and make
sure the front face is at and even at the joints.
3) Remove the two front panels as described on page 9 and
then remove the decorative top by loosening the two wing
bolts underneath and sliding it out of the brackets.
(Fig. #18).
4) Slide the assembled surround from the top down and
engage in slots on surround brackets. (Fig. #19 & 20).
5) Push the entire appliance back until the surround assembly
is in contact with the replace structure.
6) Position the decorative bay top onto the rebox top. Align
and refasten the wing screws.
7) Replace the front panels.
Part B
WING BOLTS
Part C
Part A
D
D
Fig. # 17
Fig. # 18
Fig. # 20
Fig. # 19
SURROUND SLOTS
SURROUND ENGAGED
IN SLOTS