Do you have a question about the Packard Bell EasyNote SW Series and is the answer not in the manual?
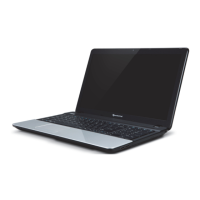
Contains step-by-step disassembly instructions for the EasyNote SW51/SW61 chassis.
General rules for disassembling the system unit, including power off and connector labeling.
Guidance on reversing the disassembly process, ensuring proper placement and tightening.
Lists essential tools like Philips, Hex bolt, and flat bed screwdrivers for disassembly procedures.
Alerts to hazardous voltage inside the computer, even when the power is off, posing injury risk.
Advice on preventing damage to sensitive electronic components from static electricity.
Discourages power supply disassembly due to hazardous voltages and user-serviceable parts.
Ensures the system is disconnected from power and telecommunication links before removing the cover.
Steps to remove the battery, involving turning off the computer and disconnecting the AC adapter.
Procedure to remove the HDD and optional Bluetooth module using specific screws.
Instructions for removing the optical disk drive using screws and an eject pin.
Steps to remove the main hatch by unscrewing it from the chassis.
Procedure to remove memory modules after the main hatch has been removed.
Steps to remove the mini-PCI card by disconnecting its antenna cables and screws.
Instructions to remove the heat sink by unscrewing CPU and chipset screws.
Steps to remove the CPU after the main hatch and heatsink have been removed.
Procedure to remove the top cover by unlocking a button bar and disconnecting cables.
Disconnecting the multimedia keyboard and touchpad flat cables from the top cover.
Steps for removing the LCD panel assembly, including connectors and hinge covers.
How to remove speakers by unscrewing them and disconnecting their respective cables.
Procedure to remove the lid switch unit by disconnecting its connector and removing a screw.
Instructions to remove the front bezel by unclipping and removing associated screws.
Removing screws from top supporting bracket, hinges, and inverter board for LCD panel access.
Disconnecting the inverter backlight connector and removing supporting brackets and antenna.
Disconnecting the LCD cable from the inverter board and the back of the LCD display panel.
Removing ten screws from the top cover of the bottom base assembly.
Removing fifteen screws and two hex bolts from the bottom base assembly.
Separating the top cover from the bottom base assembly after screw removal.
Steps to remove the optional subwoofer, including unscrewing and cable disconnection.
Procedure to remove the USB/power board by disconnecting cables and removing two screws.
Steps to remove the optional Bluetooth cable by disconnecting it from the mainboard.
Instructions to remove the main board by unscrewing it from the bottom base assembly.
Steps to disconnect the video out cable and board from the main board.
Details on information changes, copyright protection, and liability limitations for the manual.
| Brand | Packard Bell |
|---|---|
| Model | EasyNote SW Series |
| Category | Laptop |
| Language | English |