EasyManua.ls Logo

Packard Bell EasyNote TM86 Series - User Manual

Packard Bell EasyNote TM86 Series
216 pages
Print Icon
To Next Page IconTo Next Page
Loading...
Packard Bell EasyNote TM86/TM87/TM89 Series
Service Guide
PRINTED IN TAIWAN
Service guide files and updates are available
on the ACER/CSD web; for more information,
please refer to http://csd.acer.com.tw

Table of Contents

Questions and Answers

  • H
    halexanderAug 17, 2025
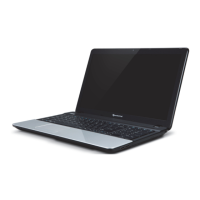
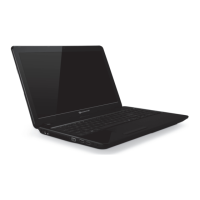
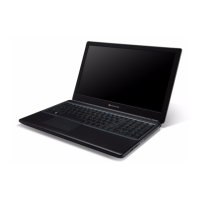
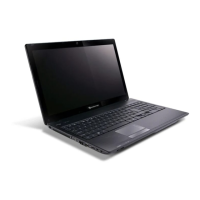
    What to do if my Packard Bell EasyNote TM86 Laptop won't turn on?
    • A
      Amanda Joseph MDAug 17, 2025
      First, ensure the power cable is securely connected to both your Packard Bell Laptop and the electrical outlet. Try removing any extension cables or surge protectors between the laptop and the outlet, plugging directly into a known good outlet. If it still fails to power on, disconnect the power, open the casing and check the Thermal Unit and fan airways are free of obstructions. Also, remove any external and non-essential hardware and recently installed software.
  • J
    Jordan LynnAug 20, 2025
    What to do if my Packard Bell EasyNote TM86 Laptop has no display?
    • R
      Rebecca BraunAug 20, 2025
      First, make sure the internal display is selected and that the computer has power (fans start, status LEDs light up). You can also drain any stored power by removing the power cable and battery, then holding the power button for 10 seconds. Try connecting an external monitor. Disconnect all external devices, including docking stations, memory cards, and CD/DVDs. Reseat the memory modules, or remove the drives.
  • M
    Mark HarperAug 23, 2025
    Why does my Packard Bell EasyNote TM86 Laptop have abnormal video display?
    • C
      Cynthia BrownAug 23, 2025
      If you see permanent vertical/horizontal lines or dark spots in the same location, or extensive pixel damage (different colored spots in the same locations), the LCD might be faulty and should be replaced. Otherwise, try adjusting the brightness to its highest level, check that the display resolution is correctly configured, roll back the video driver to the previous version if updated, or remove and reinstall the video driver. Also, check the Device Manager to see if the device is properly installed without any red Xs or yellow exclamation marks.
  • J
    Jackie ParrishAug 26, 2025
    Why does my Packard Bell EasyNote TM86 randomly lose BIOS settings?
    • Q
      qgarciaAug 26, 2025
      If your Packard Bell Laptop is more than one year old, replace the CMOS battery. Run a complete virus scan using up-to-date software. Disconnect and reconnect the power and data cables between devices, or replace the cables. If HDD information is missing from the BIOS, the drive may be defective and should be replaced. In some cases, the Motherboard may need to be replaced.
  • J
    Justin WeeksAug 28, 2025
    Why does my Packard Bell EasyNote TM86 Laptop have sound problems?
    • J
      Jo FisherAug 28, 2025
      Try rebooting the computer first. Then, go to Device Manager to check if the audio device is properly installed. Roll back the audio driver to the previous version if you recently updated it, or remove and reinstall the audio driver. Ensure all volume controls are set to mid-range. Also, check in the Sound settings to ensure that Speakers are selected as the default audio device, and configure the Speaker Setup. Remove any recently installed hardware or software. You can also try restoring system and file settings from a known good date using System Restore, or reinstalling the Operating System.
  • A
    Amanda RamseyAug 31, 2025
    What to do if my Packard Bell Laptop HDD is not operating correctly?
    • K
      Kim RobertsonAug 31, 2025
      First, disconnect all external devices. Run a complete virus scan. Try running the Windows 7 Startup Repair Utility. Restart the computer and press F2 to enter the BIOS Utility. Ensure all cables and jumpers on the HDD and ODD are set correctly. Remove any recently added hardware and associated software. Run the Windows Disk Defragmenter and Windows Check Disk. You can also restore system and file settings from a known good date using System Restore.
  • B
    Betty McbrideSep 2, 2025
    How to fix microphone problems on Packard Bell EasyNote TM86?
    • J
      Jessica MccormickSep 3, 2025
      Check that the microphone is enabled. Right-click on the Recording tab and select Show Disabled Devices. Right-click on the microphone and select Enable. Select the microphone then click Properties and the Levels tab. Increase the volume to the maximum setting and click OK. Finally, select the microphone and click Configure.
  • S
    stevenmullenSep 5, 2025
    What to do if Packard Bell Laptop drive not detected?
    • J
      Jay ReidSep 5, 2025
      Restart the computer and press F2 to enter the BIOS Utility. Turn off the power and remove the cover to inspect the connections to the ODD.
  • T
    Thomas CaseySep 8, 2025
    What to do if my Packard Bell EasyNote TM86 ODD is not operating correctly?
    • A
      Alexander SmithSep 8, 2025
      Reboot the computer and retry the operation. Try an alternate disc. Navigate to Start? Computer. Check that the ODD device is displayed in the Devices with Removable Storage panel. Navigate to Start? Control Panel? System and Maintenance? System? Device Manager.
  • T
    Tracy WeeksSep 12, 2025
    How to fix Packard Bell Laptop drive read failure?
    • M
      Matthew CainSep 12, 2025
      Remove and clean the failed disc. Retry reading the CD or DVD. Test the drive using other discs.

Summary

System Specifications

Features

Overview of the computer's key features and functionalities.

Operating System

Details on the installed operating systems.

Platform

Information on the processor and chipset.

System Memory

Specifications for RAM type, capacity, and speed.

Display

Details about the LCD screen resolution, brightness, and response time.

Graphics

Information on graphics card models and capabilities.

Storage Subsystem

Details about hard disk drives and card readers.

Audio

Specifications for audio components like speakers and microphone.

Optical Media Drive

Information on the optical drive's read/write capabilities.

Dimensions and Weight

Physical measurements and weight of the notebook.

Communication

Features related to webcam and microphone.

Privacy Control

Security features like password protection and lock slots.

Power Subsystem

Details on AC adapters, battery life, and power management.

Special Keys and Controls

Information on the keyboard and touchpad features.

I;O Interface

List of input/output ports available on the notebook.

Software

Pre-installed software and utilities.

Optional Items

List of optional hardware components.

Environment

Operating temperature and humidity specifications.

System Block Diagram

Notebook Tour

Front View

Identification and description of components on the front of the notebook.

Closed Front View

Components visible on the front when the notebook is closed.

Left View

Identification and description of ports and slots on the left side.

Right View

Identification and description of ports and drive on the right side.

Bottom View

Components located on the underside of the notebook.

Indicators

Explanation of status LEDs and their meanings.

TouchPad Basics

Keyboard Usage

Lock Keys and Embedded Numeric Keypad

Explanation of Caps Lock and Num Lock functions.

Windows Keys

Description of Windows-specific keyboard shortcuts.

Hot Keys

Usage of function keys for quick controls like brightness and volume.

Hardware Specifications and Configurations

Processor

Detailed specifications of the CPU, including speed, cores, and cache.

BIOS

Information about the BIOS vendor and ROM type.

System Memory

Memory configurations, including DIMM types and capacities.

LAN Interface

Details about the LAN chipset and connector.

Onboard LAN

Specifications for the integrated LAN controller.

Hard Disk Drive Interface

Specifications for supported hard disk drives.

Super-Multi Drive Module

Information on optical drive capabilities and supported formats.

Audio Interface

Details on the audio codec and speaker specifications.

Power and Keyboard Controller

Information on the controller and keyboard features.

Battery

Specifications for the notebook's battery pack.

LCD 15.6”

Technical details of the 15.6-inch LCD panel.

Card Reader

Features and specifications of the card reader.

System Utilities

BIOS Setup Utility

Guide to accessing and navigating the BIOS setup utility.

Navigating the BIOS Utility

Instructions for using BIOS menu options and parameters.

BIOS Information Screen

Details on accessing and understanding BIOS information screen.

BIOS Main Screen

Details on accessing and understanding BIOS main screen.

BIOS Security Screen

Details on accessing and understanding BIOS security screen.

BIOS Boot Screen

Details on accessing and understanding BIOS boot screen.

BIOS Exit Screen

Details on accessing and understanding BIOS exit screen.

BIOS Flash Utilities

Procedures for updating the system BIOS.

DOS Flash Utility

Step-by-step guide to updating BIOS using DOS.

WinFlash Utility

Instructions for using the Windows-based BIOS flashing utility.

Remove HDD;BIOS Password Utilities

Procedures for removing HDD and BIOS passwords.

Using Boot Sequence Selector

Method to change boot order without entering BIOS.

Using DMITools

Utility for updating DMI pool information.

Using the LAN MAC EEPROM Utility

Tool for writing MAC addresses to EEPROM.

Machine Disassembly and Replacement

Disassembly Requirements

List of tools and preparations needed for disassembly.

Pre-disassembly Instructions

Essential steps to perform before disassembling the computer.

Disassembly Process Overview

General stages of disassembly and component removal.

External Module Disassembly

Procedures for removing external components and peripherals.

Removing the Battery Pack

Step-by-step guide to safely remove the battery.

Removing the SIM Card

Instructions for ejecting and removing the SIM card.

Removing the SD Dummy Card

Procedure for removing the SD dummy card.

Removing the Optical Drive Module

Steps to remove the optical drive from the chassis.

Removing the Logic Lower Door

Guide to removing the bottom access door.

Removing the 3 G Module

Instructions for removing the 3G wireless module.

Removing the DIMM Module

Steps to remove memory modules from their sockets.

Removing the WLAN Module

Procedure for removing the wireless LAN card.

Removing the Hard Disk Drive Module

Guide to removing the HDD from its bay.

Main Unit Disassembly

Procedures for disassembling the main internal components.

Removing the Keyboard

Step-by-step instructions for keyboard removal.

Removing the Upper Cover

Guide to removing the top casing of the notebook.

Removing the Left Speaker Module

Steps to remove the left speaker assembly.

Removing the Right Speaker Module

Steps to remove the right speaker assembly.

Removing the Power Board

Procedure for removing the power board.

Removing the TouchPad Bracket

Instructions for removing the touchpad mounting bracket.

Removing the Card Reader Board

Steps to remove the card reader module.

Removing the USB Board

Guide to removing the USB interface board.

Removing the Bluetooth Board

Procedure for removing the Bluetooth module.

Removing the Mainboard

Detailed steps for removing the system's main logic board.

Removing the Thermal Module

Instructions for removing the CPU heatsink and fan assembly.

Removing the CPU

Procedure for safely removing the Central Processing Unit.

LCD Module Disassembly

Steps for disassembling the LCD screen assembly.

Removing the LCD Assembly

Guide to removing the complete LCD screen module.

Removing the LCD Bezel

Instructions for removing the LCD screen's front frame.

Removing the Camera Module

Steps to remove the integrated webcam module.

Removing the Inverter Board

Procedure for removing the LCD backlight inverter board.

Removing the LCD Panel

Instructions for removing the LCD screen panel itself.

Removing the LCD Brackets and FPC Cable

Steps to detach LCD mounting brackets and flat flex cables.

Removing the Microphone Cable

Procedure for removing the internal microphone cable.

Removing the Antennas

Instructions for removing the wireless antennas.

Troubleshooting

Common Problems

A guide to diagnosing and resolving common computer issues.

Power On Issue

Steps to troubleshoot if the system does not power on.

No Display Issue

Troubleshooting steps for when the screen remains blank.

LCD Failure

Specific steps to diagnose and resolve LCD display problems.

Built-In Keyboard Failure

Troubleshooting for issues with the integrated keyboard.

TouchPad Failure

Steps to resolve problems with the touchpad functionality.

Internal Speaker Failure

Troubleshooting for issues with the built-in speakers.

ODD Failure

Diagnostic steps for optical drive malfunctions.

WLAN Failure

Troubleshooting steps for wireless network connectivity issues.

Thermal Unit Failure

Steps to address overheating or fan-related problems.

External Mouse Failure

Troubleshooting for issues with external mouse devices.

Other Failures

General troubleshooting for other component failures.

Intermittent Problems

Steps to diagnose and fix issues that occur randomly.

Undetermined Problems

Procedures for isolating failures when symptoms are unclear.

Post Codes

Explanation of POST codes for system boot diagnostics.

Jumper and Connector Locations

Top View

Diagram showing jumper and connector locations on the top side of the motherboard.

Bottom View

Diagram showing jumper and connector locations on the bottom side of the motherboard.

USB;B Board

Location and description of USB board connectors.

Power Board

Identification of connectors and LEDs on the power board.

3 G;B Board

Location and description of 3G board connectors.

CR;B Board

Identification of card reader board connectors.

Clearing Password Check and BIOS Recovery

Procedures for clearing BIOS passwords and recovering BIOS.

Clearing Password Check

Steps to bypass or clear BIOS password protection.

Clear CMOS Jumper

Location and use of the CMOS clear jumper.

BIOS Recovery by Crisis Disk

Method for recovering BIOS using a USB storage device.

FRU (Field Replaceable Unit) List

EasyNote Exploded Diagrams

Visual diagrams showing component breakdown for assembly and disassembly.

Main Assembly

Exploded view of the notebook's main internal structure.

Upper Assembly

Exploded view of the notebook's upper internal components.

LCD Assembly

Exploded view of the notebook's LCD screen module.

FRU List

Comprehensive list of all field-replaceable units with part numbers.

Model Definition and Configuration

Packard Bell EasyNote TM86 Configurations

Detailed specifications for various TM86 models.

Packard Bell EasyNote TM87 Configurations

Detailed specifications for various TM87 models.

Packard Bell EasyNote TM89 Configurations

Detailed specifications for various TM89 models.

Test Compatible Components

Microsoft Windows 7 Environment Test

List of components tested and verified for Windows 7 compatibility.

Online Support Information

Packard Bell EasyNote TM86 Series Specifications

General IconGeneral
Operating SystemWindows 7 Home Premium
Weight2.6 kg
ChipsetIntel HM55 Express
Display15.6-inch HD (1366 x 768)
GraphicsIntel HD Graphics
Optical DriveDVD Super Multi DL
Wireless802.11b/g/n
LANGigabit Ethernet
Webcam1.3 MP
Ports3 x USB 2.0, VGA, HDMI, Headphone, Microphone, Ethernet
Battery6-cell Li-ion
Card ReaderMulti-in-1 card reader

Related product manuals