25
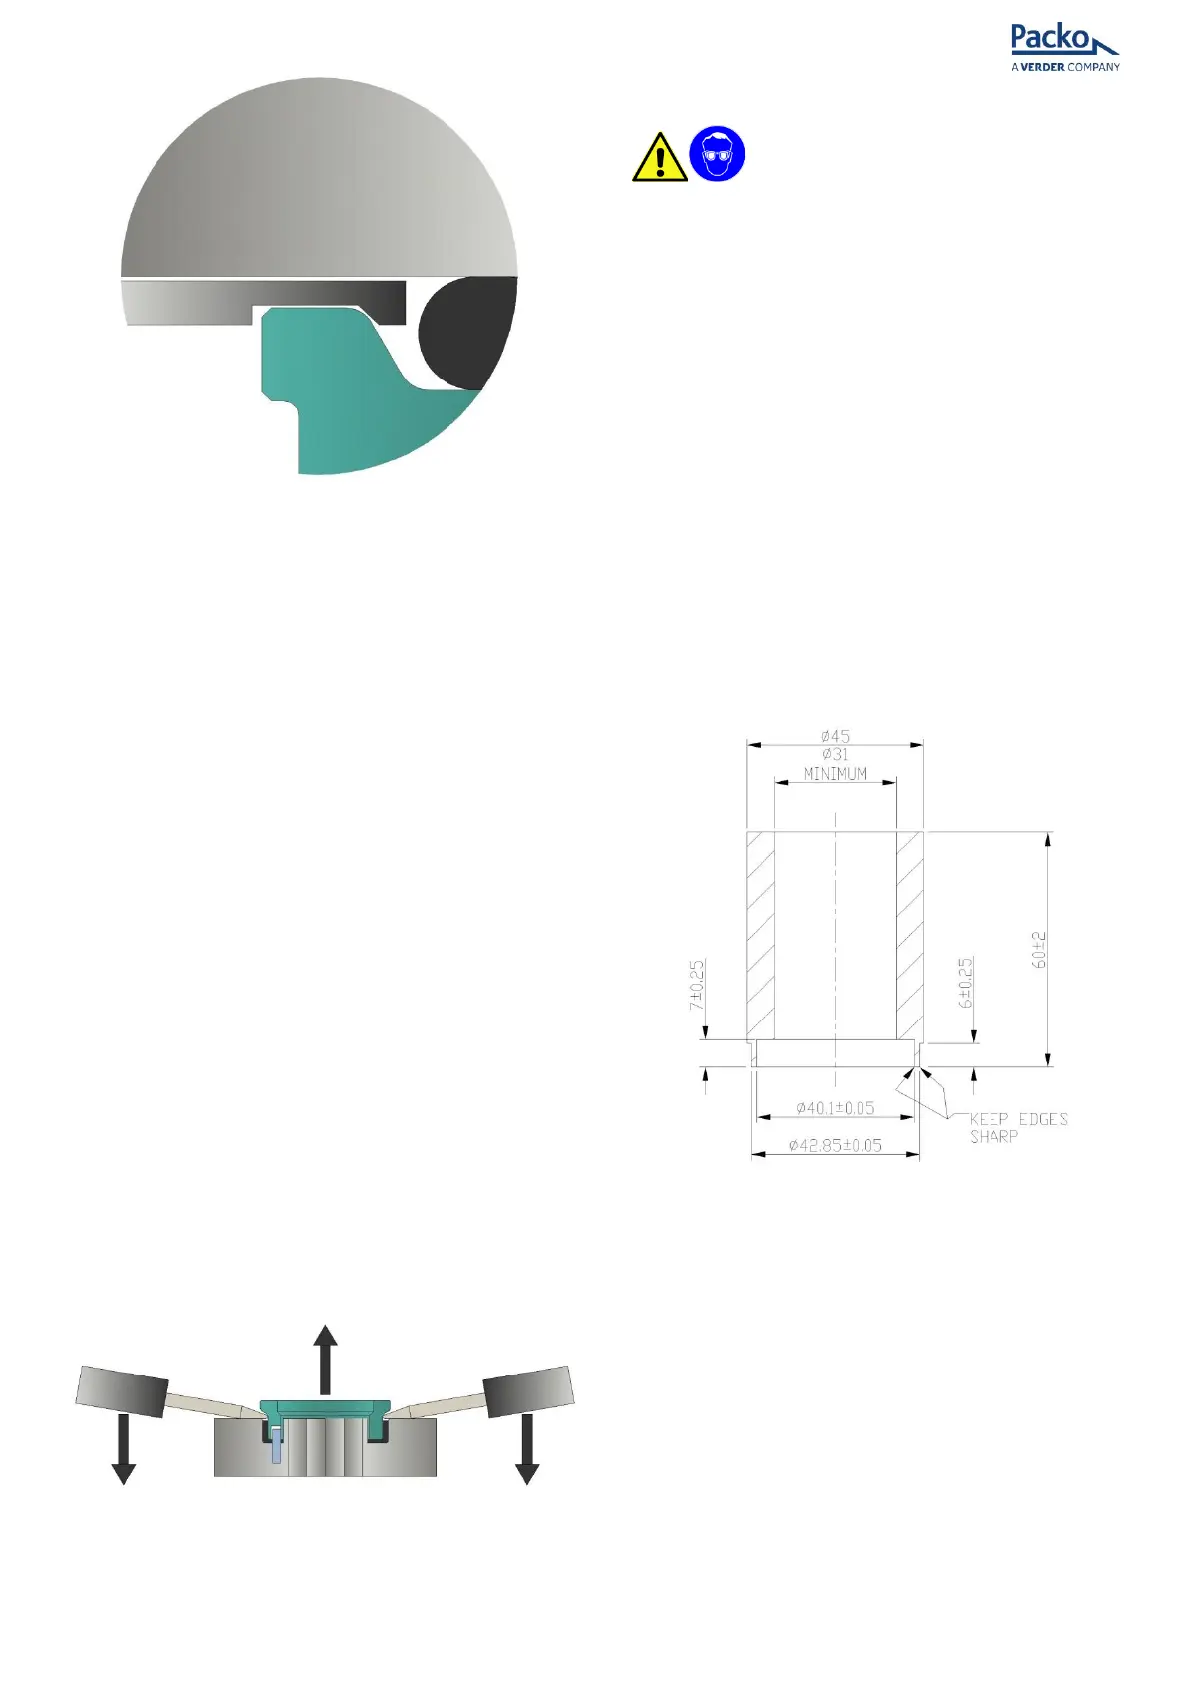
Figure 21 - Seal seat removal hooked end
• Push back the O-ring with the end of the tool
and rotate the tool by 90 degrees, until the
hooked end locks in position behind the seal
seat. (Figure 20 & 24)
• Working the tool gently around the
circumference of the seal, carefully pull the
seal face out.
• Take great care not to scratch or damage the
smooth face of the seal.
• Keep each seal with its respective shaft to
ensure correct mating of the seal faces on re-
assembly.
• The joint ring (83) may come out with the
seal face. If not, then remove it from the
rotor case bore and keep it together with the
seal face.
• You may wish to label the components.
Note: static seal seats can also be accessed from
the back of the rotor case after removing the
rotor case and seal housings (see 6.6 SEAL
HOUSINGS).
• Only remove the rotary seal seat (80) from
the back of the rotor (56) if you intend to fit a
new seal or L cup rubber (83). Gently prise
out the seat from the rotor using two soft
levers to avoid scratching rotor and damaging
seal face. (Figure 22).
Figure 22 - Seal removal from rotor
HP32 & HP34 Pumps
ATTENTION
Note: Double mechanical shaft seals are not
available on the HP3 size pumps
• Pull the static faces (80) from their bores in
the rotor case (51), removing the joint ring
(83) with each seal face. Take care not to
scratch or damage the smooth face of the
seal.
• If you intend to re-use these faces keep each
seal with its respective shaft to ensure correct
mating of mating of seal faces on reassembly
- you may wish to label the components.
• Only remove the seal seat from the back of
the rotor (56 & 57) if you intend to fit a new
seal or cup rubber (83).
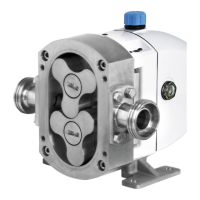
To remove the seal seat from the back of the
rotor a special tool is required. This tool needs to
be manufactured to the dimensions shown in
Figure 23.
Figure 23 - Sleeve dimension
• Press the sleeve down onto the visible edge of
the cup rubber. This will force the rubber
down into the seal bore in the rotor. The seal
face will be pushed out of its bore.
Do not lever out the seal face with screwdrivers
or similar tools as seal materials are brittle and
are easily damaged or broken.
If the seal face is to be re-used, note which way
up it was fitted - seal faces are not reversible.
Fitting Mechanical Seals: