26
Note: if refitting previously used seal faces
ensure that rotary and static faces are in their
original pairs.
HP4-6
ATTENTION
Fit the seal face with the narrow face track into
the rotor case. The seal face with the wide face
track should be fitted into the rotor.
• Fit the O-ring (83) to the static primary seal
face and lubricate the bore in the rotor case
with a suitable lubricant compatible with the
pumped fluid and the elastomer.
• DO NOT use mineral-oil based lubricants on
EPDM joints.
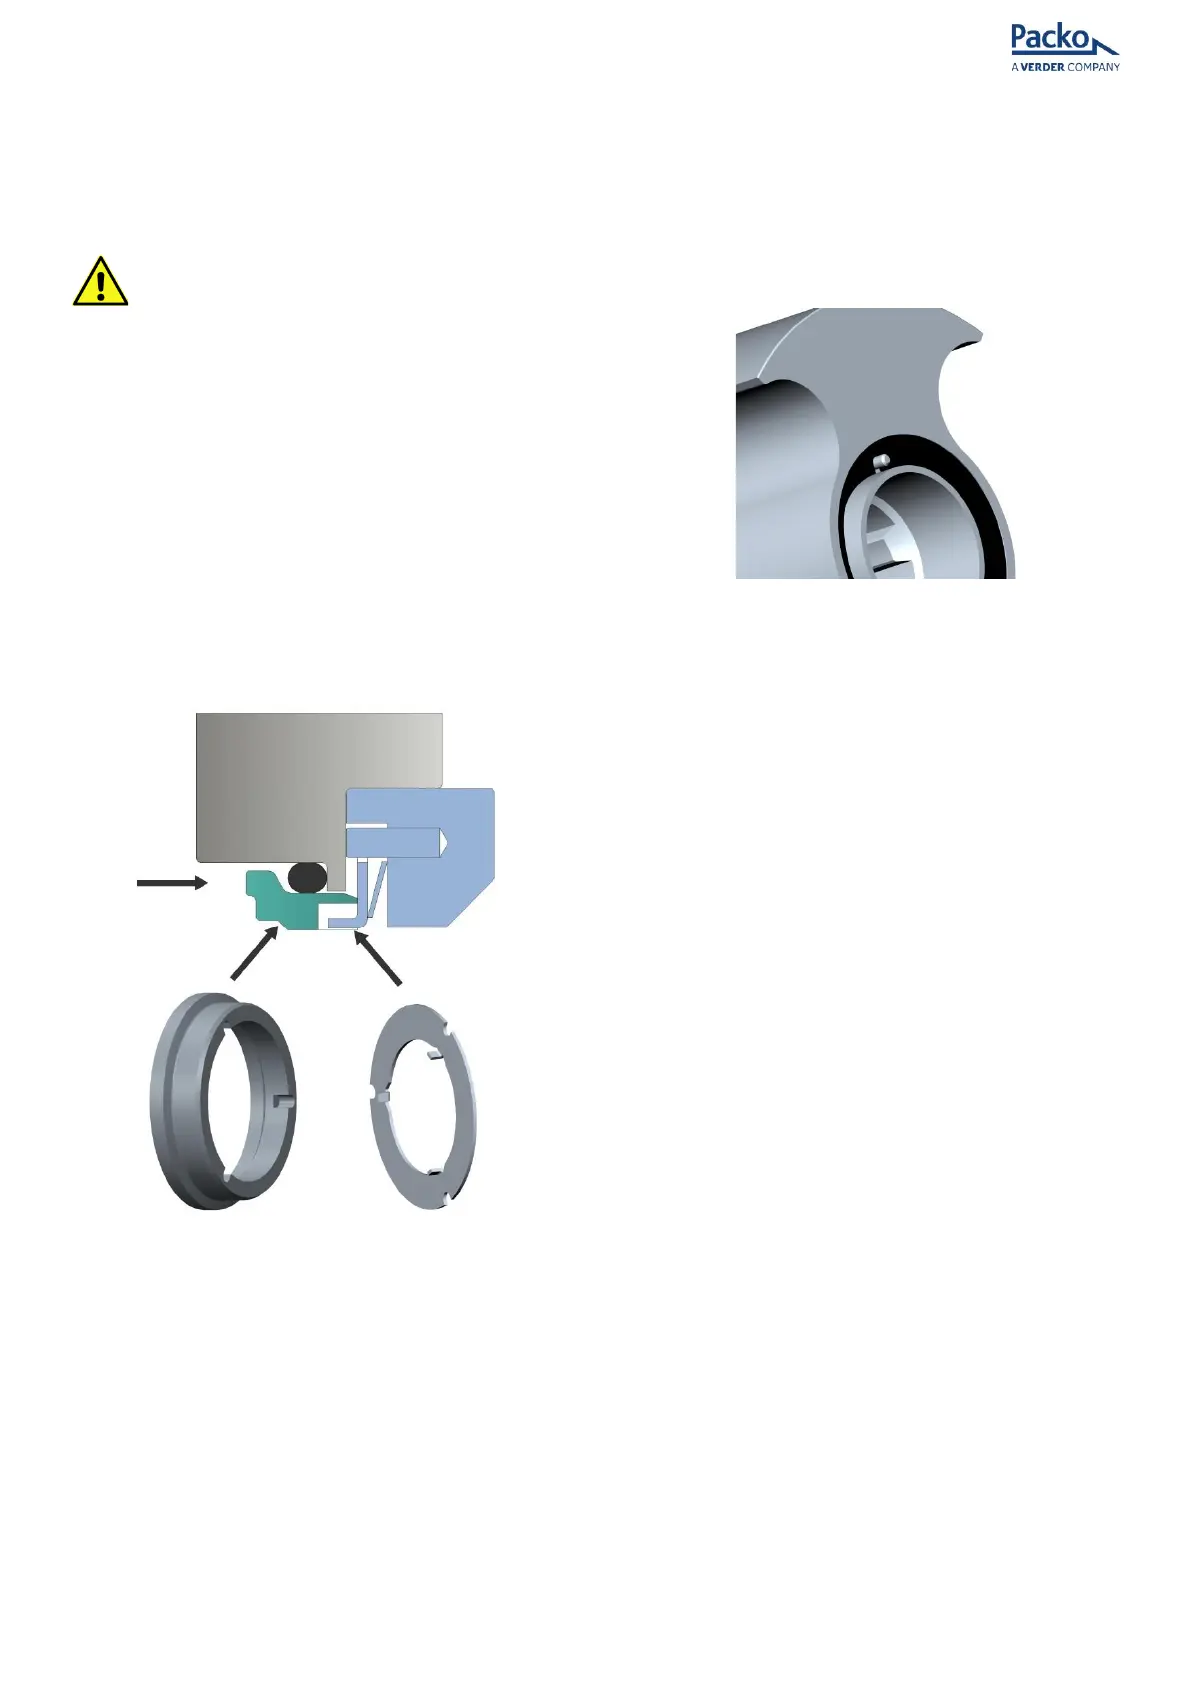
• Align slots in the seal face with tabs of drive
plate in the seal housing; a small cut-out is
provided so one drive tab can be seen (Figure
24).
Figure 24 - Fitting stationary seat
• Push each seal seat in straight; when
correctly fitted, seal seats should slide freely
against the resistance of their springs.
Undue pressure is not required or recommended
as seals are precision components. Be sure not to
damage the O-ring (83), if difficulty is
experienced put the O-ring into the rotor case
bore then push the seal seat into the bore.
Note: if the rotor case has been removed (see
6.7 ROTOR CASE), static seal seats should be
inserted into the rotor case, before mounting on
to bearing housing.
• To fit the seal seat to the rotor (56), first
insert L cup rubber (83) into the rotor (DO
NOT lubricate), ensure alignment with the
drive pin. (Figure 25).
Figure 25 – Align the L cup to the rotor drive pin
• If the PTFE trim is fitted, insert the rubber
washer first followed by the PTFE sleeve. Note
that the sleeve is slightly tapered and will be
easier to fit if the narrow side is inserted first.
Then lubricate the outside diameter of the
seal seat.
• Align the rotor drive pin with one of the three
slots in seal seat.
• Engage the leading edge of the seal seat into
the cup rubber or PTFE sleeve. Push down
evenly until the seal seat rests squarely on
the bottom of the seal bore in the rotor.
• DO NOT damage the seat face.
• When correctly fitted, the seat is parallel with
the back face of the rotor and must not be
tilted. Any “run-out” of the seat will cause
leakage of the seal.
• Assembly of the seal is now complete.
• Carefully clean all the seal faces with a soft
lint free cloth and to remove all dust and
grease.
• It may be necessary to use a compatible
solvent to remove oil or grease.
• It is not normally necessary to remove the
seal housings (86) from the back of the rotor
case except to check the condition of the
springs (82) and drive plates (81).
• If re-fitting the seal housings, align the 3 slots
in outer edge of drive plate with the 3 pins.
When fitted, ensure the drive plate can slide
freely against the spring pressure. (see 6.6
SEAL HOUSINGS)
HP3 size pumps: