300
800
300300
3
0
0
F
C
B
H
A
D
E
G
3
0
0
-
4
0
0
2500
5
ENGLISH
Heat pump Calidi XP
MA20-23 GB Translation of the original instructions (Swedish)
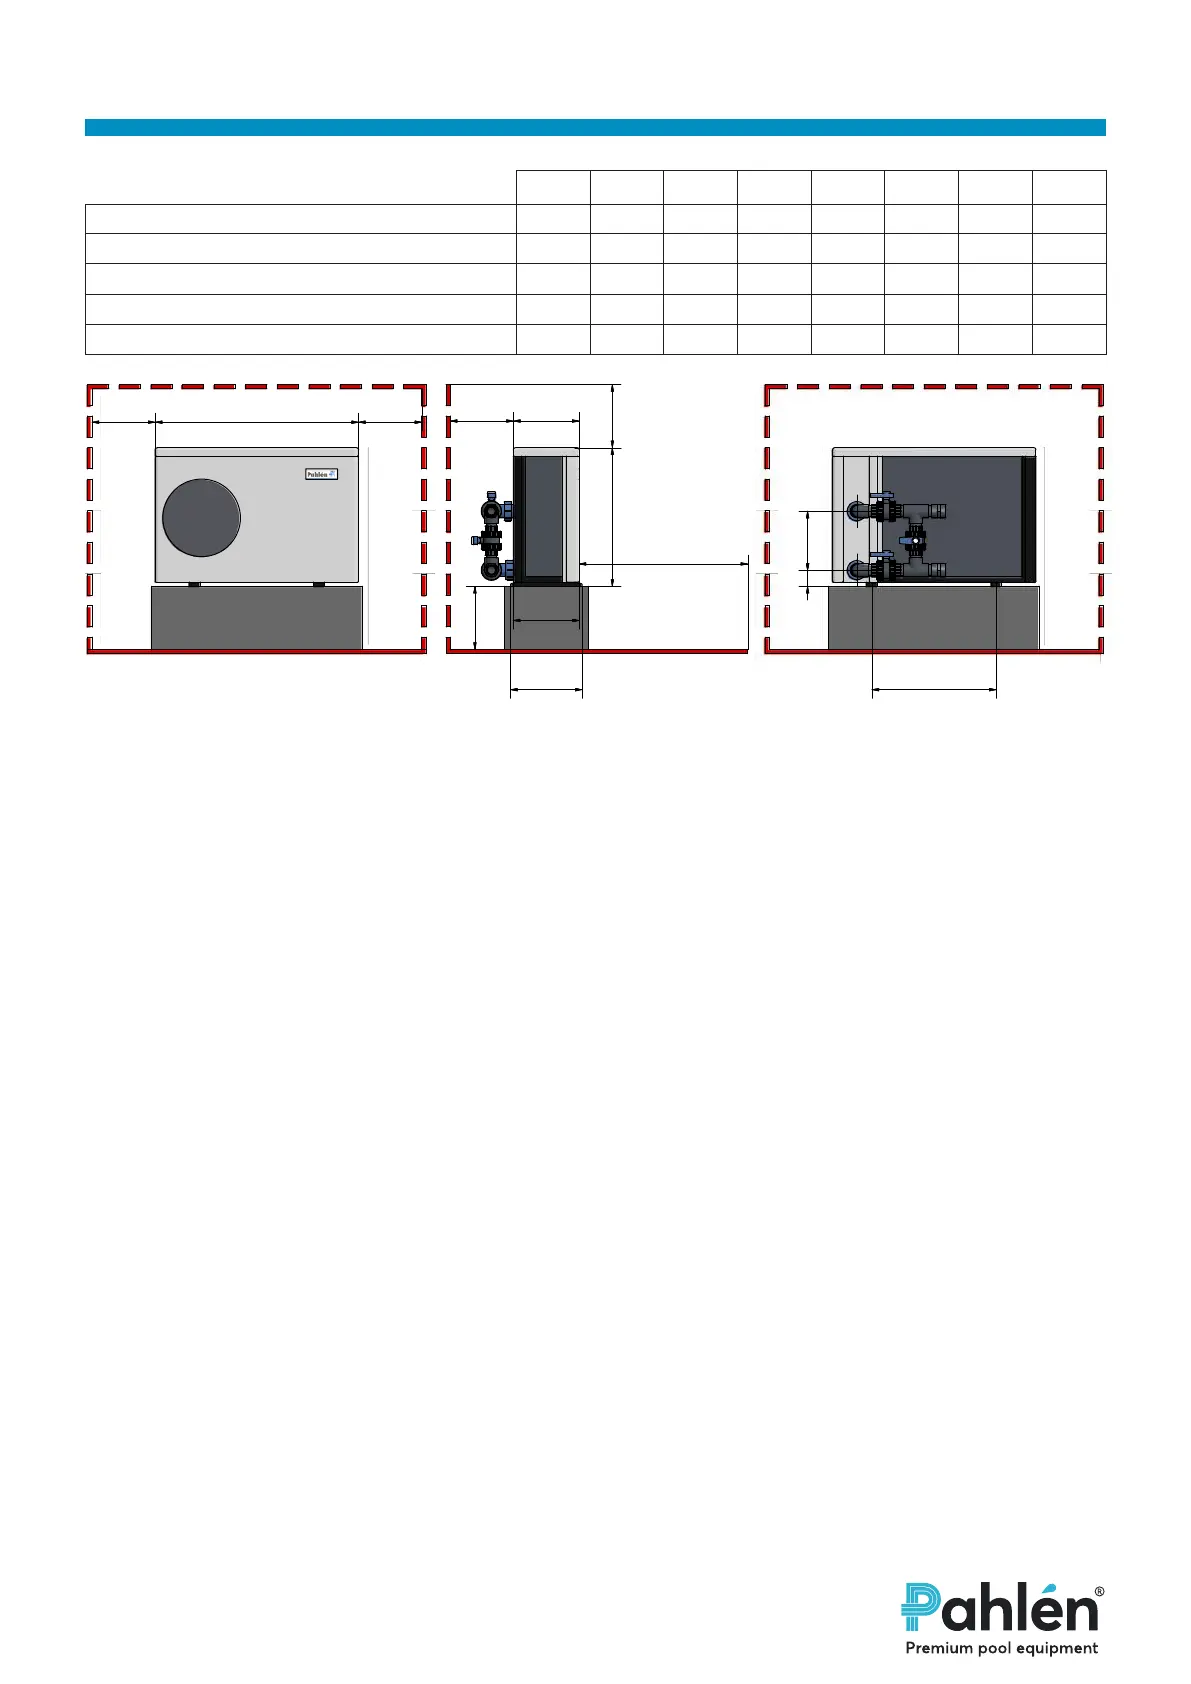
Dimensions
A B C D E F G H
Item no. 14983340 Heat pump XP10 315 590 312 340 961 290 74 658
Item no. 14983341 Heat pump XP15 315 590 312 340 961 340 74 658
Item no. 14983342 Heat pump XP17 395 590 392 420 961 390 74 658
Item no. 14983343 Heat pump XP28 395 720 392 420 1092 620 74 958
Item no. 14983344 Heat pump XP35 505 790 496 530 1161 650 74 958
Installation
Water ow through the heat pump is driven by the external pool circulation pump. The recommended water ow is shown in the
technical specication.
Bypass-kit
Bypass-kit (item no. 14950181 for c-c between 280–390 mm, item no. 14950182 for c-c between 620–650 mm) are accessories
from Pahlen that contain all the connections required for correct mounting and the possibility to easily adjust the water ow
through the heat pump optimally
Ground stand:
Item no. 14983407 for heat pump up to XP17.
Wall stand:
Art.nr 14983408 for heat pump up to XP15.
Placing
Placing of the heat pump is very important and can aect its performance and maintenance options.
Consider the following factors:
• Heat pump must be installed outdoors in a well-ventilated place in order to avoid cold air recirculation.
It requires at least 300 mm clearance from the walls, shrubbery or the like around the heat pump in order not to block air intake.
Note also that the pump requires at least 2500 mm space in front of it in order to prevent air recirculation.
We do NOT recommend placing the pump under the eaves, wooden decks or porches, since this may cause cool air
recirculation that can greatly aect performance.
• Consider that it should be easy to access around the heat pump at installation (plumbing and electric works), and that enough
space is also available for future maintenance .
• The total length of pipe between the heat pump and the pool should not exceed 10 meters. Heat pump must ALWAYS be
connected with a xed tube.
• It should be placed on a rm, level surface, on a 300–400 mm high concrete base or a tripod that can handle its weight.
Fix the heat pump frame/feet with M10 bolts.
• Heat pump should never be placed near any source of explosive or corrosive substances.
• In order to protect the heat pump in exposed locations, prevent sand or air with high salt content (since this can cause clogs,
damage or corrosion to the pump), you can plant shrubs or put up fences for protection, but at a good distance from the
heat pump.
• When the heat pump is working, condensation water is formed in the bottom. Make sure that the supplied drainage hose for
water drainage has been installed.
Required free space = min. measured in mm
 Loading...