13
(a)
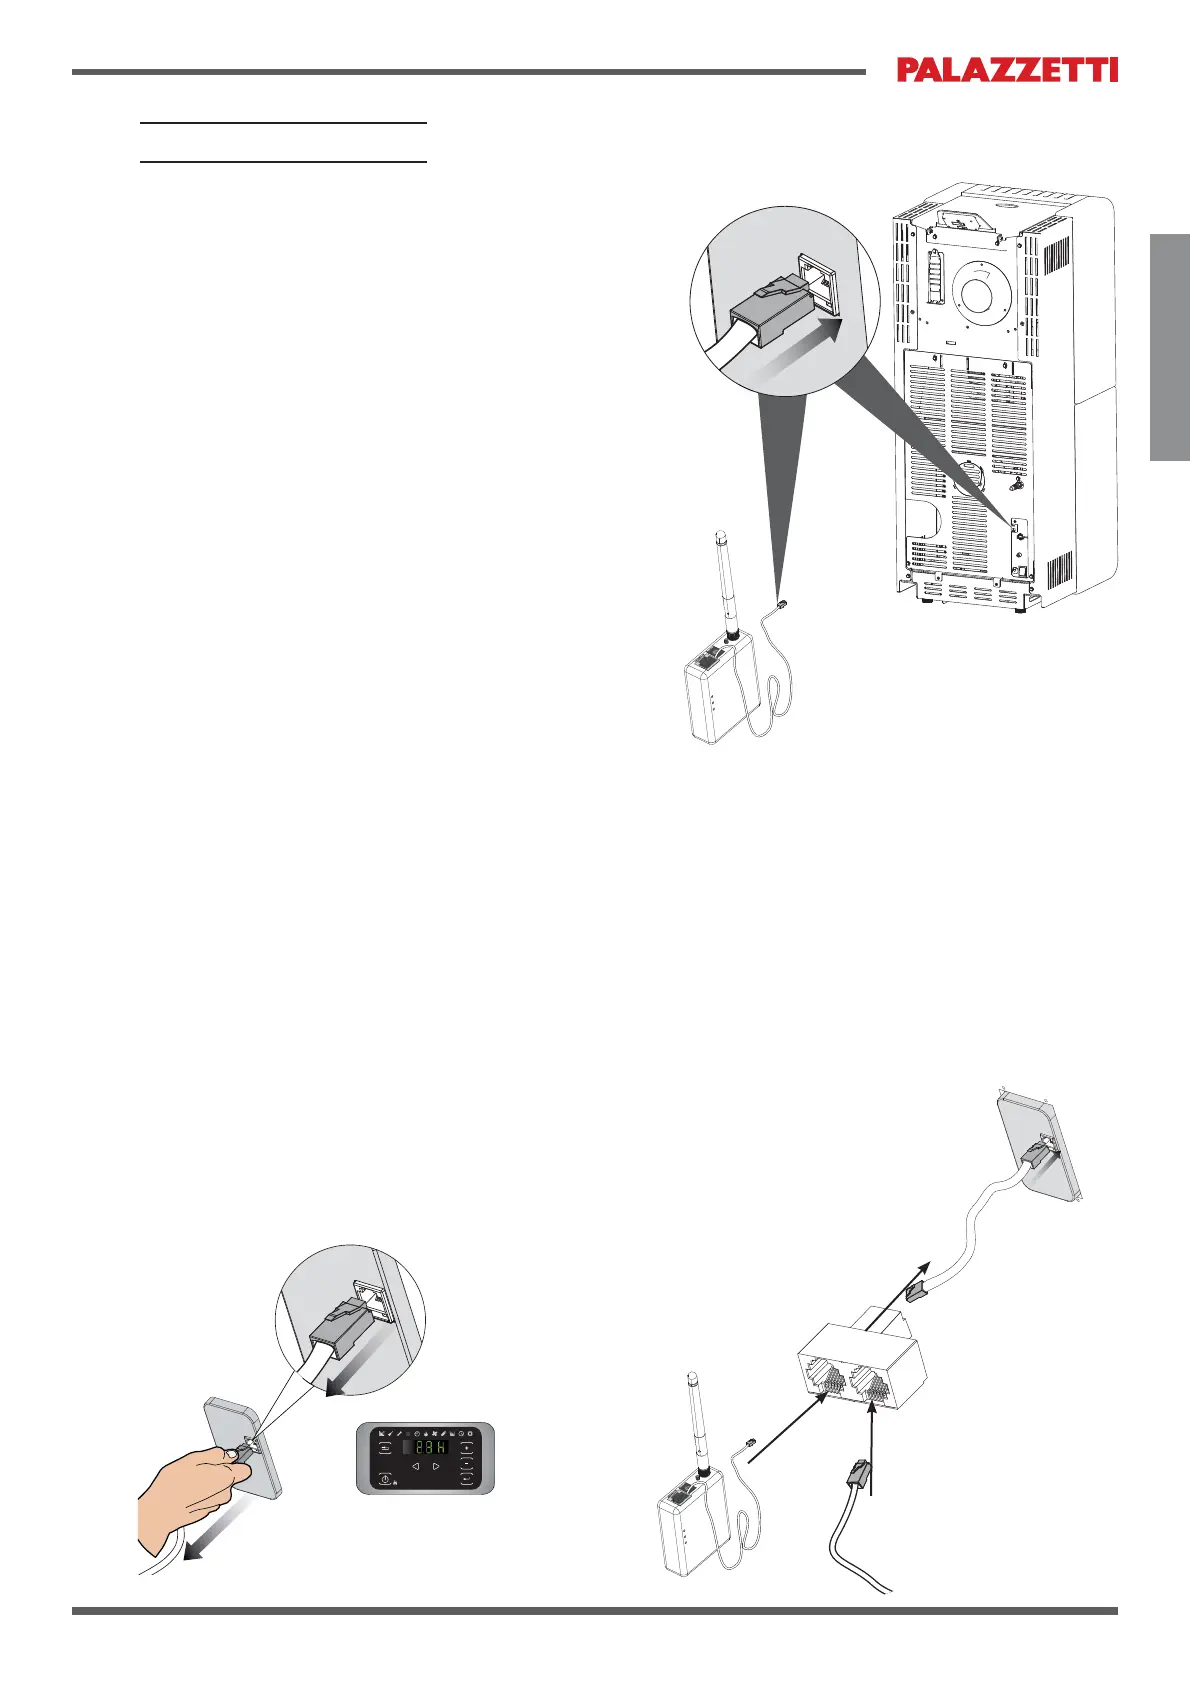
(b)
Fig. 4.3
Fig. 4.1
Fig. 4.2
13
ENGLISH
4 INSTALLATION
To install the connection box, proceed as follows:
¿W WKH DQWHQQD WR WKH FRQQHFWLRQ ER[
CAUTION! Make sure the antenna is fully
screwed in.
hook the device up to the Palazzetti stove
secure the connection box to the stove
power up the connection box.
4.1 HOOKUP TO STOVE
The type of hookup depends on the stove in
question.
4.1.1 3HOOHWVWRYHVFRQ¿JXUHGLQWKHIDFWRU\
If your pellet stove has already has a free
female RJ11 socket, it is ready to hook up to
the connection box. You need only connect the
connection box’s RJ11 connector to the stove
¿J
In this case, there is no need to use the splitter
included in the kit.
4.1.2 Installation via control panel with RJ11
connector
)RU DOO SHOOHW VWRYHV QRW FRQ¿JXUHG IRU WKH
hookup, but which have a control panel with an
5-VRFNHWRQWKHEDFN¿J
Make sure the stove is out and switched off
Disconnect the RJ11 connector from the
EDFNRIWKHVWRYH¶VFRQWUROSDQHO¿J
Connect the splitter to the stove’s control
SDQHOXVLQJWKHPDOHPDOH5-FDEOH¿J
4.3a).
Connect the cable you disconnected from
the control panel and that of the connection
ER[WRWKHVSOLWWHU¿JE