75
12.4.5.3 Connecting the Piping to Outdoor Multi
Decide piping length and then cut by using pipe cutter.
Remove burrs from cut edge. Make flare after inserting the
flare nut (locate at valve) onto the copper pipe. Align center
of piping to valve and then tighten with torque wrench to
the specified torque as stated in the table.
* For Gas side piping please refer table and diagram below
12.4.6 Cutting and Flaring the Piping
1 Please cut using pipe cutter and then remove the burrs.
2 Remove the burrs by using reamer. If burrs is not removed, gas leakage may be caused. Turn the piping end
down to avoid the metal powder entering the pipe.
3 Please make flare after inserting the flare nut onto the copper pipes.
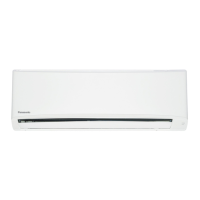
12.4.7 How to Take Out Front Grille
Please follow the steps below to take out front grille if necessary such as when installing or servicing.
1 Pull down 3 caps at the bottom, then remove
3 mounting screws.
2 Open front panel.
3 Remove 3 mounting screws on the front grille.
4 Slide the 4 lock knobs on the upside of front
grille to unlock position.
5 Pull the front grille towards you to remove the
front grille.
Connection pipe
(female side)
Auxiliary pipe
(male side)
Flare Nut
Hall Union
Liquid side
Outdoor Multi Combination Model Pipe size (refer to diagram)
CS-TZ60*** CU-3Z68***,
CU-4Z68***,
CU-4Z80***,
CU-5Z90***
3
(CZ-MA2PA)
CS-TZ71*** CU-4Z80***,
CU-5Z90***
4
(CZ-MA2PA) & (CZ-MA3PA)
Hall Union
Hall Union
Connection pipe
(female side)
Pipe size expander
(CZ-MA2PA)
Auxiliary pipe
(male side)
(Indoor)
Auxiliary pipe
(male side)
(Outdoor)
Flare Nut
Auxiliary pipe
(male side)
(Outdoor)
Auxiliary pipe
(male side)
(Indoor)
Hall Union
Hall Union
Connection pipe
(female side)
Pipe size expander
(CZ-MA2PA)
Flare Nut
Pipe size reducer
(CZ-MA3PA)
Gas side
4
3
Packing
When properly fl ared, the internal surface of the
flare will evenly shine and be of even thickness.
Since the flare part comes into contact with the
connections, carefully check the flare finish.
Improper fl aring
Inclined Surface
damaged
Cracked Uneven
thickness
1. To cut 2. To remove burrs 3. To fl are
Bar
Red arrow mark
Handle
Core
Yoke
Clamp handle
Bar
0 – 0.5 mm
Copper pipe
Reamer
Point down
Pipe
When reinstalling the front
grille, carry out above steps
2 - 3 in the reverse order.
1
5
2
3
4
Screw
(3 location)
Cap and Screw
(3 location)
Front
grille
LOCK
Lock knob
UNLOCK
Front panel

 Loading...

