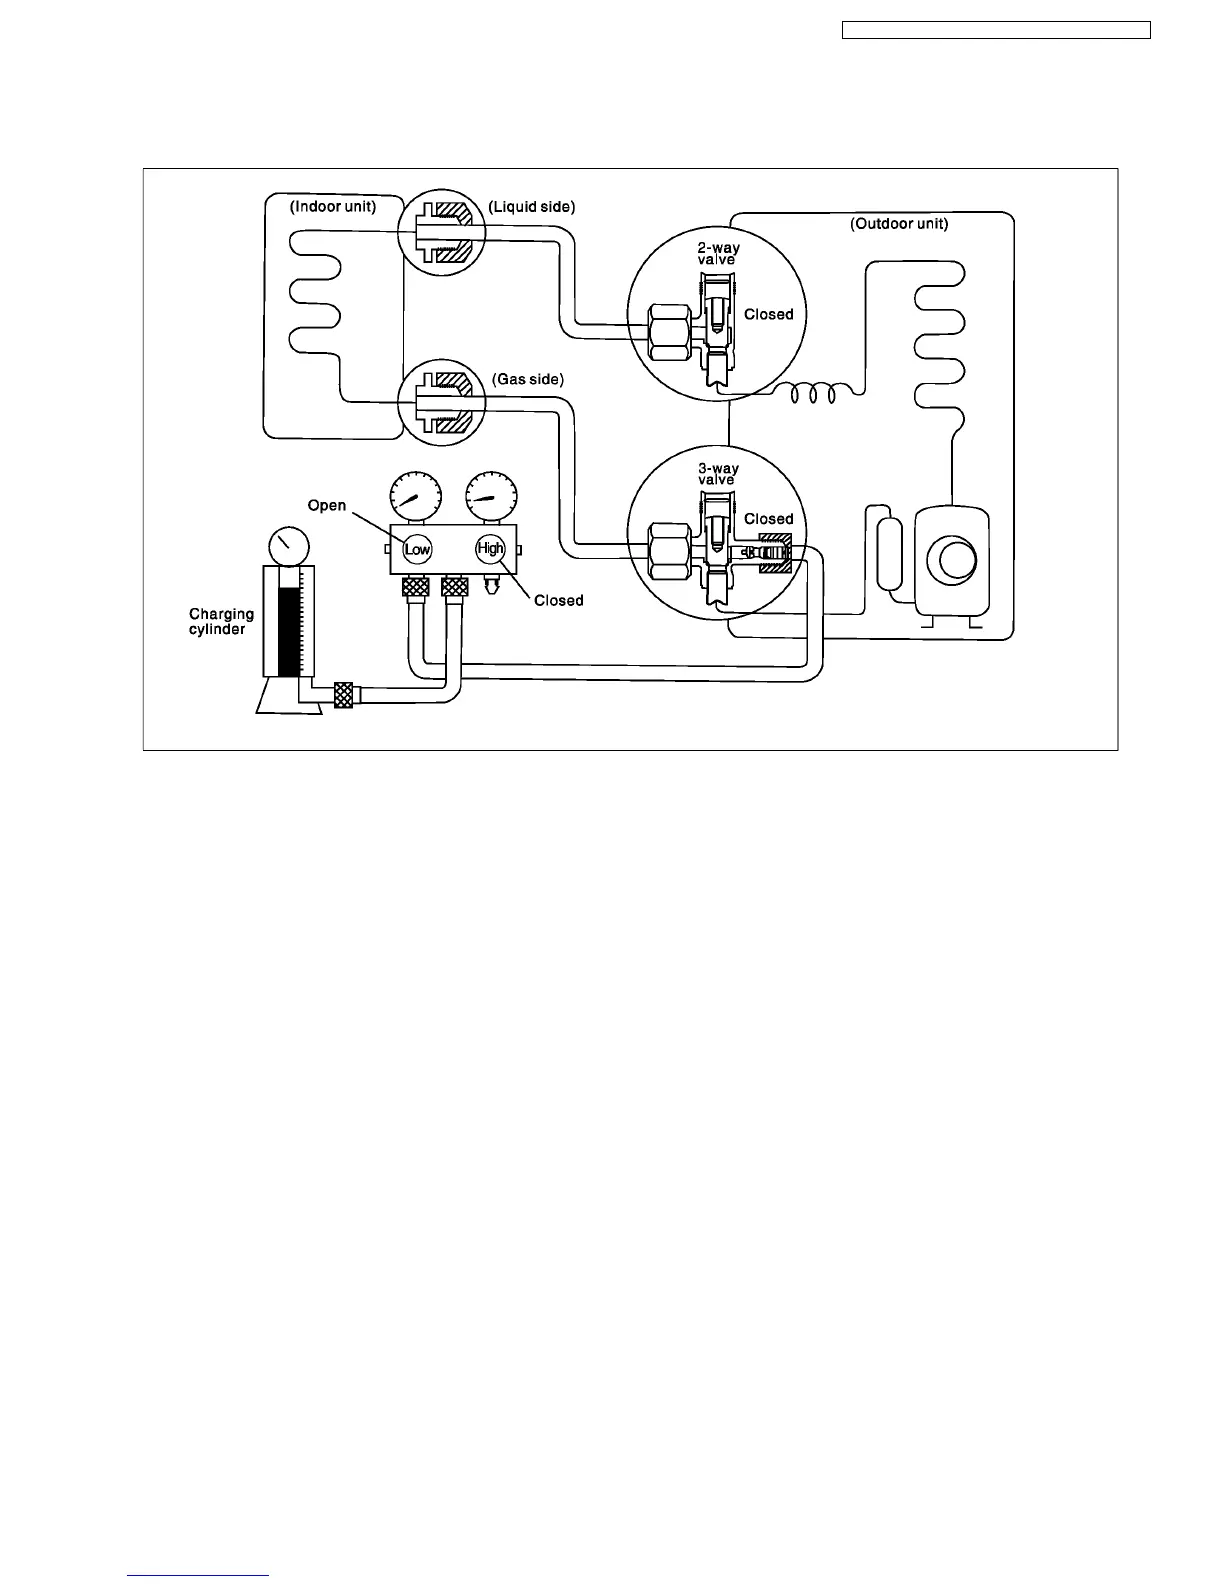
9.2.1. 2-1 Re-air purging
1. Confirm that both 2-way and 3-way valves are set to the
closed position.
2. Connect the charge set and a charging cylinder to the
service port of the 3-way valve.
3. Air purging
•
• •
• Open the valves on the charge set and charging
cylinder, purge the air by loosening the flare nut on the
2-way valve approximately 45°for 3 seconds, then close
it for 1 minutes; repeat this 3 times.
•
• •
• After purging the air, use a torque wrench tightenting the
flare nut on the 2-way valve.
4. Check for gas leakage
•
• •
• Check the flare connections for gas leakage.
5. Discharge the refrigerant
•
• •
• Open the valve on the charging cylinder and discharge
the refrigerant unit the gauge indicates 3 to 5 kg/cm
2
G
(0.3 to 0.5 Mpa).
6. Disconnect the charge set and the charging cylinder, and
set the 2-way and 3-way valves to the open position.
•
• •
• Be sure to use a hexagonal wrench to operate the valve
stems.
7. Mount the valve stem nuts and the service port cap.
•
• •
• Be sure to use a torque wrench to tighten the service
port cap to a torque 1.5kg.m (18N.m).
•
• •
• Be sure to check for gas leakage.
Procedure
43
CS-SA9CKP CU-SA9CKP5 / CS-SA12CKP CU-SA12CKP5