10
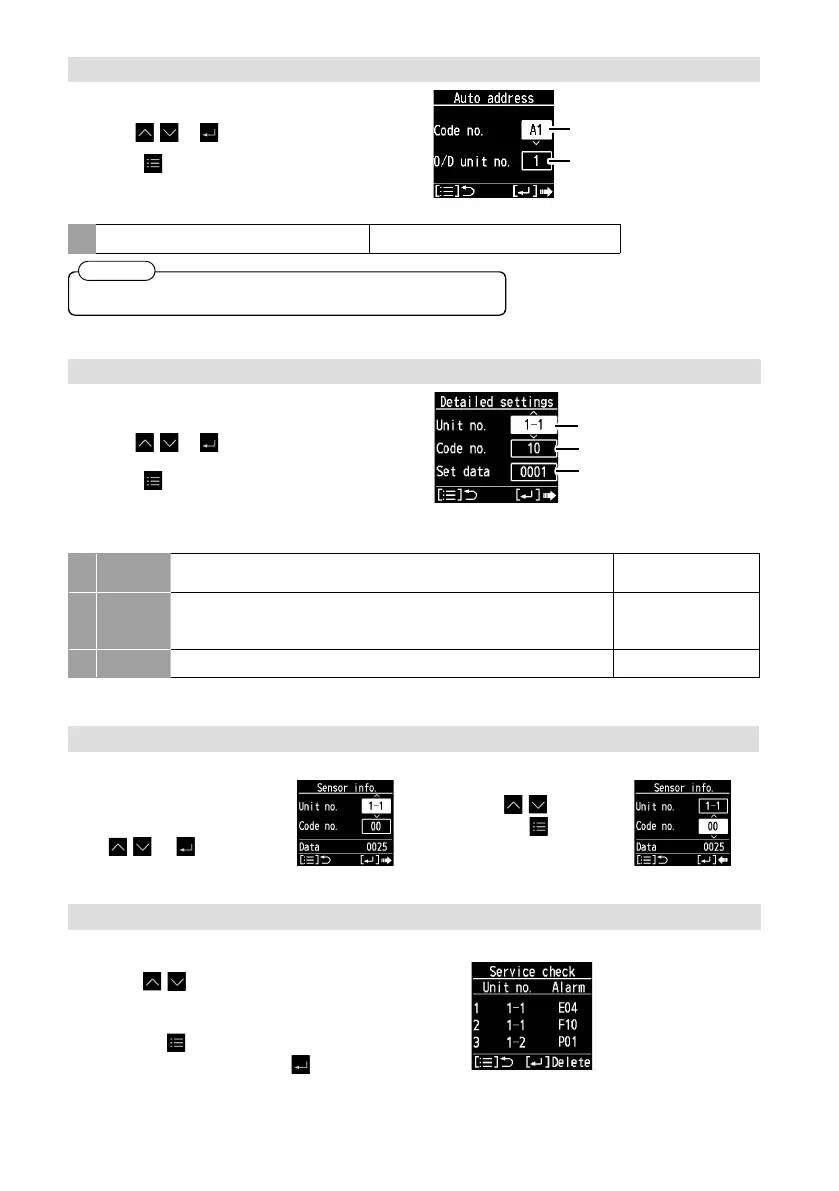
Auto address
3
Set.
( Select the Code no. [A1] and O/D unit no.)
Press → . (Repeat)
Code no.
O/D unit no.
4
Press .
After Selecting [YES], the unit restarts.
Code no.
O/D unit no.
A1
Set the Auto address for each O/D unit no.
Select the O/D unit no. (outdoor unit) for Auto address.
• Outdoor unit number
Set Auto address after all units are turned on and 90 seconds or more have passed.
Operate the units after Auto address is set and 90 seconds or more have passed.
Attention
Detailed settings
3
Set.
(Select the indoor unit number, Code no. and Set data.)
(When selecting Code no., refer to the following table.)
Press
→ . (Repeat)
Indoor unit number
Set data
Code no.
4
Press .
After Selecting [YES], the unit restarts.
Code no. Set data
31
Vent output
setting
Set this when connecting a commercially sold fan, etc. to the ventilation
fan output “FAN DRIVE:2P (White)” on the indoor control board.
*Dedicated cables (optional) are required.
• 0000: Not connected
• 0001: Connected
32
Temp sensor
setting
Set this when measuring the room temperature with the room temperature sensor of the remote
controller.
• When using the main and sub remote controllers, the main one is enabled.
• When using with the remote sensor in combination, set the indoor unit setting data.
*
This setting is not available during group-controlling.
• 0000: Indoor unit
• 0001: Remote controller
33
Temp display
setting
Set the type of temperature display.
• 0000: °C
• 0001: °F
* Depending on the type of indoor unit, Code no. may be displayed with 6 digits. In this case, read as follows.
e.g. 10 → 000010
Sensor info.
This displays each sensor temperature of the remote controller, indoor units and outdoor units.
3
Select.
(Select the unit number and
Code no.)
Press
→ . (Repeat)
4
Confi rm the content.
press .
●Pressing
will return
to the Maintenance func
screen.
Service check
This displays the alarm history.
3
Confi rm the content.
Press .
Information of the last 4 errors is displayed.
[
--
] shows that no error has occurred.
●Pressing
will return to the Maintenance func screen.
●To delete the error history, press
and select [YES].
 Loading...