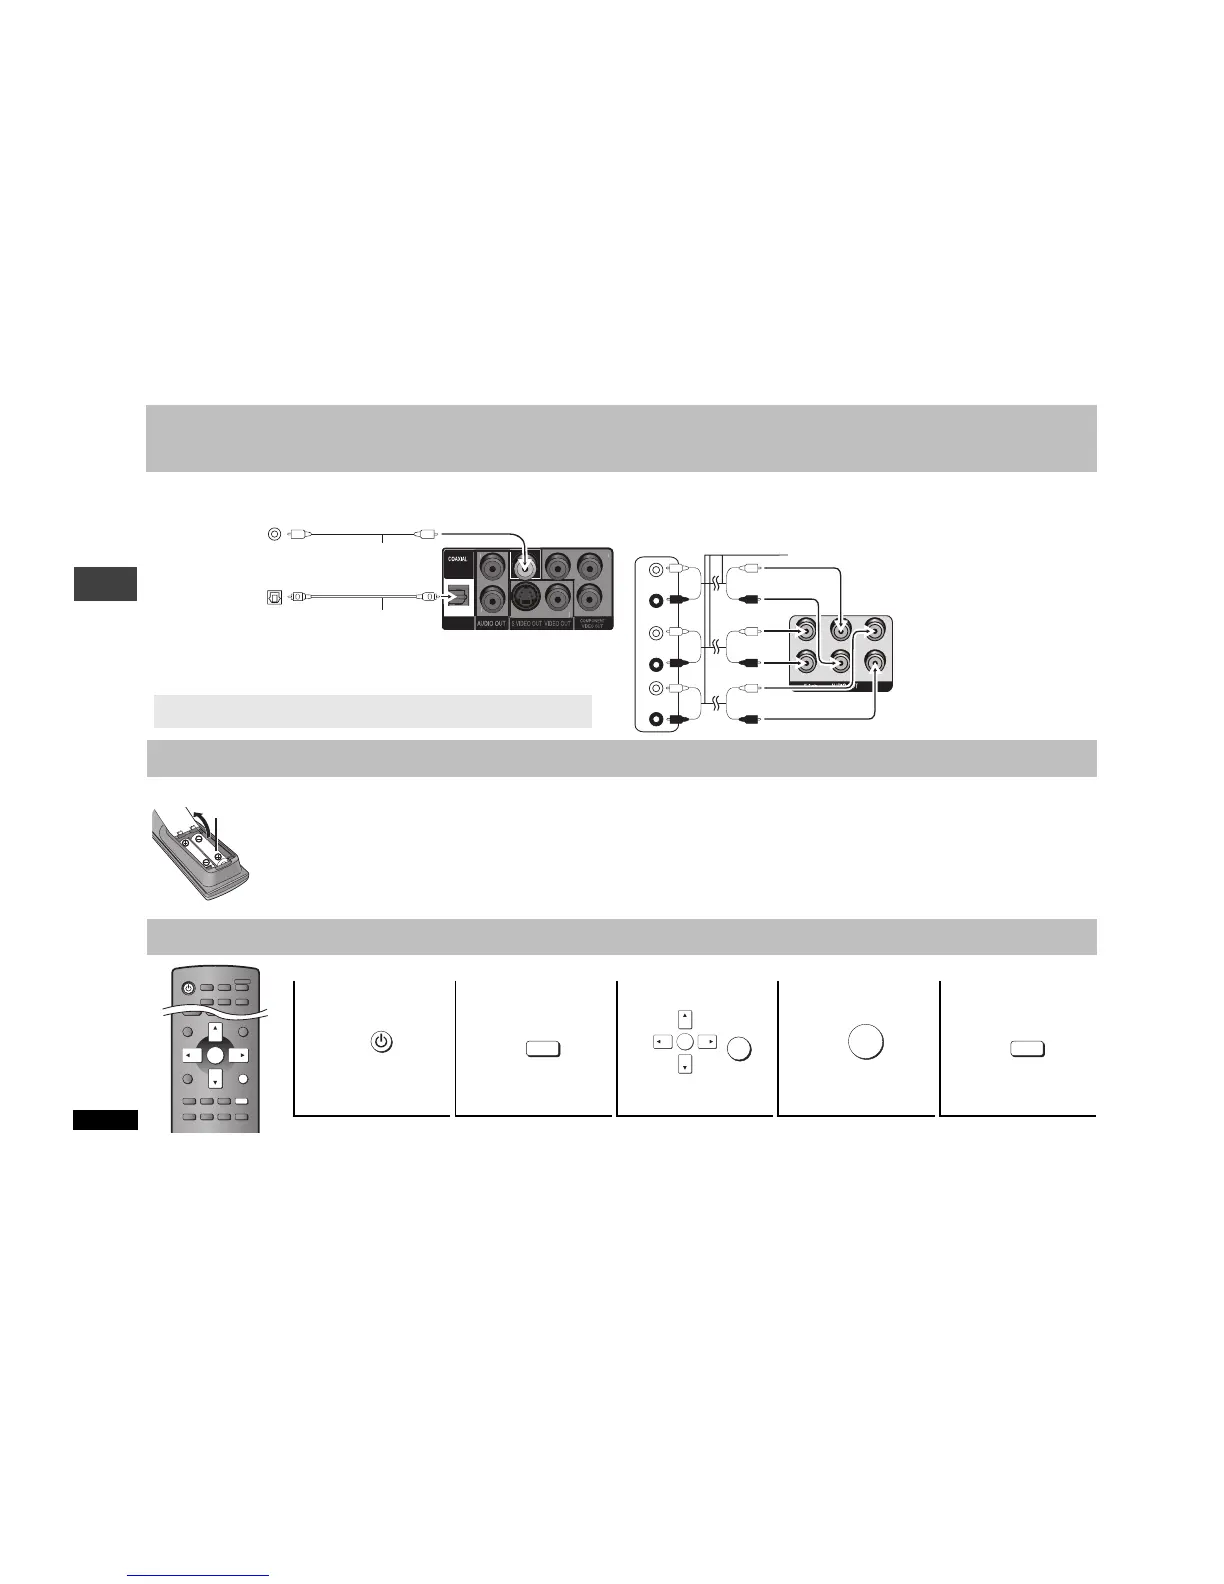
COAXIAL IN
OPTICAL IN
Amplifier with a built-in
decoder or a decoder-
amplifier combination
Coaxial cable
∫ Enjoying multi-channel surround sound
with COAXIAL IN or OPTICAL IN
Set “Audio Output” to “Off” (
➜
page 21, “HDMI” tab), and change “PCM Digital Output”,
“Dolby Digital”, “DTS Digital Surround” and “MPEG
[Except[Asia[
”(
➜
page 21, “Audio” tab).
Optical digital audio cable
Do not bend sharply when
connecting.
≥You cannot use DTS Digital Surround decoders not suited to DVD.
≥
Even if using this connection, output will be only 2 channels when playing DVD-Audio. To enjoy multi-channel
surround sound, connect with 5.1 ch AUDIO OUT terminals (
➜
right ) or HDMI terminals (
➜
page 7).
Back of the unit
or
L
R
CENTER
SURROUND
FRONT L/L
SUBWOOFER
FRONT R/R
(R)
(L)
FRONT
(R)
(L)
SURROUND
CENTER
SUBWOOFER
∫ Enjoying multi-channel surround sound
with AUDIO IN 5.1ch
To obtain maximum performance of DVD-Audio multi-channel PCM sound, this
connection is recommended.
Audio cable Connect cables to terminals
corresponding to the speakers you
have connected.
≥Change “Speaker Settings”
(➜ page 21, “Audio” tab).
Back of the unit
Amplifier
STEP 2 The remote control
∫ Batteries
≥ Insert so the poles (i and j) match those in the remote control.
≥ Do not use rechargeable type batteries.
Do not:
≥ mix old and new batteries.
≥ use different types at the same time.
≥ heat or expose to flame.
≥ take apart or short circuit.
≥ attempt to recharge alkaline or manganese batteries.
≥
use batteries if the covering has been peeled off.
Mishandling of batteries can cause electrolyte leakage which can
damage items the fluid contacts and may cause a fire.
Remove if the remote control is not going to be used for a long period
of time. Store in a cool, dark place.
∫ Use
Aim at the remote control sensor (➜ page 9), avoiding obstacles, at a
maximum range of 7 m directly in front of the unit.
R6/LR6, AA
STEP 3 QUICK SETUP
12345
Power ON.
Shows
QUICK
SETUP
screen.
F
ollow the message
and make the settings.
Press to finish
QUICK SETUP.
Press to exit.