ENGLISH - 7
Attaching (continued)
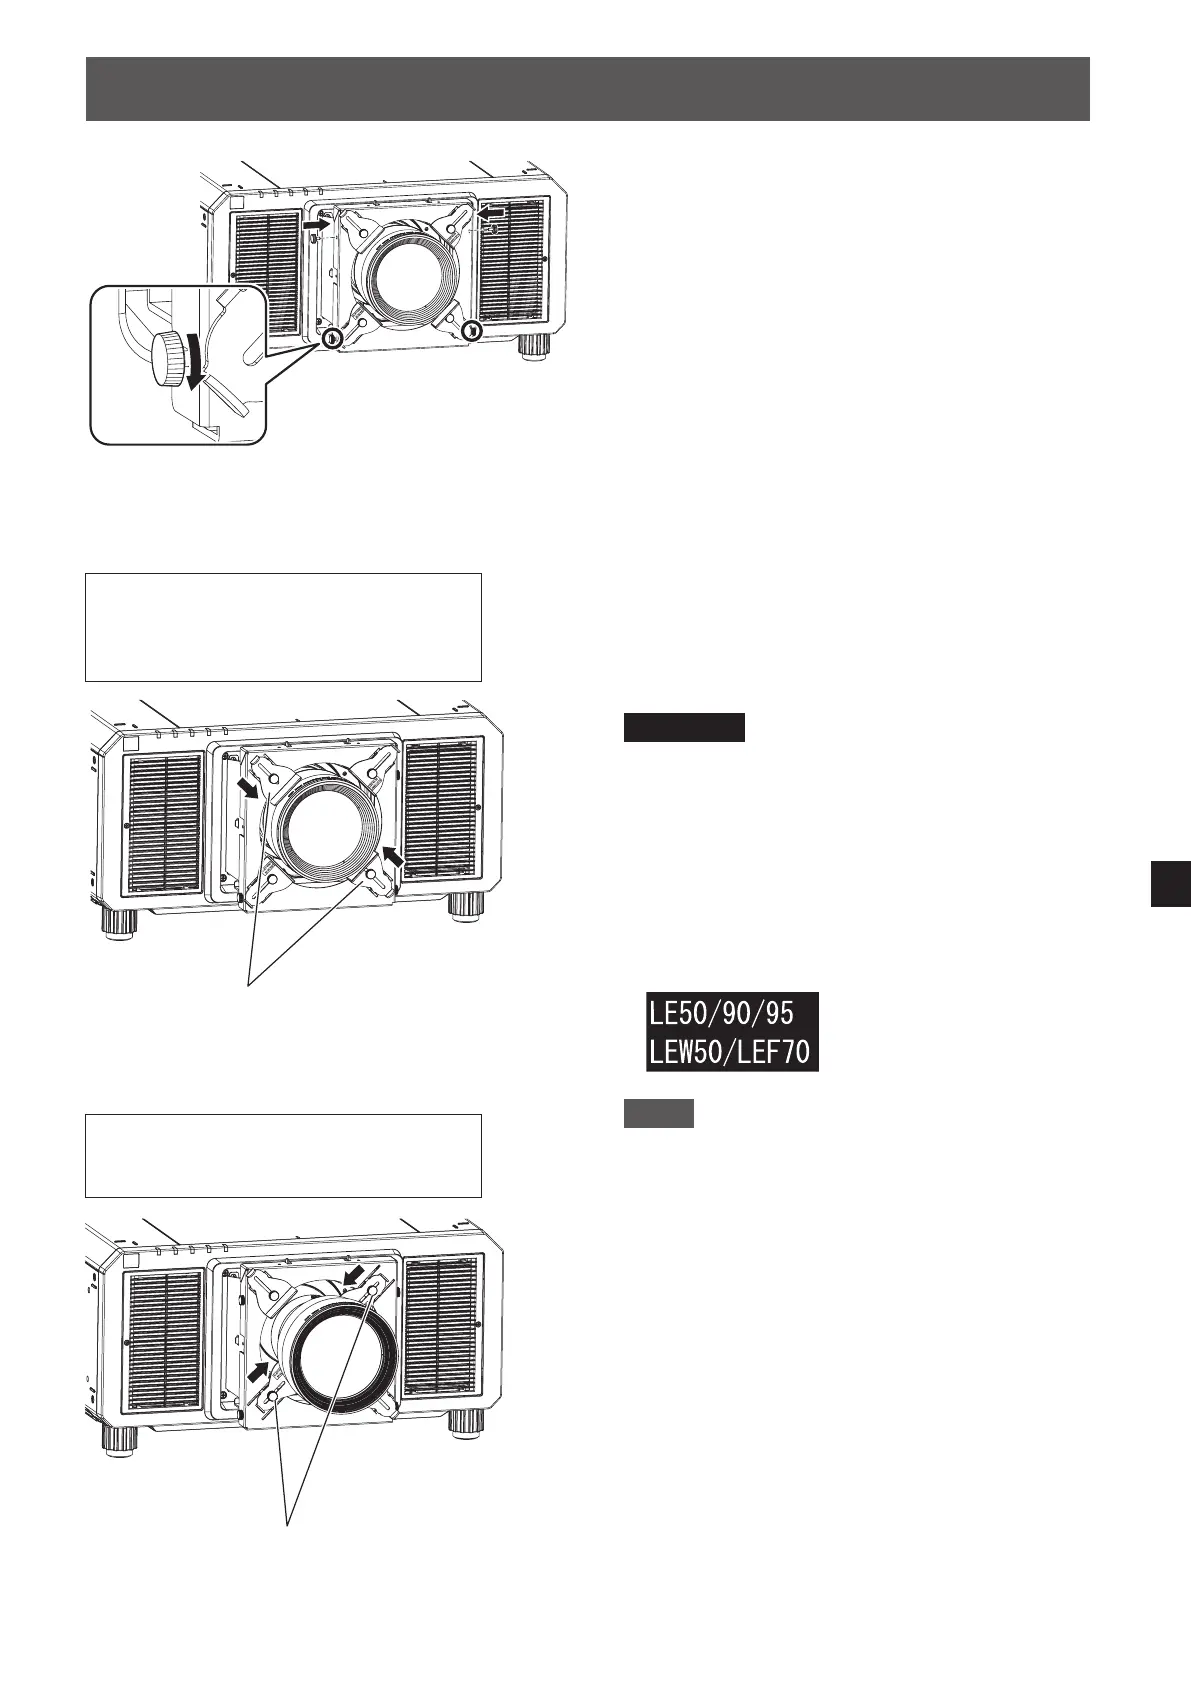
5) Fix the upper part of the lens xing
attachment bracket using the thumbscrews
removed in step 1 of "Preparing the Lens
Fixing Attachment."
6) Fix the lower part of the lens xing attachment
bracket by tightening the thumbscrews (two
places).
7) Loosen the two thumbscrews of the lens
xing brackets.
8) Push the lens xing brackets up against the
lens, and then x them in place by tightening
the two thumbscrews.
Attention
z
The lens xing brackets to be used differ
depending on the projection lens that is installed
on the projector.
When using a lens other than the ET-D75LE50 /
ET-D75LE90 / ET-D75LE95 / ET-D3LEW50 /
ET-D3LEF70, use lens xing brackets (A).
When using the ET-D75LE50 / ET-D75LE90 /
ET-D75LE95 / ET-D3LEW50 / ET-D3LEF70, use
lens xing brackets (B). The following indication
appears on lens xing brackets (B).
Note
z
When using a projection lens other than the
ET-D75LE50 / ET-D75LE90 / ET-D75LE95 /
ET-D3LEW50 / ET-D3LEF70, lens xing brackets
(B) may come into contact with the projection
lens when the lens xing attachment bracket is
attached, depending on the adjustment state of
the lens shift.
In such cases, use the projector with lens xing
brackets (B) removed. Safely store the removed
lens xing brackets (B), thumbscrews, spring
washers, and at washers so as not to lose them.
z
When this product is attached, the projector's
active focus optimizer function may not operate
properly. In such cases, do not press the lens
xing brackets onto the projection lens with
excessive force.
Lens xing brackets (A)
When using a lens other than the
ET-D75LE50 / ET-D75LE90 /
ET-D75LE95 / ET-D3LEW50 /
ET-D3LEF70
When using the ET-D75LE50 /
ET-D75LE90 / ET-D75LE95 /
ET-D3LEW50 / ET-D3LEF70
Lens xing brackets (B)