8
HOW TO INSTALL
CÓMO INSTALAR
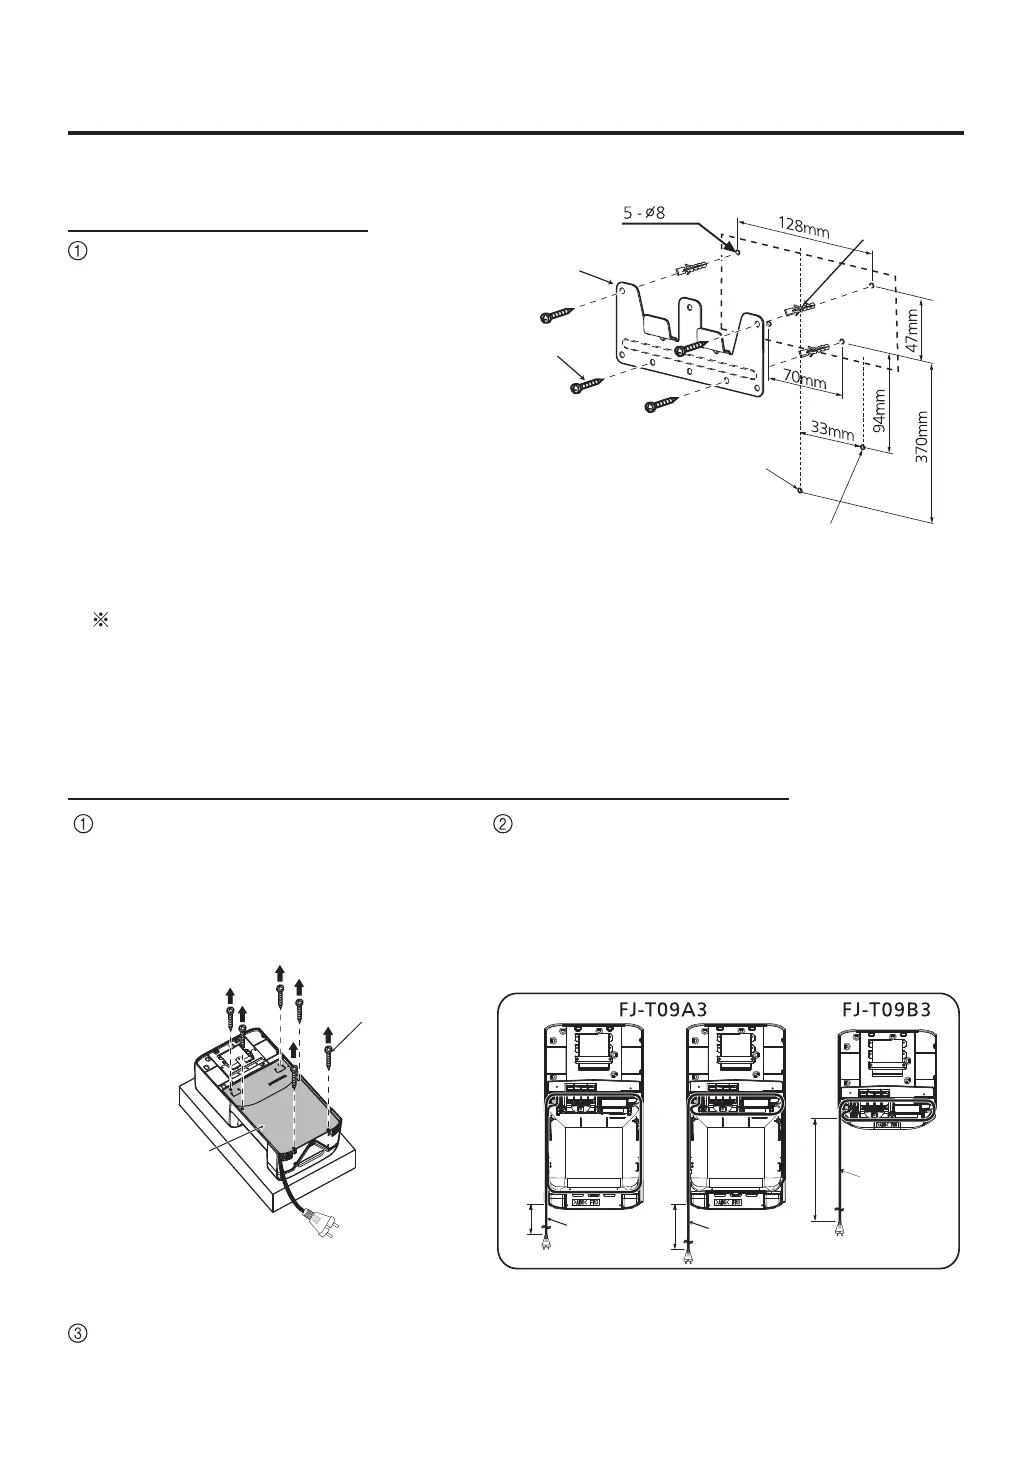
2. Install the fixation board
Instale la placa de fijación
2
Install the fixation board with the screws
(ø3.8x20 mm 4 pcs) which supplied in the
accessory.
Instale la placa de fijación con los tornillos
(ø3.8x20 mm 4 piezas) que se suministran con
el accesorio.
4
ø
If it is installed on a concrete wall, drill the bottom
holes with impact drill on the wall, insert the plastic
plugs, (not included) and fix the fixation board with
screws (ø3.8x20 mm 4 pcs) in the accessory.
Si se instala en una pared de concreto, taladre los
orificios inferiores con taladro de impacto en la
pared, inserte los tapones de plástico, (no incluidos)
y fije la placa de fijación con tornillos (ø3.8x20 mm 4
piezas) que se suministran con el accesorio.
4
ø
The fixation board comes with 8 installation holes, but you just need to use 4 of
them. It is recommended to use the installation holes as shown in the figure.
La placa de fijación viene con 8 agujeros de instalación, pero sólo tiene que utilizar 4 de ellos. Se recomienda utilizar los
agujeros de instalación como se muestra en la figura.
4
3. Adjust the length and lead-out direction of the power cord.
Ajuste la longitud y dirección de salida del cable de alimentación.
3
Remove the fixing screws on the back baffle plate of
the main unit.
Quite los tornillos de fijación de la placa deflectora
trasera de la unidad principal.
Adjust the length of the power cord by winding it according to
the following figure, and select the lead-out direction (left or
right) as needed.
Ajuste la longitud del cable de alimentación enrollándolo de
acuerdo a la siguiente figura, y seleccione la dirección de salida
(izquierda o derecha), según sea necesario.
The illustrated plug is for Philippines.
El enchufe ilustrado es para Filipinas.
Fixing screws for
the back baffle
plate (6 pcs)
Tornillos de
fijación de la
placa deflectora
trasera (6 piezas)
6
Back baffle plate
Placa deflectora
trasera
About 410 mm 410
Alrededor de 410 mm
Power cord
Cable de
alimentación
About 715 mm 715
Alrededor de 715 mm
About 985 mm
Alrededor de 985 mm
Power cord
Cable de
alimentación
Power cord
Cable de
alimentación
After adjustment, reinstall the six removed screws.
Después del ajuste, vuelva a instalar los seis tornillos que se retiraron.
Fixation board
Placa de fijación
Depth: 35 mm
Profundidad: 35 mm
35
Plastic plug
(not included)
Tapón plástico
(no incluido)
Screws (4 pcs)
Tornillos (4 piezas)
4
Main unit fixing hole
Orificio para la fijación
de la unidad principal
(FJ-T09A3)
Main unit fixing hole
Orificio para la fijación
de la unidad principal
(FJ-T09B3)
 Loading...