MAINTENANCE (CLEANING)
A
WARNING
Disconnect power source before working on
unit. Maintenance must be done every year.
When removing the panel, beware of it in
case it may fall off and cause an injury.
ACAUTION
0
0
0
©
o
0
o
Never use gasoline, benzene, thinner or any
other
such chemicals for cleaning the
ventilating fan.
Do not immerse motor in water when
cleaning.
Do not soak resin parts in water over 140°F
(60°C).
After long time
use, dust
may fall down
when removing the panel and filter.
To maintain the performance of product,
please clean the filter every month and
replace it every year.
When cleaning the product, switch cap
can't be removed.
If the filter is damaged or the filter has not
been installed, insects may get into the unit.
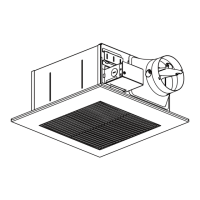
1 . Close shutter and detach the panel by pushing up
thetab.(Fig.23)
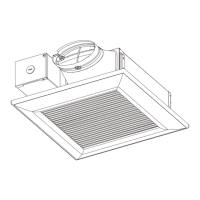
2. Remove dust and dirt inside the panel by using a
vacuum cleaner. Clean the surface of the panel with
non-abrasive kitchen detergent and wipe dry with
clean cloth. (Please do not immerse panel in water
while cleaning). (Fig.
24)
3. Squeezethe buckle of the filter and detach it.
Remove dirt from it
by
using
a
vacuum cleaner.
(Fig.
25)
When replacing the filter, please purchase new
filterfrom our representative. (Model number
of filter is FV-FL01 WS1 for FV-01 WS2 and
FV-FL04WS1
for FV-04WS2.)
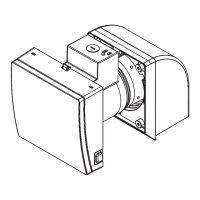
4. Remove
dust
and dirt from fan
body by
using
a
vacuum cleaner first, and then
a
cloth
dampened with kitchen detergent. Wipe any
dirt with clean cloth. (Fig.
26)
5. Replace the filter afterfinishing the cleaning.
(Fig.
27)
6. Follow step 13 of installationl (page
8)
to replace
the panel.
Shutter.
Panel
Tab-
Fig. 23
Vacuum cleaner
Fig. 24
"Switch cap
(can't be removed)
Fig.
25
Fig.26
Buckle the filter firmly
CD
f ully insert to frame
Fig. 27
10