INSTALLATION II
-
Wall thickness is
6"~10"
(1
52mm ~2 54mm)
NOTE:
1 . This ventilating fan can be installed with an
interior wall covering a thickness of
1/2"-1
1/4"
(12.7-31.8mm).
1
. Cut
holes in the wall and remove the junction
box following the stepl
~3
of installation
I
.(Page
6)
2. Slip
duct
unit into flexible
duct
(not supplied) and
secure it with duct tape. (Fig.
17)
According to the thickness of the wall, decide the
length of the flexible duct. For 1
0"
wall, it is
suggested the flexible duct length is
5"
when it is in
extension.
3. Insert the duct into wall and secure it with 4
screwII(ST4.2X20)
in accessory. (Fig.
18)
Before installation, adjust the direction of
the duct unit in accordance with UP mark.
The upper edge should keep horizontal.
4. Finish indoor installation following step
5-1
3
of
installationl
. (Page 6to
8)
5. Detach hood following step 14 of installationl.
(Page
8)
Press buckle on hood base and detach duct
collar after loosening three buckles
.
(Fig.
19).
6. Pull flexible duct to a suitable length through
the hood base. Keep the upper edge of hood
base horizontal and secure it by 4 screwll
(ST4.2X20) in accessory. Seal the gap between
the wall and hood base by sealant. (Fig.
20)
7. Join the flexible
duct
and
duct
collar with mastic
tape.
(Fig.
21)
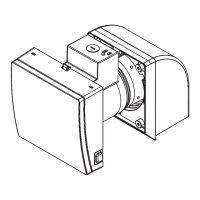
8. Press duct collar and flexible duct until duct
collar fits into hood base completely. (Fig.
22)
A
CAUTION
Make sure the three buckles fix the duct
collar firmly.
9. Follow steps 16 of installationl
(page
8)
to
complete the installation work.
Flexible duct
(Not supplied
FV-01WS2: 4inch size
FV-04WS2: 6inch size)
Duct tape
Fasten by buckles
Fig. 22
 Loading...
