STEP 1
STEP 5
STEP 3
STEP 2
STEP 4
STEP 6
Flex-Z Fast™ bracket
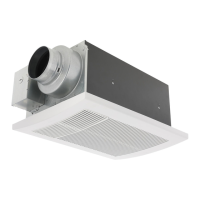
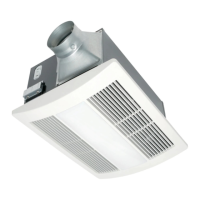
Circular ductConduit
WARNING
WARNING
Disconnect power source before
working on the fan heater.
Installation work and electrical wiring must
be done by qualified person(s) in accordance
with all applicable codes and standards,
including fire-rated construction. Neither
unauthorized modification, repair nor
disassembly is allowed.
To reduce the risk of fire, do not store
or use gasoline or other flammable
vapors and liquids in the vicinity of the
fan heater.
Please wear gloves during the following
installation procedure.
CAUTION
Secure the machine screw (M4X8) to
the suitable hole tightly without interfering
the Flex-Z Fast™ bracket for ground
continuity. Take care to avoid crossing or
stripping the threads.
Fig.13
Fig.12
Fig.14
Fig.15
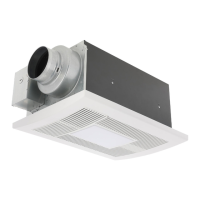
Follow steps 1 , 4 , 5 , 7 of INSTALLATION
(NEW CONSTRUCTION) on pages 8-10.
(Before connecting the circular duct to the
adaptor, the duct should be pulled down.)
Install the adaptor to the Flex-Z Fast™
bracket using 2 self-drilling screws. (Fig.14)
Secure the fan body to Flex-Z Fast™ bracket
with 2 self-drilling screws, plug connector
to receptacle and secure the fan body to the
adaptor with the machine screw (M4X8).
(Fig.15)
Follow steps 10 to 14 of INSTALLATION
(NEW CONSTRUCTION) on page 11.
Secure the Flex-Z Fast™ bracket
to joists with the 4 tapping screws(ST4.2x20)
which have been pre-set in the Flex-Z Fast™
bracket. Existing ductwork and wiring should
be left in place. (Fig.13)
Remove the existing equipment and cut
ceiling opening*.
*Ceiling opening size: 10 7/8 inch(275 mm)
X 16 5/8 inch(422 mm)
2 Self-drilling screws
(Fix the flange to the Flex-Z
Fast
TM
bracket through the ceiling)
Flex-Z Fast™
bracket
Flex-Z Fast™
bracket
Unit: inches (mm)
16 5/8 (422)
10 7/8 (275)
Joist
Joist
English
12
Ceiling drywall
1
1
Ceiling drywall
(already existed)
3
3
2
2 Self-drilling screws
Ceiling drywall
Joist
Circular duct
Mastic or
approved
foil tape
Conduit
Junction box
cover
Knock-out
hole
4
4 Tapping
screws
(
ST4.2x20)
Machine screw (M4X8)
(Use the suitable hole)
Receptacle
Plug connector
Joist
INSTALLATION
(
RETROFIT
)
 Loading...