● Mounting the sensor to a wall
•
Mount the product as follows, so
that the multiple light reflections
on the wall do not emit to the light-
receivingpart.Whenthereection
factor on a wall is high, it is effec
-
tive to use a dull black color.
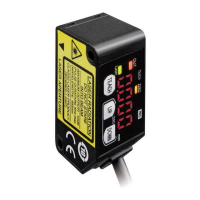
6 I/O CIRCUIT DIAGRAMS
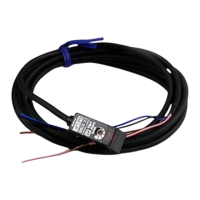
● NPN Output Type
Main circuit
100Ω
AGND
(Brown) +V
(Pink) External input
(Black) Control output
(Blue) 0V
0 to +5V
(Gray) Analogue voltage output
(Shield) Analogue ground AGND
Load
External
input
Analogue
input device
+
-
12 to 24V DC
±10%
● PNP Output Type
Main circuit
100Ω
AGND
(Brown) +V
(Pink) External input
(Black) Control output
(Blue) 0V
0 to +5V
(Gray) Analogue voltage output
(Shield) Analogue ground AGND
Load
External
input
Analogue
input device
+
-
12 to 24V DC
±10%
7 TEACHING
2-point teaching
● This is the basic teaching method.
1 2
Background Sensing object
Threshold
ON
OFF
Distance
1. Press the TEACH key in the background present condition.
2. Press the TEACH key in the sensing object present condition.
Stable sensing is possible
Stable sensing is not possible
Limit-teaching
● This is teaching method in case small object or object in background are existing.
<When an object in background is used as reference>
UP key
Threshold
Teaching value
Distance
Background
<When a sensing object is used as reference>
DOWN key
Teaching value
Threshold
Distance
Sensing object
1. Press the TEACH key in the background present condition or the
sensing object present condition.
2. When an object in the background is used as a reference, press the
UP key to set the threshold on the sensor side.
When a sensing object is used as a reference, press the DOWN
key to set the threshold on the sensing object side.
3. Teaching is completed.
Automatic
1-point teaching (Window comparator mode)
● This is mode is used for setting the threshold range for the distance from the ref-
erence value of the sensing object, by performing 1-point teaching. This mode is
used for sensing within the threshold range.
● When performing 1-point teaching (window comparator mode), preset “Window
comparator mode 1” in the sensing output setting of the PRO mode. For the set-
ting method, refer to “
12
PRO MODE SETTING.”
OFF
ON
OFF
Threshold 2_SL
Reference surface
Threshold 1_SL
Sensing object
1. Press the TEACH key twice in the sensing object present condition.
(1st time: TEACH mode, 2nd time: Teaching)
2. Teaching is completed.
Automatic
2-point teaching (Window comparator mode)
●
T
his is method to set the threshold range by conducting the 2-point teaching.
● When performing 2-point teaching (window comparator mode), preset “Window
comparator mode 2” in the sensing output setting of the PRO mode.
For the setting, refer to
“
12
PRO MODE SETTING.”
● When conducting teaching, use sensing objects (P-1 and P-2) whose distance are
different from each other.
Sensing object P-1 Sensing object P-2
1st time (Threshold 1_SL)
2nd time (Threshold 2_SL)
OFF
OFF
ON
Distance
1. Press the TEACH key in the sensing object P-1 present condition. (1st time)
2. Press the TEACH key in the sensing object P-2 present condition. (2nd time)
Stable sensing is possible
Stable sensing is not possible
3-point teaching (Window comparator mode)
●
This is the method to perform 3-point teaching (P-1, P-2, P-3) and to set the threshold range
by setting threshold 1_SL in the mid-point between the 1st time and 2nd time, and threshold
2_SLinthemid-pointbetweenthe2ndtimeand3rdtimeasshowninthefollowinggure.
● When performing 3-point teaching (window comparator mode), preset “Window
comparator mode 3” in the sensing output setting of the PRO mode.
For the setting, refer to
“
12
PRO MODE SETTING.”
●
When performing teaching, use sensing objects (P-1, P-2, P-3) with different distance.
●
After teaching, P-1, P-2 and P-3 will be automatically rearranged from the smaller value.
Sensing object
P-1
Sensing object
P-2
Sensing object
P-3
1st time
2nd time
3rd time
Threshold
1_SL
Threshold
2_SL
OFF
OFF
ON
Distance
1. Press the TEACH key in the sensing object P-1 present condition. (1st time)
3. Press the TEACH key in the sensing object P-3 present condition. (3rd time)
2. Press the TEACH key in the sensing object P-2 present condition. (2nd time)
Stable sensing is possible
Stable sensing is not possible

 Loading...