EasyManuals Logo

Panasonic lumix DC-TZ90 User Manual

Panasonic lumix DC-TZ90
302 pages
To Next Page IconTo Next Page
To Previous Page IconTo Previous Page
Page #31 background imageLoading...
Page #31 background image
31
DVQP1288
Preparations
Setting the clock
7
When [The clock setting has been completed.] is displayed,
press [MENU/SET]
8
When [Please set the home area] is displayed, press
[MENU/SET]
9
Press to set your home area and
press [MENU/SET]
City or area name
Current time
Difference from GMT (Greenwich Mean Time)
If the clock is not set, the correct date cannot be printed when you order a photo studio to print the
picture, or when you stamp the date on the pictures with [Text Stamp].
Changing time settings
1
Select [Clock Set] from the [Setup] menu
For details about how to set the menu (→45)
2
Set the date and time (Perform steps
5
-
6
. (→30))
Clock settings will be saved for approx. 3 months even after the battery is removed, provided a
fully charged battery was installed in the camera for 24 hours beforehand.
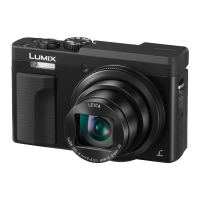
Table of Contents

Other manuals for Panasonic lumix DC-TZ90

Questions and Answers:

Question and Answer IconNeed help?

Do you have a question about the Panasonic lumix DC-TZ90 and is the answer not in the manual?

Panasonic lumix DC-TZ90 Specifications

General IconGeneral
Sensor1/2.3-inch High Sensitivity MOS Sensor
Effective Pixels20.3 Megapixels
LensLEICA DC VARIO-ELMAR
Dimensions112.0 x 67.3 x 41.2 mm
Focal Length4.3 - 129mm (24 - 720mm in 35mm equivalent)
ApertureF3.3 - F6.4
ISO Sensitivity80-3200 (expandable to 6400)
Display3.0-inch TFT Screen LCD Display (1040K dots)
Viewfinder0.2-inch EVF (1166K dots)
Video Recording4K UHD (3840x2160) at 30p/25p
ConnectivityWi-Fi
Battery LifeApprox. 380 shots (CIPA standard)
WeightApprox. 322g with Battery and SD Memory Card
Storage MediaSD/SDHC/SDXC memory card
Image Stabilization5-axis Hybrid O.I.S. (Optical Image Stabilizer)

Related product manuals