NOTE: Most tap water can be used in this iron. If water is very hard, distilled or demineralized
water should be used. Do not use water processed through home water softening
systems because this water contains minerals that may be harmful to the iron. Do
not use water additives or substitute water such
as
linen or scented water in the
steam iron. They can stain fabrics or damage the iron.
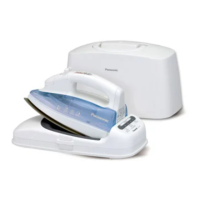
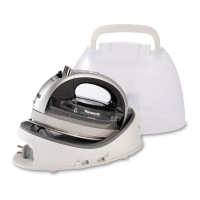
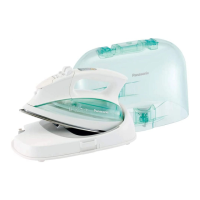
HOW TO SUPPLY ELECTRICITY
The iron must
be set
securely on the Power
Base
in order
to
supply electricity. Electricity
will
only be provided while the
iron
is placed
on
the Power Base. If you
desire
to set the iron down
while moving a
garment
on your ironing board, the
iron
must only be
placed
on the
Power
Base.
The Power
Base
will
keep
the temperature of the
iron at
the selected level.
HOW TO CONTROL
TEMPERATURE
How to operate the Temperature Control Pad("SET
"
Pad)
1 . Every time you push the
"
SET " Pad, the
Temperature
Indicator Light
moves to the next position,
a
higher temperature.
2. Desired temperature can
be
chosen by pushing the
"
SET " Pad until it
lights at the appropriate position.
OHIGH
OMED
OLOW
OOFF
TEMPERATURE INDICATOR
LIGHT
(
RED
):
*
Continuously blinks until the iron
reaches its
selected temperature.
*
Turn on continuously when the iron has reached
its selected temperature to let you know that you
can start ironing.
"OFF" LIGHT
(
GREEN
):
This light turns
on
when:
*
The cord is plugged into the outlet.
*
The iron
has
automatically shut itself
off.
*
The iron
has been
manually turned
off.
NOTE: All the lights will turn off once the iron leaves the Power Base. They will turn
on
again
when the
iron is
re-placed.
HOW
TO USE AS A
STEAM IRON
1. Fill iron with water. See section
"
HOW TO FILL WITH WATER
".
2. Plug the cord into a standard 120V- 60Hz electrical outlet.
3. Set the iron on the Power Base securely. The
green
"
OFF " light will turn on.
NOTE: If the green light does not turn on, replace the iron on the Power Base
again, otherwise the Temperature Control Pad cannot function.
4. Push
the
"
SET
"
Pad to the corresponding temperature level. The red light starts blinking.
-7-
 Loading...