Do you have a question about the Panasonic PT-DW5000E and is the answer not in the manual?
Ensures safe transport of the projector and lens, emphasizing vibration and impact protection.
Details safe installation practices, including avoiding vibrations, high-voltage areas, and proper mounting.
Advises on proper disposal procedures by contacting a dealer or specialized dealer.
Provides guidance on viewing conditions, lens handling, and lamp characteristics for optimal use.
Explains how to clean the projector cabinet and lens, and basic maintenance steps.
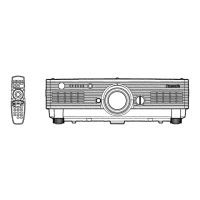
Details the functions of each button on the remote control for projector operation.
Describes how to use the remote control's buttons to operate a computer as a mouse.
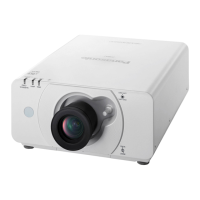
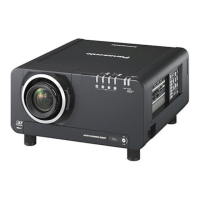
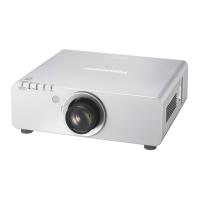
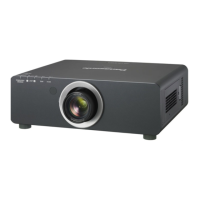
Details the physical parts and status indicators on the front and sides of the projector unit.
Details the rear view of the main unit, including ventilation, power switch, and control buttons.
Details the various input/output terminals on the side of the projector and their functions.
Step-by-step guide for inserting batteries into the remote control unit correctly.
Explains the effective range and conditions for operating the remote control.
Instructions for setting the projector ID number on the remote control for system operation.
Guide on using the remote control buttons to emulate mouse functions on a PC.
Describes the four available projection schemes and how to select them via the menu.
Details projector positioning, lens adjustment, and mounting considerations for image setup.
Lists projection distances for different screen sizes and lenses for a 4:3 aspect ratio.
Lists projection distances for different screen sizes and lenses for a 16:9 aspect ratio.
Offers formulas to calculate projection distances for various lenses and aspect ratios.
Essential precautions before connecting video/audio equipment, including power and signal types.
Details the pin configuration for the S-Video input terminal.
Details the pin configuration for the DVI-D input terminal.
Details the pin configuration for the RGB2 input terminal.
Illustrates how to connect DVD players, video decks, and hi-vision video decks.
Shows examples of connecting PCs, including those with DVI-D terminals, to the projector.
Step-by-step instructions for connecting power and turning on the projector.
Covers basic adjustments like focus, input selection, and picture positioning.
Detailed steps for safely shutting down the projector and waiting for the cooling fan.
Describes the function that allows cooling after a power failure or cord disconnection.
Step-by-step guide for aligning and attaching the projection lens to the projector.
Instructions for safely detaching the projection lens from the projector.
Guides on adjusting the lens focus, zoom, and vertical position (optical shift).
Details how to adjust the lens horizontally using the left/right adjustment dial.
Details the AUTO SETUP function for automatic resolution, clock phase, and position adjustment.
Details the overall structure of the on-screen menu system for projector settings.
Step-by-step guide on how to press buttons, select items, and adjust settings within menus.
How to navigate back to the previous screen or exit the menu system.
Explains how menu items shown in transparent characters are unavailable for certain signals.
Provides information on prompt lines and how setting adjustments are indicated.
Instructions on how to reset all projector adjustment values to their factory defaults.
Explains picture adjustment options specifically for RGB signal inputs.
Explains picture adjustment options specifically for DVI signal inputs.
Explains picture adjustment options for S-Video and Video signal inputs.
Explains picture adjustment options for YPBPR signal inputs.
Describes the different Picture Modes (Dynamic, Graphic, Standard, Cinema, Natural) and their uses.
Explains how to use the BRIGHT setting to adjust the black level and overall picture brightness.
Explains how to use the CONTRAST setting to adjust the picture's contrast ratio.
Details how COLOR adjustment affects color depth and saturation for S-Video/Video/YPBPR signals.
Explains how TINT adjustment affects skin tone towards greenish or reddish hues.
Guides on adjusting color temperature for white balance, affecting reddish or bluish hues.
Explains how to adjust the brightness of white parts of the image for better color accuracy.
Details how SHARPNESS adjustment affects image crispness, softening or sharpening edges.
Explains the NR function for reducing video noise in S-Video/Video/YPBPR signals.
Explains how AI enables gray scale control for optimal contrast and image projection.
Guides on selecting the appropriate TV system (NTSC, PAL, SECAM) for input video signals.
Allows selection between RGB and YPBPR systems for supported signals.
Explains how to move the displayed image horizontally and vertically on the screen.
Guides on setting the aspect ratio (AUTO, 16:9, 4:3, S4:3, HV FIT) for optimal display.
Explains how to change the enlargement ratio of the displayed image horizontally and vertically.
Guides on minimizing visible noise by adjusting clock phase for RGB/YPBPR signals.
Details how to correct keystone distortion and adjust vertical linearity.
Enables faithful capture of images shot at 24 frames per second, suitable for movies.
Allows fine adjustments for blanking to hide noise or protruding image parts.
Optimizes image quality by adjusting resolution items like Total Dots and Display Lines.
Adjusts clamp position to achieve optimal value for dark areas in images.
Allows moving the picture within the display area when the full area is not utilized.
Selects standard or WXGA mode for XGA signal inputs for optimal display.
Selects standard or cut-off screen mode for SXGA signal inputs.
Guides on selecting and changing the projector's on-screen display language.
Allows registering and recalling multiple image adjustment data sets for the same signal type.
Enables adjustment of six colors (R, G, B, Cyan, Magenta, Yellow) for different signal systems.
Offers two modes (NORMAL, HIGH) for adjusting contrast based on operating environment.
Automatically adjusts the projector when input signals change, without needing manual setup.
Allows setting the screen color to blue or black when no signal is input.
Sets EDID to match the connected DVI device for optimal compatibility.
Enables controlling multiple projectors simultaneously or separately with a single remote control.
Selects the projection scheme based on whether the screen is front or rear projected.
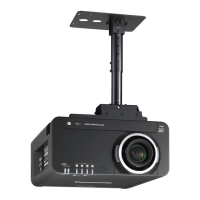
Chooses the installation scheme for floor-standing (Desk) or ceiling mount.
Allows selection between Single Lamp and Dual Lamp modes based on user needs.
Adjusts projection lamp luminance (HIGH/LOW) based on brightness needs and extends lamp life.
Sets communication parameters (baud rate, parity) for serial terminals and RS232C control.
Allows viewing the projector's system information, such as ROM version and runtime.
Adjusts fan speed based on operating conditions, including high altitude settings (HIGHLAND).
Controls fan speed based on projection direction (horizontal or vertical angle).
Allows setting functions for the remote control's FUNC1 button (Lamp Power, Aspect, Sub Memory List).
Automatically sets the projector to standby mode if no signals are input for a set duration.
Function used by service personnel to input a password for access or confirmation.
Steps to display internal test patterns for checking projector condition and performance.
Diagram illustrating the sequence for cycling through the projector's internal test patterns.
Enables password input screen display or setting a company URL underneath projected images.
Allows enabling or disabling the password input screen that appears each time the projector is turned on.
Instructions for changing the existing startup password for enhanced security.
Enables setting a custom text to be displayed underneath the projected images.
Guides on how to modify the text content that is displayed when the text setting is enabled.
Explains the necessary network settings for using the web browser to control the projector.
Lists the required PC specifications (OS, CPU, RAM, browser) for networking functions.
Illustrates a typical connection setup between a PC and the projector using a LAN cable.
Shows connection diagrams for single projector and plural projector setups using serial terminals.
Details the pin assignments and signal names for D-Sub 9-pin serial input and output terminals.
Lists the factory default communication conditions for RS232C compliant serial terminals.
Explains the basic format for sending commands via serial communication, including STX, ID, command, and ETX.
Details commands like POWR, QPW, IIS, QSL, LPM, OLP, and their parameters for projector control.
Describes using the REMOTE 2 terminal for external control panel operation of the projector.
Details pin assignments for the REMOTE 2 terminal and the effect of shorting pins.
Specifies cable requirements for connecting a computer to the SERIAL terminal.
Details the projector's indicators for lamp replacement needs or abnormal temperature conditions.
Step-by-step guide for safely removing, cleaning, and re-installing the air filters.
Crucial warning to allow the lamp unit to cool before handling to prevent burns or injury.
Essential safety guidelines and warnings before and during lamp unit replacement.
Explains lamp life, replacement indicators, and recommended timing for lamp unit replacement.
Describes the visual indicators (monitor lights, on-screen messages) for lamp replacement after 1300 hours.
Provides a detailed procedure for removing old lamps and installing new ones, including tool requirements.
Warns that the lamp unit remains hot after use and can cause burns if touched.
Instructions for connecting the power cord and turning on the projector after lamp replacement.
Steps to press the power button and confirm that a picture is projected after lamp replacement.
Guides on navigating the main menu to select the OPTION2 screen.
Steps to select and display the SYSTEM INFORMATION screen from the OPTION2 menu.
How to add the 'LAMP TIME RESET' option by holding the ENTER button.
Guides on selecting LAMP1 or LAMP2 to reset the lamp time.
Procedure to reset the used hours for the replaced lamp unit to zero.
Steps to access the projector's web interface by entering the IP address and login credentials.
Details the process of changing the password for accessing the web browser control interface.
Explains the functions available on the initial web interface page for basic projector operations.
Details the controls for Power On/Off and Shutter functions available on the basic web page.
Explains how to use the System Selector buttons on the web interface to switch input signals.
Explains advanced control options like Power, Shutter, OSD, Freeze, Lens Adjustment, and Test Patterns.
Displays projector status such as input switching, temperature, lamp runtime, and self-diagnosis.
Details how to access error information and lists parameters with descriptions of potential troubles.
Steps to configure e-mail settings, including SMTP server, recipient addresses, and warning thresholds.
Further options for setting up the second e-mail address and periodic reports.
Guides on configuring the DNS IP addresses required for network name resolution.
Details the setup for the POP server when POP authentication is required for mail transmissions.
Explains how to use the Ping test to check network connectivity to E-mail, POP, or DNS servers.
Shows the content of e-mail messages sent for configuration reports and error occurrences.
Guides on adjusting the projector's time zone, date, and time settings.
Explains how to configure network settings, including DHCP client and host name.
Shows the network status, including module version, IP/MAC addresses, and packet statistics.
Lists and describes the PJLink™ commands for projector control and status inquiry.
Details PJLink™ security authentication, which uses the same password as Web Browser Control.
Lists common projector issues (e.g., no image, blurred image) and corresponding checks for resolution.
Provides detailed technical data for the projector, covering power, display, lens, and optical output.
Lists and describes various input/output terminals including RGB2, Video, S-Video, Serial, DVI-D, and LAN.
Lists optional accessories like hanging attachments, projection lenses, and replacement lamp units.
Details compatible display modes, resolutions, scanning frequencies, dot clock, image quality, and format.
Illustrates projector dimensions and required clearances for ventilation and installation.
| Projection distance | 104 m |
|---|---|
| Vertical scan range | 60 - 85 Hz |
| Horizontal scan range | 80 - 91 kHz |
| Projection technology | DLP |
| Contrast ratio (typical) | 2000:1 |
| Screen size compatibility | 1.27 - 15.24 \ |
| Projector native resolution | WXGA (1280x768) |
| Keystone correction, vertical | -30 / 30 ° |
| Bandwidth | 0.108 GHz |
| Aspect ratio | 16:9 |
| Power supply type | AC |
| Dimensions (WxDxH) | 530 x 429 x 167 mm |
| Power requirements | 230V @ 50/60Hz |
| Networking features | Ethernet, Fast Ethernet |
| Lamp type | UHM |
| Lamp power | 300 W |
| Light source type | Lamp |
| Service life of light source | 4000 h |
| Analog signal format system | NTSC, NTSC 4.43, PAL, PAL 60, SECAM |
| Display number of colors | 16.78 million colors |
| Power consumption (typical) | 750 W |
| Operating temperature (T-T) | 0 - 45 °C |
| Operating relative humidity (H-H) | 20 - 80 % |
| Weight | 14500 g |
|---|