How do I fix a Panasonic PT-EZ770Z when the menu screen is missing?
- MMichelle PadillaSep 12, 2025
If the menu screen does not appear on your Panasonic Projector, check if the on-screen display function is turned off (hidden).

How do I fix a Panasonic PT-EZ770Z when the menu screen is missing?
If the menu screen does not appear on your Panasonic Projector, check if the on-screen display function is turned off (hidden).
What to do if my Panasonic PT-EZ770Z Projector has no image?
If no image is appearing on your Panasonic Projector, try these steps: * Check that all connections to external devices are correctly performed. * Ensure the input selection setting is correct. * Verify that the [BRIGHTNESS] adjustment is not set to the minimum. * Confirm that the external device connected to the projector is working properly. * Check if the shutter function is in use. * Make sure the lens cover is removed from the lens. If the power indicator is flashing red, consult your dealer.
Why is my Panasonic PT-EZ770Z not displaying image from computer?
If the image from a computer is not appearing on your Panasonic Projector, consider these points: * Check if the cable is too long. For D-Sub cables, the length should be 10 m (32'10") or shorter. * Verify the external video output on the laptop is set correctly. (For example, the external output settings may be switched by pressing “Fn” + “F3” or “Fn” + “F10” simultaneously. The method varies depending on the computer type, so refer to the user manual provided with your computer.)
How to troubleshoot no audio on a Panasonic PT-EZ770Z?
If you're not getting any audio output from your Panasonic Projector, check the following: * Ensure the external device is connected correctly to the audio input terminal. * Verify that [MUTE] in [AUDIO SETTING] is not set to [ON]. * Confirm that the audio input selection in [AUDIO SETTING] is set correctly.
Why is my Panasonic PT-EZ770Z image blurry?
If the image on your Panasonic Projector is fuzzy, try the following: * Ensure the lens focus is set correctly. * Verify the projection distance is appropriate. * Check if the lens is dirty. * Confirm the projector is installed perpendicular to the screen.
What causes a Panasonic PT-EZ770Z Projector image to display incorrectly?
If the image on your Panasonic Projector is not displaying correctly, consider the following: * Ensure the [SYSTEM SELECTOR] selection is set correctly. * Check for any problems with the video tape or other image sources. * Verify that the input signal is compatible with the projector.
What to do if my Panasonic PT-EZ770Z lamp cover is not installed securely?
If your Panasonic Projector is experiencing issues and the lamp cover is not installed securely, ensure that the lamp cover is properly and securely installed.
What to do if DIGITAL LINK input isn't working on Panasonic Projector?
If the DIGITAL LINK input image or sound is not being output on your Panasonic Projector: * Ensure the connections between the twisted-pair-cable transmitter and the projector or an external device are correctly done. * Verify that [DIGITAL LINK MODE] is set to [AUTO] or [DIGITAL LINK], and not to [ETHERNET]. * Check if a signal that is not compatible with a twisted-pair-cable transmitter is being input.
Why is there no image from DisplayPort on my Panasonic PT-EZ770Z Projector?
If the image output from the DisplayPort of your computer does not appear on the Panasonic Projector: * If connecting the projector to a computer that uses an early-type chipset or graphics card compatible with DisplayPort, the projector or computer may not be operated properly. * Consider updating the graphics accelerator driver of the computer to the latest version. * Try turning off and on the power of both the projector and the external device. * Verify that a compatible signal is being input to the projector.
Why don't the buttons on my Panasonic PT-EZ770Z Projector control panel work?
If the buttons on the control panel of your Panasonic Projector are not operating, check the following: * Ensure that the [CONTROL PANEL] setting in [CONTROL DEVICE SETUP] is not set to [DISABLE]. * Verify if the terminal is being used for contact control.
| Placement | Desktop, Ceiling |
|---|---|
| Product type | Large venue projector |
| Product color | White |
| Housing material | Plastic |
| Market positioning | - |
| Matrix size | 0.76 \ |
| Projection distance | - m |
| Vertical scan range | 24 - 120 Hz |
| Horizontal scan range | 15 - 100 kHz |
| Projection technology | LCD |
| Supported aspect ratios | 16:10 |
| Contrast ratio (typical) | 5000:1 |
| Screen size compatibility | 40 - 400 \ |
| Projector native resolution | WUXGA (1920x1200) |
| Keystone correction, vertical | -40 - 40 ° |
| Keystone correction, horizontal | -30 - 30 ° |
| Built-in display | No |
| Power source | AC |
| Power consumption (standby) | 10 W |
| Power consumption (typical) | 590 W |
| Throw ratio | 1.7 - 2.8:1 |
| Zoom capability | Yes |
| Focal length range | 26.9 - 45.4 mm |
| Aperture range (F-F) | 1.7 - 2.3 |
| Vertical lens shift range | -60 - 60 % |
| Horizontal lens shift range | -10 - 10 % |
| Lamp type | UHM |
| Lamp power | 400 W |
| Lamps quantity | 1 lamp(s) |
| Light source type | Lamp |
| Service life of light source | 3000 h |
| Service life of light source (economic mode) | 4000 h |
| Noise level | 37 dB |
| Noise level (economic mode) | 29 dB |
| Dot clock scanning frequency | 162 MHz |
| Supported video modes | 480i, 480p, 576i, 576p, 720p, 1080p |
| Analog signal format system | NTSC, NTSC 4.43, PAL, PAL 60, PAL M, PAL N, SECAM |
| Number of built-in speakers | 1 |
| Operating temperature (T-T) | 0 - 45 °C |
| Operating relative humidity (H-H) | 10 - 80 % |
| BNC input ports | 5 |
| Serial interface type | RS-232 |
| USB 2.0 ports quantity | USB 2.0 ports have a data transmission speed of 480 Mbps, and are backwards compatible with USB 1.1 ports. You can connect all kinds of peripheral devices to them. |
| Component video (YPbPr/YCbCr) in | 0 |
| Depth | 445 mm |
|---|---|
| Width | 530 mm |
| Height | 177 mm |
| Weight | 10600 g |
| Package depth | 587 mm |
| Package width | 650 mm |
| Package height | 297 mm |
| Package weight | 16600 g |
Critical safety warnings about electrical hazards, fire risk, and product handling.
Guidelines for operating environment, rain/moisture avoidance, and domestic use.
Compliance notices (FCC, Canada) and disposal information for batteries and lamps.
Safety advice related to the UK moulded plug and fuse replacement.
General guidelines and warnings for using the projector safely and effectively.
Guidelines for safely transporting the projector, including lens and feet handling.
Warnings about installation locations, ceiling mounting, and radio wave interference.
Measures for protecting the projector from unauthorized access and data leaks.
Explanation of DIGITAL LINK technology and compatible devices.
Advice on achieving good picture quality and handling the projection lens.
Notes on LCD panel precision and factors affecting optical parts lifespan.
Lamp characteristics and proper disposal methods for the unit and its components.
List of standard accessories provided with the projector.
Overview of software and documentation included on the CD-ROM.
List of optional accessories available for purchase, such as lenses and brackets.
Initial screens displayed upon power-on, including focus and initial settings.
Steps to adjust the projector's focus for a clear image.
Procedure to select the on-screen display language.
How to set the projection method based on installation orientation.
Setting the power consumption mode during standby.
Adjusting screen format and image position for optimal viewing.
Overview of the projector's main components and functions.
Detailed explanation of each button on the remote control and its function.
Identification and description of the projector's front, side, rear, and control panel features.
Details and pin assignments for all projector input and output terminals.
Instructions for inserting/removing batteries and setting the remote control ID.
How to connect the projector using a wired remote control cable.
Information on different installation modes and optional mounting brackets.
Explains projection distance calculation and provides a table for lens protrusion.
Detailed tables showing projection distances for various lenses and screen aspect ratios.
Formulas to calculate projection distance for specific lenses and aspect ratios.
How to adjust the projector's tilt and level using the adjustable feet.
Step-by-step instructions for safely removing and attaching the projector lens.
Important considerations before connecting devices and pin assignments for various terminals.
Diagram and notes for connecting AV devices like Blu-ray players and VCRs.
Diagrams illustrating how to connect computers to the projector via various interfaces.
Setup for connecting via DIGITAL LINK using a twisted-pair-cable transmitter.
Detailed steps for connecting the power cord, turning the projector on/off, and understanding the power indicator.
Procedures for selecting input signals and adjusting image focus, zoom, and shift.
Explains how to use remote control functions like switching input, shutter, mute, freeze, timer, and settings.
How to navigate the projector's on-screen menus and reset settings to defaults.
Options for adjusting picture quality like mode, contrast, brightness, color, and sharpness.
How to select picture modes (Standard, Dynamic, DICOM SIM., Cinema) for different content.
Adjusting the color contrast of the projected image.
Adjusting the dark parts (black level) of the projected image.
Adjusting the color saturation of the projected image.
Adjusting skin tone by shifting the color balance.
Adjusting color temperature for bluish or reddish white areas.
Detailed steps for adjusting white balance in user-defined color temperature settings.
Adjusting contrast balance by modifying midtone brightness.
Adjusting the sharpness of image contours.
Reducing noise in degraded images or signals.
Automatic aperture correction for optimum contrast.
Adjusting image vividness for bright environments using a luminance sensor.
Automatic or manual signal system detection for optimal image display.
Steps to achieve faithful sRGB color reproduction for RGB signals.
Adjusting image position, aspect ratio, and zoom.
Moving the image position vertically or horizontally.
Switching the aspect ratio of the projected image.
Adjusting the image size by zooming in or out.
Adjusting clock phase to correct flickering or smeared outlines in images.
Correcting keystone distortion when the projector or screen is tilted.
Adjusting keystone distortion for individual corners of the projected image.
Advanced settings for image processing and blanking.
Enhancing vertical resolution and image quality using cinema processing.
Adjusting blanking width to hide screen noise or overscan.
Adjusting input resolution for flickering or smeared images.
Adjusting the optimal point when the black part of the image is blunt or green.
Moving the image position within the display area.
Changing the language for the on-screen display and menu items.
Settings related to color adjustment, screen settings, auto signal, and various display options.
Correcting color differences between projectors using RGB color adjustments.
Adjusting and registering colors for each input signal format.
Setting the screen size and adjusting image position based on aspect ratio.
Enabling automatic setup for unregistered input signals.
Automatically adjusting position and signal level for optimal image display.
Setting the slice level for input sync signals on RGB terminals.
Setting the EDID and signal level for DVI-D input.
Setting the signal level for HDMI input.
Setting the signal level for DIGITAL LINK input.
Setting the signal level for DisplayPort input.
Configuring the display and position of on-screen messages and warnings.
Setting closed caption display options for specific signal types.
Setting the background color when no signal is input.
Setting the logo displayed when the projector is turned on.
Configuring automatic shutter opening and closing during power on/off.
Setting and operating the presentation timer function.
Pausing the projected image and turning off audio.
Enlarging images and moving the zoomed image position.
Comprehensive setup options including projector ID, projection method, ECO management, and network configuration.
Setting a unique ID for controlling multiple projectors.
Selecting the projection orientation (front, rear, ceiling, floor).
Optimizing lamp power and settings for energy saving and reduced power consumption.
Setting the time before the projector automatically enters standby due to no signal.
Configuring power consumption settings during standby mode.
Setting up scheduled execution of projector commands.
Selecting the input source to use when the projector is powered on.
Configuring communication settings for RS-232C control via the serial terminal.
Emulating control commands from older Panasonic projector models.
Setting the behavior of the <REMOTE 2 IN> terminal.
Assigning functions to the remote control's FUNCTION button.
Adjusting volume, audio balance, built-in speaker output, and mute mode.
Enabling or disabling audio output from the projector's internal speaker.
Configuring audio output behavior when the projector is in standby.
Enabling or disabling audio mute function.
Displaying projector status, including input signals, runtime, temperatures, and firmware versions.
Detailed information about the input signal characteristics.
Setting the projector's time zone, date, and time, including automatic adjustment.
Saving current settings as a backup.
Restoring settings from a backup.
Resetting various settings to their factory default values.
Information about the service password function.
Settings for the Picture-in-Picture function, including mode and window adjustments.
Displaying built-in test patterns for easy image adjustment.
Managing registered signals, renaming, expanding lock-in range, protecting, and deleting signals.
Preventing registered signals from being deleted or modified.
Removing registered signals from the projector's memory.
Functionality for registering and switching between multiple image adjustment settings for the same signal.
Settings for projector security, including password protection, menu lock, and device control limitations.
Enabling or disabling the security password prompt upon startup.
Changing the security password for the projector.
Overlaying security messages or user logos on the projected image.
Customizing the text of security messages.
Locking menu operations to prevent unauthorized changes.
Setting or changing the password for menu lock functionality.
Enabling or disabling button operations on the control panel and remote control.
Configuration options for network connectivity, including digital link, IP settings, web control, and email alerts.
Switching the communication method for the DIGITAL LINK/LAN terminal.
Setting duplex mode for Ethernet or DIGITAL LINK connections.
Displaying the status and quality of the DIGITAL LINK connection.
Configuring network settings like IP address, DHCP, and DNS servers.
Setting network control methods (web browser, PJLink, Crestron, AMX, Extron).
Network connection examples using twisted-pair cables for DIGITAL LINK.
Instructions for accessing and controlling the projector via a web browser.
Explanation of elements within the web control interface.
Details displayed on the projector status page in web control.
How to access and interpret error and warning details from self-diagnosis.
List and description of potential failure items indicated by self-diagnosis.
Displaying current network configuration status via web control.
Viewing logs of access attempts to the web server.
Displaying E-mail sending error information.
Basic control functions accessible via web interface, like input, volume, and picture mode.
Advanced control options via web interface for position and picture settings.
Configuring network settings such as projector name, DHCP, IP address, and DNS.
Performing network connectivity tests to servers like E-mail or DNS.
Setting the projector's time zone, date, and time, including NTP synchronization.
Configuring email alerts for warnings, lamp runtime, and periodic reports.
Setting up POP or SMTP authentication for sending emails.
Configuring ECO management settings like lamp power and auto power save functions.
Example of an email report sent by the projector for setup data and system status.
Example of an email notification sent when an error occurs in the projector system.
Accessing the password change interface for administrator and user accounts.
Changing user name and password for administrator access to web control.
Changing user name and password for standard user access to web control.
Changing passwords specifically for user rights within the web control interface.
Information on controlling the projector via Crestron ConnectedTM through web control.
Overview of controls available on the web interface, including tools, power, input, and adjustments.
Accessing network status, passwords, and control system information via web tools.
Displaying projector information like name, MAC address, lamp hours, and error status via web interface.
Accessing help desk features for sending and receiving messages with administrators.
Explains indicator lights for lamp, temperature, and filter status and how to troubleshoot issues.
Procedures for cleaning the projector's exterior, lens, air filter, and replacing the lamp unit.
Instructions for cleaning the projector's exterior casing.
Guidelines for cleaning the projector lens carefully.
Steps for removing, cleaning, and attaching the projector's air filter unit.
Information and warnings related to replacing the projector's lamp unit.
A guide to diagnosing and resolving common projector issues with page references.
Detailed technical data, including PJLink protocol, control commands, and signal compatibility.
Information on supporting and using the PJLink protocol for projector control.
Lists PJLink commands for projector control, including power, input, shutter, and lamp status.
Details about the RS-232C serial terminal for computer control.
Explanation of the command structure for serial communication.
Specifications for serial communication cables and D-Sub connector pin assignments.
Lists projector control commands for computer operation via serial interface.
Commands for controlling lens functions like H/V shift, focus, and zoom.
Information on using the <REMOTE 2 IN> terminal for external control.
Table showing possible combinations for picture-in-picture display modes.
Comprehensive table detailing video signal compatibility, resolutions, and plug-and-play support.
Detailed technical specifications of the projector, including power, consumption, LCD panel, lens, and light output.
Specifications for operating temperature, humidity, and remote control range.
Horizontal and vertical scanning frequencies supported for various signal types.
Detailed specifications for each input/output terminal, including signal types and impedance.
Physical dimensions of the projector, with and without the standard zoom lens.
Safety guidelines and specifications for installing the projector using a ceiling mount bracket.
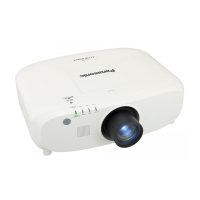
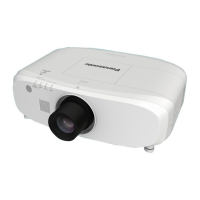
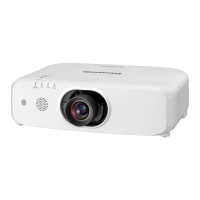
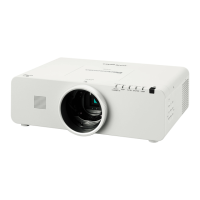


Loading...